Duane Brown

Latest

FLEXnet Error Codes

source: CADforum

The license subsystem in Autodesk products reports possible errors in the form of [X.Y.Z], where “X” is the kind of a problem, “Y” is 1 (standalone license) or 5 (FlexLMlicense) and “Z” is the specific error (usually a negative number).

The “Z” error codes for FlexLM are as follows:

-1 Cannot find license file.
-2 Invalid license file syntax.
-3 No license server system for this feature.
-4 Licensed number of users already reached.
-5 No such feature exists.
-6 No TCP/IP port number in license file and FLEXnet Licensing service does not exist. (pre-v6 only)
-7 No socket connection to license server manager service.
-8 Invalid (inconsistent) license key or signature.  The license key/signature and data for the feature do not match.  This usually happens when a license file has been altered.
-9 Invalid host.  The hostid of this system does not match the hostid specified in the license file.
-10 Feature has expired.
-11 Invalid date format in license file.
-12 Invalid returned data from license server system.
-13 No SERVER lines in license file.
-14 Cannot find SERVER host name in network database.   The lookup for the host name on the SERVER line in the license file failed.  This often happens when NIS or DNS or the hosts file is incorrect.  Workaround: Use IP address (e.g., 123.456.789.123) instead of host name.
-15 Cannot connect to license server system.  The server (lmgrd) has not been started yet, or the wrong port@host or license file is  being used, or the TCP/IP port or host name in the license file has been changed.
-16 Cannot read data from license server system.
-17 Cannot write data to license server system.
-18 License server system does not support this feature.
-19 Error in select system call.
-21 License file does not support this version.
-22 Feature checkin failure detected at license server system.
-23 License server system temporarily busy (new server connecting).
-24 Users are queued for this feature.
-25 License server system does not support this version of this feature.
-26 Request for more licenses than this feature supports.
-29 Cannot find ethernet device.
-30 Cannot read license file.
-31 Feature start date is in the future.
-32 No such attribute.
-33 Bad encryption handshake with vendor daemon.
-34 Clock difference too large between client and license server system.
-35 In the queue for this feature.
-36 Feature database corrupted in vendor daemon.
-37 Duplicate selection mismatch for this feature. Obsolete with v8.0+ vendor daemon.
-38 User/host on EXCLUDE list for feature.
-39 User/host not on INCLUDE list for feature.
-40 Cannot allocate dynamic memory.
-41 Feature was never checked out.
-42 Invalid parameter.
-47 Clock setting check not available in vendor daemon.
-52 Vendor daemon did not respond within timeout interval.
-53 Checkout request rejected by vendor-defined checkout filter.
-54 No FEATURESET line in license file.
-55 Incorrect FEATURESET line in license file.
-56 Cannot compute FEATURESET data from license file.
-57 socket() call failed. *OS Error
-59 Message checksum failure.
-60 License server system message checksum failure.
-61 Cannot read license file data from license server system.
-62 Network software (TCP/IP) not available.
-63 You are not a license administrator.
-64 lmremove request before the minimum lmremove interval.
-67 No licenses available to borrow.
-68 License BORROW support not enabled.
-69 FLOAT_OK can’t run standalone on license server system.
-71 Invalid TZ environment variable.
-73 Local checkout filter rejected request.
-74 Attempt to read beyond end of license file path.
-75 SYS$SETIMR call failed (VMS). *OS Error.
-76 Internal FLEXnet Licensing error-please report to Macrovision Corporation (Acresso).
-77 Bad version number must be floating-point number with no letters.
-82 Invalid PACKAGE line in license file.
-83 FLEXnet Licensing version of client newer than server.
-84 USER_BASED license has no specified users – see license server system log.
-85 License server system doesn’t support this request.
-87 Checkout exceeds MAX specified in options file.
-88 System clock has been set back.
-89 This platform not authorized by license.
-90 Future license file format or misspelling in license file.  The file was issued for a later version of FLEXnet Licensing than this program understands.
-91 Encryption seeds are non-unique.
-92 Feature removed during lmreread, or wrong SERVER line hostid.
-93 This feature is available in a different license pool.  This is a warning condition. The server has pooled one or more INCREMENT lines into a single pool, and the request was made on an INCREMENT line that has been pooled.
-94 Attempt to generate license with incompatible attributes.
-95 Network connect to THIS_HOST failed.  Change this_host on the SERVER line in the license file to the actual host name.
-96 License server machine is down or not responding.   See the system administrator about starting the server, or make sure that you’re referring to the right host (see LM_LICENSE_FILE environment variable).
-97 The desired vendor daemon is down.
1) Check the lmgrd log file, or
2) Try lmreread.
-98 This FEATURE line can’t be converted to decimal format.
-99 The decimal format license is typed incorrectly.
-100 Cannot remove a linger license.
-101 All licenses are reserved for others.  The system administrator has reserved all the licenses for others.  Reservations are made in the options file.  The server must be restarted for options file changes to take effect.
-102 A FLEXid borrow error occurred.
-103 Terminal Server remote client not allowed.
-104 Cannot borrow that long.
-106 License server system out of network connections.  The vendor daemon can’t handle any more users.  See the debug log for further information.
-110 Cannot read dongle: check dongle or driver.  Either the dongle is unattached, or the necessary software driver for this dongle type is not installed.
-112 Missing dongle driver.   In order to read the FLEXid hostid, the correct driver must be installed.  These drivers are available from your software vendor.
-114 SIGN= keyword required, but missing from license certificate.  You need to obtain a SIGN= version of this license from your vendor.
-115 Error in Public Key package.
-116 TRL not supported for this platform.
-117 BORROW failed.
-118 BORROW period expired.
-119 lmdown and lmreread must be run on license server machine.
-120 Cannot lmdown the server when licenses are borrowed.
-121 FLOAT_OK requires exactly one FLEXid hostid.
-122 Unable to delete local borrow info.
-123 Returning a borrowed license early is not supported.  Contact the vendor for further details.
-124 Error returning borrowed license.
-125 A PACKAGE component must be specified.
-126 Composite hostid not initialized.
-127 A item needed for the composite hostid is missing or invalid.
-128 Error, borrowed license doesn’t match any known server license.
-135 Error enabling the event log.
-136 Event logging is disabled.
-137 Error writing to the event log.
-139 Communications timeout.
-140 Bad message command.
-141 Error writing to socket. Peer has closed socket.
-142 Error, cannot generate version specific license tied to a single hostid, which is composite.
-143 Version-specific signatures are not supported for uncounted licenses.
-144 License template contains redudant signature specifiers.
-145 Bad V71_LK signature.
-146 Bad V71_SIGN signature.
-147 Bad V80_LK signature.
-148 Bad V80_SIGN signature.
-149 Bad V81_LK signature.
-150 Bad V81_SIGN signature.
-151 Bad V81_SIGN2 signature.
-152 Bad V84_LK signature.
-153 Bad V84_SIGN signature.
-154 Bad V84_SIGN2 signature.
-155 License key required but missing from the license certificate.  The application requires a license key in the license certificate.   You need to obtain a license key version of this certificate from your vendor.
-500 Invalid server port number.
-501 Invalid value in license where an integer was expected.
-502 Invalid value supplied for count.
-503 Invalid hostid supplied in license.
-504 Invalid hostid type supplied.
-505 Bad feature line syntax.
-506 Internal FLEXnet Licensing error.
-507 Bad date format in license file.
-508 Bad SERVER line.
-509 Bad license string.
-510 Server’s feature doesn’t authenticate on client side.
-511 No license checked out.
-512 License already checked out.
-513 Error list returned.
-514 No certicom module available.
-515 Wrong or incomplete certicom module.
-516 SIGN or SIGN2 required in license certificate.
-517 Feature object has no licensesources.
-518 An Identical license is already checked out on this license source.
-519 This license has an asynchronously-queued checkout pending.
-521 Library for native hostid couldn’t be loaded.
-522 Already connected to another vendor daemon.
-523 No such user, host, or display.
-524 Shutdown of license server system failed.
-525 Shutdown failed – already connected to license server system.
-526 Invalid license source string.
-527 Log file switch error.

2007 Double Clicking a DWG Opens TrueView not AutoCAD in XP

source: Microsoft Support – how to

To change which program starts when you double-click a file

Notes

  • You cannot use this method for a file that does not have a file name extension, or for a file that has an .exe, .com, or .bat extension.
  • If you change the program that Windows uses to open a certain kind of file, and that program was not designed for the type of data in that file, the files may not appear correctly in the program. To be safe, note the name of the program that Windows previously used to open the file type so that you can reverse your settings if it is necessary.

To change which program starts when you double-click a file, follow these steps:

  1. Open Windows Explorer by right-clicking the Start button, and then click Explore.
  2. Click a folder that contains a file of the type that you want Windows to open in a program that you select.
  3. Right-click the file and, depending on the programs installed on your computer, complete one of the following steps:
    • Click Open With to choose the program that you want.
    • Point to Open With, and then click Choose Program to choose the program that you want.
  4. The Open Withdialog box is displayed. Use one of the following methods to select the program that you want to use for this file type:
    • In the Programs list, click the program that you want to use.
    • Click Browse, locate and then click the program that you want to use, and then click Open.
    • Click Look for the appropriate program on the Web to browse the Internet for the program that you want to use.
  5. Click to select the Always use the selected program to open this kind of file check box if it is not selected.
  6. Click OK.Note From now on, Windows XP will open all files that have this file name extension in the program that you selected. To change this, you must follow these steps again and associate a different program with this file name extension.

Problems configuring the Autodesk Network License Manager (FLEXnet)

source: TS1076366

Issue:

When you tried to configure the Autodesk Network License Manager (FLEXnet), you either experienced problems or received errors.

Solution:

For specific system requirements and step-by-step installation and
configuration instructions, you should refer to the Network Licensing
Guide
(acad_nlg.pdf) and Network Administrator’s Guide
(acad_nag.pdf) located on the software installation disk or online
help. Reading these documents is a prerequisite for successful license manager
configuration and administration. Common setup and system requirement questions
are listed below:

ATG USA NOTE: Some of this information is dated, and is no longer valid, for instance in 2009 there wasn’t a 64 bit license manager, but now there is. Please read the posts carefully.  We will be reviewing these links and making the appropriate notes where needed on this Autodesk Tech Source Doc.  We thought the layout and design of this post to be a very good comprehensive resource on LMTOOLS.

Common Autodesk Network License Manager (FlexLM) problems and errors are
listed below. Try these solutions first, and then review further instructions if
the problem persists.

If these solutions do not answer your Autodesk Network License Manager
questions or resolve the problem, the additional tests below will help determine
the cause of the issue.

  • Refer to the attached 2008 FlexLM Quick Reference (requires Autodesk
    DesignReview) for options within LMTOOLS.
  • The debug log file is not an optional setting and the license manager will
    not start correctly without a valid path and file name specified. You should
    make sure that you specified a location and file name for the debug log on the
    Config Services tab of LMTOOLS.
  • On the Config Services tab, make sure that all three paths are filled out
    completely and point to local locations. It is strongly recommended that the
    license file and debug log file reside within the Autodesk Network License
    Manager installation folder and not in a separate folder or drive. Make
    sure that the Use Services and Start Server at Powerup options are enabled as
    well or the license manager will not run once LMTOOLS is closed or the license
    manager machine is rebooted.
  • Only one service can be configured in LMTOOLS for Autodesk software. So you
    should combine multiple Autodesk product license files into a single file and
    configure them as a single service. Refer to the following solution for more
    information: Combining
    Autodesk® license files
    .
  • Make sure that the Configuration Using Services option is selected on the
    Service/License File tab of LMTOOLS. Autodesk products do not support the
    Configuration Using License File method.
  • Autodesk product licenses do not support the Utilities, Server Diags or
    Borrowing tabs in LMTOOLS. These tabs exist to support other products that use
    FlexLM and they should not be used when configuring or troubleshooting the
    Autodesk Network License Manager. For information about controlling license
    borrowing, you should refer to the Network Licensing Guide
    (acad_nlg.pdf) and the Options File whitepaper.
  • If you are experiencing problems with the Server Status tab > Perform
    Status Enquiry, make sure that the “LMTOOLS Ignores License File Path
    Environment Variables” option is selected on the Service/License File tab and
    run the Status Enquiry again. In many cases this will correct erroneous Status
    Enquiries.

If you have worked through the standard troubleshooting steps and you were
not able to resolve the issue, follow this link for additional
technical assistance.

Please collect the following information from your system before requesting
technical assistance:

  • Screenshots of any error messages encountered
  • License file currently in use at each license manager
  • Options file in use at each license manager (if applicable)
  • Debug log file in use at each license manager
  • Copy and paste from LMTOOLS > Server Status tab > Perform Status
    Enquiry
2008 FlexLM
Quick Reference
(dwf – 1043Kb)

Error 1402 during uninstallation (Could not open key)

source:  TS16508079

Issue:

When you try to uninstall an AutoCAD based product, you will get the following error:

Error 1402.  Could not open key: 
UNKNOWN\Components\Hex#\Hex#.  Verify that you have sufficient access to that key, or contact your support personnel.

 Solution:

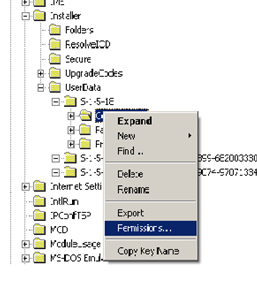
The solution is to change the permissions of the following folder in the Registry:

HKEY_LOCAL_MACHINE\SOFTWARE\Microsoft\Windows\CurrentVersion\Installer\UserData\S-1-5-18\Components 

  1. Right Click on Components select permissions.
  2. Click Advanced button.
  3. Select the OwnerTab
  4. Under Change owner to:  Select Administrators (Group) and Click Apply.
  5. Then Select Check box Replace owner on subcontainers and objectsand Click Apply.
  6. Go to the Permissions tab, select the Check box:  Replace all child objects Permissions with inheritable permissions from this object and Click apply.  NOTE:  The wording maybe a bit different depending on your operating system.

See Also:

TS1069886 and this Discussion Group Post for a video workflow in Windows 7/Vista.

How to read an Autodesk network license file (in notepad)

source : LicenseAdministration.pdf

Issue:
You have opened the license file in notepad but are unsure how to read it.

Solution:
The above source link is a pdf that explains in detail the following regarding reading a license file.

License File Format Overview
License File Syntax
     SERVER Lines
     VENDOR Lines
     USE_SERVER Line
     FEATURE and INCREMENT Lines
          Sort Rules
          Changes in FEATURE and INCREMENT Line Format
     PACKAGE Lines
     UPGRADE Lines
Feature Lines in Decimal Format
Order of Lines in the License File

Mixing Autodesk ASP and non ASP products

source: Autodesk Technical Support:

If you have ASP networked products and non ASP networked products you will need to install and configure 2 license managers on different servers, one for Citrix (ASP) license and the other license server for the networked products (non ASP) license.

The EULA requires Network licenses be used only for Workstations and that Citrix licenses only be used for Citrix. There is no option to have the same license pool do both Citrix and Network. This is why they have to be on different servers and why all Citrix document specifies a separate license server for Citrix licenses.

Cloud Based : Autodesk Moldflow Insight WS – just released

source: TenLinks.com ; Read news release

Previously available as Project Cumulus, an Autodesk Labs Technology Preview, Autodesk Moldflow Insight WS is now a full commercial release available in three versions to better address the individual computing needs of manufacturing customers.

  • Autodesk Moldflow Insight WS Standard — Provides 200 hours per year of cloud computing, enough for approximately 150 small simulations.
  • Autodesk Moldflow Insight WS Premium — Provides 800 hours per year of cloud computing, enough for approximately 300 medium simulations.
  • Autodesk Moldflow Insight WS Ultimate — Provides 2,500 hours per year of cloud computing, enough for approximately 500 large simulations.

In addition to improved capabilities for optimizing plastic products by considering a larger number of design options with Autodesk Moldflow Insight WS, Autodesk offers the services of simulation experts, providing support for all simulation users and explanations of the latest trends, issues and developments in simulation–all to help users and analysts gain greater knowledge and experience from fellow industry gurus.

Visit Autodesk Moldflow Insight WS to get more information about how it can improve product quality and accelerate innovation.

Updates for AutoCAD for Mac

AutoCAD 2011 for Mac Update 3

NOTE: update 1 and 2 must be applied before applying update 3

AutoCAD2011forMacUpdate1.dmg (dmg – 31721Kb)
Readme Update 1

AutoCAD2011ForMacUpdate2.dmg (dmg – 36266Kb)
Readme Update 2

AutoCAD2011ForMacUpdate3.dmg (dmg – 48395Kb)
Readme Update 3

2012 Utility – Revit Deployment

source: TSDOC

Revit Architecture 2012
Revit MEP 2012
Revit Structure 2012

When creating a Revit 2012 deployment, use the Revit 2012 Deployment Utility to include custom Revit.ini settings, and to suppress the paths to locate Autodesk content. When it executes, this utility runs against the image before it deploys to the client systems.

Readme

Get Me: RevitDeploymentUtility.zip

Revit opens trying to download or open a file titled Index.html

source: Autodesk Technical Support

issue:
user is seeing a download page pop up and try to download “Index.html” when Revit launches.

resolution:
The recent files page is rendered in Internet Explorer; this is why Internet Explorer is listed on the Revit system requirements. I have seen situations where changes made to Internet Explorer can cause this issue. The issue usually stems from a conflict with Revit, Internet Explorer and the internet security settings on the machine. I would make sure that the browser is set to “Run as Administrator”.

If you have not already done so, I would suggest clearing the Temp folder; this should prevent a corrupt temporary file from repeatedly opening.

If you have installed a beta version of Internet Explorer or recently upgraded Internet Explorer to a new version, I would suggest removing the newer version of Internet Explorer and verify if the issue continues.

If you recently installed an Add-on to Internet Explorer, I would suggest disabling it (in the Manage Add-ons dialog in the Internet Explorer Tools menu).

I would also make sure that “Automatic prompting for file downloads” is set to Disabled, “File Download” is set to Enabled, and “Open files based on content and not file extension” is set to enable in the Security Settings of the Internet Options.

=============

The issue stems from a conflict with Revit, Internet Explorer and the internet security settings on the machine.
I would put the system into simplified startup by going through the process below to see if the behavior continues:

1. Press the Windows Key, plus the letter “r”, to bring up the Run dialog. (The Windows Key is on the keyboard between the Ctrl and Alt keys on the left side of the keyboard.)
2. In the Run box, enter msconfig.
3. On the General tab, if the radio button is not set to Normal:
a.  Go through each of the tabs and note what items are checked or unchecked.
b. On the General tab, select Normal Startup.
4.  Select the Startup tab and click the Disable All button.
5. Click the Services tab, check the box to Hide Microsoft Services, click the Disable All button, recheck the Autodesk licensing service, and if you see it, recheck the FLEXnet licensing service.
6. Click OK and restart Windows when prompted.

Note: After making the changes on the Startup and Services tab the radio button on the General tab should say Selective Startup. In order to restore the startup state of the system, after we have completed troubleshooting, select the Normal Startup radio button on the General tab, and if the system was not originally on Normal Startup, go through the remaining tabs, and set them back the way they were.

I would also try disabling User Account Control to see if the behavior changes.

Network Deployment – Overview of Alternative Distribution Methods for Autodesk Software

source: AutodeskWiki

===========
ATGUSA NOTE: We do not provide Microsoft product usage support for these alternative methods for deploying software. 
===========

In addition to standard deployments, you can use the following alternative methods of distributing Autodesk programs on Windows platforms:

LMTOOLS Clearing the contents of the Perform Status Enquiry box

It is amazing to us that we discover these things after so many years of usage.

2008 2009 2010 2011 2012 : How to change AutoCAD from network license to standalone

source: JTB WORLD Blog , Up and Ready Blog

Sometimes it can be useful to convert a standalone license to a network license or the other way around. This works for AutoCAD and for verticals like AutoCAD Architecture, AutoCAD Electrical, AutoCAD Civil 3D, AutoCAD Map 3D, AutoCAD Mechanical, AutoCAD MEP, AutoCAD P&ID, AutoCAD Plant 3D and AutoCAD Structural Detailing. It can be done with a simple registry hack (start the Registry Editor with regedit.exe and take backup of the registry to be on the safe side).

For AutoCAD 2011 locate this key in the registry:
HKEY_LOCAL_MACHINE\SOFTWARE\Autodesk\AutoCAD\R18.1\ACAD-9001:409\AdLM

In that directory change the type for the installation that you require:

1 – Network
2 – Standalone
3 – Multiseat Standalone

For AutoCAD 2012:
HKEY_LOCAL_MACHINE\SOFTWARE\Autodesk\AutoCAD\R18.2\ACAD-A001:409\AdLM

A tip is to locate HKEY_LOCAL_MACHINE\SOFTWARE\Autodesk\AutoCAD first and then you will find the version (R18.2 is for 2012 products) and then the vertical (ACAD-A004:409 is for AutoCAD Architecture 2012).

Via Up and Ready

Change AutoCAD from standalone to network describes how it works for AutoCAD 2008 and older versions.

Change AutoCAD network to standalone to network describes how it works for AutoCAD 2009 and AutoCAD 2010.

Innovation Edge Newsletters : From Autodesk Labs

View them now:

This is great info about beta-products and cloud-based tools that often become new applications.

Subscription News: easier download interface and new advantage packs

source : AutoNews

Easier Way for Subscription Customers to Access Upgrades

We’ve improved the way Autodesk® Subscription customers access their upgrades. Key changes include:

  • Introduction to the new, intuitive “My Products” page upon clicking the “Get Your Upgrade” button in the landing page after logging in.
  • Simplified content in the Downloads page upon clicking the “Downloads” link in the left pane of the landing page.

Action: For more information on these enhancements, see the “Downloading Software” tutorial.

================

New Subscription Advantage Packs Available for Download

Autodesk® Subscription Advantage Packs for Autodesk® 3ds Max® 2012, Autodesk® 3ds Max® Design 2012, Autodesk® Maya® 2012, Autodesk® Softimage® 2012, Autodesk® Mudbox® 2012, Autodesk® Entertainment Creation Suites 2012, and Autodesk® Smoke® 2012 for Mac OS® X software are now available through the Autodesk Subscription Center.

=================

Subscription Advantage Pack for 3ds Max Design 2012 Available

The Subscription Advantage Pack for Autodesk® 3ds Max® Design 2012 software is now available for download by Subscription customers.

Feature highlights:

  • ActiveShade support for iray® renderer
  • Adobe® Photoshop® and After Effects® interoperability
  • New render pass system

video: Active Shade iray Rendering
Video: State Sets

Demonstration videos and screenshots are available on the Area.

Links to Secondary Installers

Restoring your settings after applying the secondary installer or clean uninstall
2012 Secondary Installer Included in product Install

AutoCAD : 2006 , 2007 , 2008 , 2009 , 2010 , 2011
AutoCAD LT : 2009 , 2010 , 2011 ,
AutoCAD Architecture : 2006 , 2007 , 2008 , 2009 , 2010 , 2011 ,
AutoCAD MEP : 2008 , 2010 , 2011 ,
AutoCAD MAP 3D : 2010 , 2011 ,
AutoCAD Civil 3D : 2009 , 2010 , 2011 , 2012 manual, 2012 automated,
Autodesk Revit : 2012

Server Side Client Side Network Deployment Troubleshooting Cheat Sheet

Get It: network troubleshooting informative links and snapshots PDF

Click on the source above to download a pdf containing useful Tech Solutions links and snapshots of each of them that are used by ATGUSA’s support team every day to troubleshoot network license issues.

Discussed:

VIDEOS: installing LMTOOLS, how to determine which LMTOOLS is currently installed, configuring LMTOOLS, and an example of creating a network deployment for 2010 products.

INFORMATION: Which firewall ports to open that Autodesk products use, what environment variable to set on the client and how to do that, editing the LICPATH.LIC file on the client and what to edit, and how to set the Network License Troubleshooting Environment Variable FLEXLM_DIAGNOSTICS and what to set it to and what is does.

=========

The following are the links included in the pdf , however the pdf contains some additional information.

Server Side Troubleshooting:

Network Installation Videos  
Firewall ports 27000 – 27009 , and 2080.

Client Side Troubleshooting:

Environment Variable on client
Network License Troubleshooting Environment Variable FLEXLM_DIAGNOSTICS

3ds Max – Fixing corrupted scenes, elements (objects, lights, helpers, cameras, etc) – Also Missing Dlls – FilName: fbxfilelink.dfl Class: FbxMaxWrapper SuperClass: 0x100

source

==================
From Autodesk Technical Support
Missing Dlls – FilName: fbxfilelink.dfl Class: FbxMaxWrapper SuperClass: 0x100
==================
I understand you encounter various errors rendering a scene in 3DS Max Desgin 2012.
Missing Dlls – FilName: fbxfilelink.dfl Class: FbxMaxWrapper SuperClass: 0x100
Also noticed the pipe error in your screen captures.
Here is the latest info on your issue.
Fbxfilelink.dfl and its related backburner errors / issues are likely due to a defect in 3DS Max 2012.
Some possible workarounds when users encounter these:
Open the file link manager before opening files that have a linked fbx file.
For backburner, that above may not work: Try creating a copy of the file and binding the fbx file before submitting the render job.
File Link Manager Dialog > Files panel > Bind button:
Binding the FBX geometry breaks the live File Link connection.
I know above defeats the purpose of File > Linking , but at this time they are the only workarounds until the defect can be resolved by our engineering team.
Currently there is no ETA on a fix date for this.
Can you let me know if above workarounds help with your errors?
….
Next > I notice also a Pipe error in your screen captures.
This was resolved for 2 of my clients by below tips:
It turned out to be related to a  corrupted object in the scene and once removed it worked fine.
You may need to use the process of incremental File > Merge to test what the problem object(s) might be.
Usually its because of a map / material on the objects.
Use the process of incremental File > Merge and merge items into new empty scene, then test render.
….
Final note
Have you installed the latest Service Pack 2 released this week for 3DS Max Design 2012?
Have you installed the latest FBX update for 3DS Max Design 2012?
If has some FBX defect fixes.
I would warn you in production, do Not update All computers at once.
Just update
1 manager machine
1 render slave
1 3dS Max workstation 

Test and see if all is well.
If not, its likely related to the defect mentioned above.

http://usa.autodesk.com/adsk/servlet/ps/dl/index?siteID=123112&id=2334435&linkID=10381720 
http://usa.autodesk.com/adsk/servlet/pc/item?siteID=123112&id=10775855
==================

Issue

Occasionally, when working in a scene and/or copying, translating, modifying 3ds max elements, the software may crash for no apparent reason. This may be a result of corrupted elements: object geometry, lights, cameras, etc… within the scene.

Solution

Here are several troubleshooting techniques used to identify and repair them.

Identifying the Problem Element(s)

    1. If the scene has many elements, try systematically deleting them in groups or individually to see which one is responsible for the crash.
    2. It could be an object, camera or light that is causing the problem. Press the “h” key to invoke the “Select Objects” dialogue (See Figure 1)
    3. Delete half of the scene elements. Save as a new scene. Reopen and see if it crashes. By repeating this incrementally one can narrow down a single problem element in complex scenes.

                                                             Figure 1:

    Select Objects dialogue

Repairing, Rebuilding and Deleting Problem Elements

    1. Once the problem element is found, you may have to recreate it from scratch.
    2. If it is object geometry, use the STL Check modifier to analyze your object geometry for errors.For example: “STL Check has found 116 errors on this character’s right eye” (See Figure 2)

                                                                         Figure 2:

    STL Check

If it is a grouped object comprising many smaller objects, link them all to a Dummy object.

  1. Select File > Export / Export Selected, and then transfer it to your hard drive in 3ds max format.
  2. From 3ds max’s File menu, choose ‘Import’ and re-import your file.

Note: This Export/Import can be done to individual objects as well – often it “resets” inconsistencies within the geometry.


Materials

Sometimes it can be the material which is causing errors, crashes, etc…

  • Apply a new grey default material to the object and see if it crashes.
  • If the object is using maps, remove them, and then test to see if it crashes.
  • If it no longer crashes, check all maps, resave the images and animations in your paint or video editing programs. This simple action often fixes data which has been corrupted within the image file.
  • By systematically testing each map, the process of elimination will identify which ones may be problematic.

Using the Merge command

In the main menu of 3ds max, under Files, you will find the ‘Merge’ option. This is powerful tool useful for salvaging corrupted scenes and/or elements. Often a scene which crashes intermittently can be repaired by using it.

Here are several scenarios:

  • Your scene crashes intermittently. Choose File > Reset. This resets 3ds max to its default state. Choose File > Merge and then select your problem scene. Merge it into the reset scene.
  • If you have isolated and repaired individual objects from a problem scene, use File > Merge to combine them back into the original scene again.
  • If you have isolated and repaired problematic materials from a scene, then use File > Merge to combine them back into the original scene again.
  • The overall workflow is to test/repair any problematic material, object, etc… in a new separate scene. Once they are fixed, then simply Merge or Import these into the original scene.

Synopsis

  1. Eliminate the element(s) from the scene which are still valid.
  2. Narrow down the parameters to the suspect element(s).
  3. Isolate and test these problematic element(s) in a single empty scene to identify the corrupt element that is causing the crash.
  4. Fix and merge back into your original scene the fixed element.
    The above steps are common troubleshooting techniques used for problem elements which have become corrupted within 3ds max. It is simple detective work really

2012 Book: Revit MEP – Aubin Academy Master Series

see inside of book here

THE AUBIN ACADEMY MASTER SERIES: REVIT ARCHITECTURE 2012 combines a straightforward, reader-friendly style with project-focused exercises that encourage learning by doing. Gain practical, firsthand experience with the powerful, popular Revit Building Information Modeling (BIM) software, which leading architects and engineers are using to move beyond traditional Computer-Assisted Design (CAD) to manage complex projects, foster collaboration, and boost productivity. This practical guide takes you through the process of building design development models and creating a complete set of construction documents for architectural production. By focusing on the rationale and practicality of the Revit Architecture process, the book helps you learn faster and get a clear sense of the software’s capabilities and each tool’s potential. Author Paul F. Aubin, an architecture professional for over 20 years and a respected Autodesk expert, also draws on his real-world experience to provide
detailed instruction and practical tips, both within the book and in Online Quick Start Videos designed to reinforce learning.

2012 Book: AutoCAD MEP – Aubin Academy Master Series

see inside the book here

The Aubin Academy Series: AutoCAD MEP 2012 focuses on the rationale and practicality the process of creating projects in MEP, rather than a series of independent commands and tools. The goal of each lesson in this concise manual is to help you complete your projects successfully. Tools are introduced together in a focused process, with a strong emphasis on “why” as well as “how”. The book and its exercises will provide you with a clear sense of the value of the tools and a clear indication of each tool’s potential. The Aubin Academy Series: AutoCAD MEP 2012 is a resource designed to shorten your learning curve, raise your comfort level and, most importantly, give you real life tested practical advice on using the software to create mechanical, electrical and plumbing designs and calculations. Empowered with the information in this book, you will learn how to use AutoCAD MEP to create construction documents that are reflective of industry standards and expectations.

2012: Automating the Clean Uninstall of Revit Products

Source: TS16825244
 
 
Autodesk® Revit® Architecture 2012
Autodesk® Revit® MEP 2012
Autodesk® Revit® Structure 2012
 
You would like to reset the Autodesk® Revit® 2012 user interface (i.e. the Ribbon, Quick Access Toolbar, and Project Browser) back to the out-of-the-box version and remove any customization that has been applied. 
 
Have us do it for you
Download and run the following script on your computer:
 
Do It Yourself:
Warning! This script may delete a file on your computer. It also removes a Windows Registry key. Do not use it without consulting your system administrator first. 
 
To reset the ribbon and Quick Access Toolbar:
  • Rename or delete the UIState.dat file located in the Autodesk Revit 2011 folder (rename to anything of your choice, like UIState.old), which can be found in one of the following locations, depending on your operating system:
     
    Windows XP

    %USERPROFILE%\Local Settings\Application Data\Autodesk\Revit\Autodesk Revit {Product Name} 2012 
     
    Windows Vista or Windows 7
    %APPDATA%\Autodesk\Revit\Autodesk Revit {Product Name} 2012
To reset your Project Browser to the default location:
  • Using the Windows Registry editor, rename the following registry key to anything of your choice (Panels_backup for example):
     
    HKEY_CURRENT_USER\Software\Autodesk\Revit\Autodesk Revit {Product Name} 2012\Components\Panels

Replace {Product Name} with Architecture, Structure, or MEP

Warning! Problems caused by improperly editing the Windows registry could render your computer operating system unusable. Microsoft provides a wealth of critical information that you need to know about the registry in the Microsoft Knowledge Base at http://support.microsoft.com/support.

Use the Microsoft® Registry Editor only at your own risk and only after backing up the registry as well as the system.dat and user.dat files as outlined for your operating system in the Microsoft Knowledge Base and in the related solution, TS66513. Additional information about the registry is also contained in the Help topics in the Microsoft Registry Editor.

Troubleshooting Network License Cascading Issues

source: Autodesk Technical Support:

issue:

one of your point products is taking a suite license, or is taking an undesired license.

Files needed to troubleshooting the issue include:

1.  A copy of the options file from the Server (if you have one).  This file will be in the same folder as the license file and will have a name of “adskflex.opt”. This file may or may not exist. 
2.  A copy of the debug log file from the Server.  You will find its location in LMTOOLS on the Config Services Tab, Path to the debug log file text box. 
3.  A host ID file form the System Settings tab of LMTOOLS.  Please save this as a text file with a name such as SysSet.txt 
4.  A copy of the text from choosing the Perform Status Enquiry button on the Server Status tab of LMTOOLS.  Please copy this content into a .txt file in notepad and save as a name such as SrvStat.txt. 
5.  From the workstation please send us a copy of the licpath.lic file (c:\Program Files\<Productname>\licpath.lic)   Note: All licpath.lic files for all applications on the workstation should be the same. 
6.  A copy of the client ADLM log from: 
  
XP:
C:\Documents and Settings\All Users\Application Data\Autodesk\Adlm 
W7:
C:\Users\All Users\Autodesk\Adlm

The Client ADLM log will be found if he unchecks the option to Hide Protected Operating System files in Windows Explorer > Organize > Folder Options > View.

===================
Things to try before creating a case

1.  Rearrange the products in the license file, putting the suite products last
2.  Regenerating the license for the product and the suite at the same time, and replacing those in the current license.
3.  Apply any hotfixes that resolve this issue.

4.  modify your options file using the INCLUDE EXCLUDE for the products in question:

example: Civil 3D 2011 license is taking an Infrastructure Design Suite license 2012

     #USE Civil 3D 2012 package
     INCLUDE 85604CIV3D_2011_0F HOST <Group ID>
     EXCLUDE 85799IDSP_2012_0F HOST <Group ID>

     #USE BUILDING SUITE
     INCLUDE 85799IDSP_2012_0F HOST <Group ID>
     EXCLUDE 85604CIV3D_2011_0F HOST <Group ID>

2012: Determining the path being used to save Revit Journals

Source: Autodesk Tech Support

issue:

you are not sure where your Revit software is saving journal files.

Resolution:

Go here to check the location specified in the following file:

C:\Program Files\Autodesk\Revit Architecture 2012\Program\identity.ini

It will list a journals path.

CURRENTLY WORKING 2012: Could not access network location Revit Server 2012 during installation of Update 1

source: Revit Clinic

Issue:

When upgrading Revit Server 2012 to Update 1 you get the following messages

=======Still Working Case: notes from Steve Ellis (verify readme instr. were followed)

Has the following process been followed to properly update to Update 1?

1.   Notify users that the Revit Server network will be taken offline for an update and that they should close all server-based models in Revit.

2.  Using Revit Server Administrator, apply a lock on the server to halt all Revit Server based activity.  If needed this process is included here.

3.   When the lock is successfully applied, for each server in the Revit Server network:

[3a] Shut down the server:

    Shut down the RevitServerAppPool application pool in IIS Manager
    Stop the Revit Server Autosync Service in the services panel
    Use the processes tab in the Windows task manager to determine whether there are any processes named “w3wp.exe” or “DataStorageAutoSyncService.exe” still running; if there are, terminate them.

[3b] Install the Revit Server 2012 Update 1 Service Pack.

[3c] Restart the Revit Server:

    Start the RevitServerAppPool application pool in IIS Manager
    Stop the Revit Server Autosync Service in the services panel (it will appear to have restarted after installing the UR)
    Restart the Revit Server Autosync Service in the services panel

4.  After all Revit Servers have been updated, use Revit Server Administrator to release the lock on the server and notify users that the maintenance is complete

This is very important that these steps are followed to the letter.

======please refer to the link for additional steps to take
source: Revit Clinic
Revit Local Server Down: Next Steps and Data Collection…

======Resolution: currently being tested on client, ATS conversation summary:

There is no previous instance where this has occurred, and they are not able to duplicate the issue on their end.  They are suggesting that a likely scenario explaining this would be that the update 1 download had some packets missing, causing the installation to go wrong.

This being the case, the update 1 cannot be uninstalled separately from the Revit Server.  Revit Server must be uninstalled and reinstalled.  The issue must be tested to see if it is fully resolved.  Then re-download the update 1 and during a time when it can be tested without risking further downtime, install it.

The time it would take to troubleshoot this down to a specific cause cannot be determined, and possibly take longer than the procedure outlined above.

AutoCAD splash screen starts up and then closes (Standalone) no errors

source

Issue

When running the software, it becomes unresponsive and freezes your computer. When you restart the computer and you try to restart AutoCAD, the splash screen starts up and then closes down with no apparent error message.

This symptom is very similar to TS14908069.

Solution

1. Check the file “productname201xENUAdlm.log” located here:

   Windows XP
   C:\Documents and Settings\All Users\Application Data\Autodesk\ADLM

   Vista/Windows 7
   C:\ProgramData\Autodesk\ADLM

2. The error will typically be:

   Reason=Fatal error
   ComputerName=COMPUTER
   OS=5.1.2600.Service Pack 2
   File=AdlmIntSATSLicense.cpp,Line=1150
   AdlmIntError=38 [Error getting license usage and behavior]
   Reason=Fatal error
   ComputerName=COMPUTER
   OS=5.1.2600.Service Pack 3
   File=AdlmIntSATSLicense.cpp,Line=347
   VendorID=2 [ADLMACT]
   VendorError=101 [The license cannot be accessed/loaded/opened]
This indicates that the ADLM trusted storage file has been corrupted when AutoCAD crashed.

3. Rename the following file by adding a .bak extension at the end of the filename.

   Windows XP
   C:\Documents and Settings\All Users\Application Data\FLEXnet\adskflex_*_tsf.data

   Vista/Windows 7
   C:\ProgramData\FLEXnet\adskflex_*_tsf.data

This file contains all activations for all 2010 and 2011 products.  You will need to re-register all your products if this file is renamed/deleted.

4. Restart AutoCAD and it will automatically re-register via Register Today and it will start up as expected.   A new adskflex_*_tsf.data file will be created when you re-register your product.

2010 2011 2012 AutoCAD Architecture : Severe lag time for Options and Plot dialogue to appear

Issue:
30 seconds to 1 minute or longer for options / plot dialogue box to pop up.
4GB RAM on board

scope:
single computer
3 versions, 2010, 2011, 2012 (all exhibiting behavior)

attempted:
turn off hardware accel.
all software was updated
secondary installer 
clean uninstallation

Resolution: From Autodesk Technical Support

I understand your customer is experiencing a delay when opening the PLOT or OPTIONS dialogs in all versions of AutoCAD.

The most typical cause of the performance issues you describe are broken search paths in the Options > Files tab, or a dead or non-responding printer in the Control Panel. Try this:

  • Go to Start > Control Panel > Printers. Right-click each printer listed and select Properties. If there is a slow or no response here, that delay will propagate into AutoCAD. Just delete any dead or slow printers.
  • Type OPTIONS at the command line, then click the Files tab. You’ll need to expand each path listed and make sure all paths listed are all reachable via Windows Explorer.

2008 2009 Printing and Plotting Troubleshooting Guide

source: TS1070053

Issue
This guide provides a collection of solutions that are useful for troubleshooting common printing and plotting issues that may occur with Autodesk products.

Solution


2012 Revit Architecture greyed out IE7 or later not installed

issue:

when installing Revit Architecture 2012, on an XP Pro SP3 64 bit system there is a circle with a slash through it next to the greyed out checkbox making the product unselectable for install.  When hovering cursor over circle, the message IE7 or later not detected.  However IE8 is installed on machine.

Attempts at resolution:

clean out %temp% directory
disk cleanup
revo pro could not find anything
Revit Architecture, dwf viewer were all cleanly uninstalled NOT PRESENT.
registry was clean of all revit products
XP was completely up to date using windows update (optional updates)
.NET framework 4 client installed.

Resolution:

uninstalled IE 8 and reinstalled IE8 resolved this issue.

2012 Clean Uninstall Navisworks Manage

source: Autodesk Technical Support

To ensure a clean uninstallation of Navisworks Manage 2012 do the following:

*******************
NOTE From Autodesk Technical Support
No registry key removal is necessary, the folders I provided you are directly from our resident Navisworks expert as recommendation for a clean uninstall.
*******************

uninstall the program using Add/Remove Programs (in XP) or Programs and Features (in Vista/Win 7).

Delete these directories:

C:\Autodesk\Navisworks Manage 2012\
C:\Program Files\Autodesk\Navisworks Manage 2012
C:\ProgramData\Autodesk Navisworks Manage 2012
C:\Users\All Users\Autodesk Navisworks Manage 2012 (copy and paste this link in your explorer bar to locate)
C:\Users\**YOUR USERID**\AppData\Roaming\Autodesk Navisworks Manage 2012

Deleting the following directories may resolve activation issues with standalone installs

using Vista / Win 7:

C:\ProgramData\FLEXnet\adskflex_00691b00_tsf.data
C:\ProgramData\FLEXnet\adskflex_00691b00_tsf.data_backup.001
C:\ProgramData\Autodesk\Adlm\cascadeinfo.cas

2011: Automating the Clean Uninstall of Revit Products

source: Autodesk

click for  2012: Automating the Clean Uninstall of Revit Products

Autodesk® Revit® Architecture 2011
Autodesk® Revit® MEP 2011
Autodesk® Revit® Structure 2011

Issue

There may be circumstances where Autodesk Revit® 2011 products need to be
removed from the workstation.  The following process will ensure all residual
files are properly removed as well.

Have us do it for you

Download and run the following script on your computer:

REVIT
2011 – Uninstall.vbs
(vbs –
16Kb)

Warning!

  1. This script will only remove your Autodesk Revit 2011 product if you have
    installed Revit to the default location on your computer.
  2. This script removes Autodesk Revit 2011 products from your machine.  It also
    deletes files and folders on your machine.
  3. Please backup any customizations before using this script.
  4. Disable any Anti-virus that may be running on your machine before running
    the script.
  5. Ensure you are a Adminstrator on your machine before running this script.
  6. The above script does not remove the Autodesk Material Libraries (step 3 below) or any shared components with other Autodesk Products.

Autodesk Exchange Apps Store: Publish and Market your customizations right inside AutoCAD 2012

source: Read all about it -AUGI World Pg. 12

This is available from within AutoCAD 2012 on line help.
Users can publish their customizations to a central location, and market them.

Secondary Installer Civil 3D 2012

Issue
To reset the default AutoCAD Civil 3D 2012 user settings, you want to reinitiate the secondary installer.

**************
Note: Instructions for Adding a Reset User Settings in the windows start menu 
**************

Solution
To reset the AutoCAD Civil 3D 2012 default user settings, you must first delete your application files and registry entries for the program. Follow these steps:

Note: Make sure that you back up any customized AutoCAD Civil 3D 2012 files before starting this procedure. (indicated below as backup) CLICK HERE FOR STEPS
====================================

1. Log on to the workstation as the user.
2. On the Start menu (Windows), click Run.
3. In the Run dialog box, enter regedit.
4. In the Registry Editor, locate the following subkey and delete it:

HKEY_CURRENT_USER\Software\Autodesk\AutoCAD\R18.2\ACAD-A000:409

5. Exit the Registry Editor.

===================
In XP Windows Explorer, locate and delete the following application folders:

C:\Documents and Settings\<user name>\Application Data\Autodesk\C3D 2012 (backkup this directory first)
C:\Documents and Settings\<user name>\Local Settings\Application Data\Autodesk\C3D 2012

In Vista / Windows 7, locate and delete the following application folders:

C:\Users\<<userid>>\AppData\Roaming\Autodesk\C3D 2012 (backkup this directory first)
C:\Users\<<userid>>\AppData\Local\Autodesk\C3D 2012

The user should now be able to launch AutoCAD Civil 3D 2012. When the product is opened, the files and folders that were deleted will be recreated by the secondary installer.

Warning! Problems caused by improperly editing the Windows registry could render your computer operating system unusable. Microsoft provides a wealth of critical information that you need to know about the registry in the Microsoft Knowledge Base at http://support.microsoft.com/support.

Use the Microsoft® Registry Editor only at your own risk and only after backing up the registry as well as the system.dat and user.dat files as outlined for your operating system in the Microsoft Knowledge Base and in the related solution, TS66513. Additional information about the registry is also contained in the Help topics in the Microsoft Registry Editor.

Factoid: AutoCAD Commands Graph

source: CAD Forum

The number of new commands and variables introduced in the individual versions of AutoCAD:

List of commands with version number

2012 FLEXnet Feature Codes

source

2006-2009 FLEXnet Feature Codes
2010 FLEXnet Feature Codes
2011 FLEXnet Feature Codes

The feature codes for Autodesk 2012 applications are as follows:

Product Feature Code
AutoCAD 2012 85730ACD_2012_0F
AutoCAD Architecture 2012 85731ARCHDESK_2012_0F
AutoCAD Civil 3D 2012 85830CIV3D_2012_0F
AutoCAD ecscad 2012 85677ECSCAD_2012_0F
AutoCAD Electrical 2012 85678ACAD_E_2012_0F
AutoCAD for Mac 2012 85875ACDMAC_2012_0F
AutoCAD Inventor LT Suite 2012 85759INVLTS_2012_0F
AutoCAD LT 2012 85732ACDLT_2012_0F
AutoCAD LT Civil Suite 2012 85808ACDLTC_2012_0F
AutoCAD Map 3D 2012 85776MAP_2012_0F
AutoCAD Map 3D Enterprise 2012 85850MAP3DE_2012_0F
AutoCAD Mechanical 2012 85733AMECH_PP_2012_0F
AutoCAD MEP 2012 85734BLDSYS_2012_0F
AutoCAD P&ID 2012 85780PNID_2012_0F
AutoCAD Plant 3D 2012 85779PLNT3D_2012_0F
AutoCAD Raster Design 2012 85841ARDES_2012_0F
AutoCAD Revit Architecture Suite 2012 85791REVITS_2012_0F
AutoCAD Revit MEP Suite 2012 85793REVSYP_2012_0F
AutoCAD Revit Structure Suite 2012 85792REVSU_2012_0F
AutoCAD Structural Detailing 2012 85744STRDET_2012_0F
Autodesk Utility Design 2012 85827UTLDESN_2012_0F
Autodesk 3ds Max 2012 856983DSMAX_2012_0F
Autodesk 3ds Max Design 2012 85700MAXDES_2012_0F
Autodesk 3ds Max Entertainment Creation Suite Premium 2012 85710MXECSP_2012_0F
Autodesk 3ds Max Entertainment Creation Suite Standard 2012 85708MXECS_2012_0F
Autodesk Alias Automotive 2012 85740AUTOST_2012_0F
Autodesk Alias Design 2012 85741DESNST_2012_0F
Autodesk Alias Surface 2012 85742SURFST_2012_0F
Autodesk Alias TC Integrator for GM 2012 85758ATCIGM_2012_0F
Autodesk Animation Academy 2012 85712AAA_2012_0F
Autodesk Building Design Suite for Education 2012 85770ESAE_2012_0F
Autodesk Building Design Suite Premium 2012 85787BDSPRM_2012_0F
Autodesk Building Design Suite Standard 2012 85797BDSS_2012_0F
Autodesk Building Design Suite Ultimate 2012 85788BDSADV_2012_0F
Autodesk Design Academy 2012 85774DES_ACA_2012_0F
Autodesk Design Suite Premium 2012 85784DSPRM_2012_0F
Autodesk Design Suite Standard 2012 85783DSSTD_2012_0F
Autodesk Design Suite Ultimate 2012 85801DSADV_2012_0F
Autodesk DirectConnect JT 2012 85754DC_JT_2012_0F
Autodesk DirectConnect NX 2012 85755DC_UG_2012_0F
Autodesk Ecotect Analysis 2012 85840ECOA_2012_0F
Autodesk Education Master Suite 2012 85769EMS_2012_0F
Autodesk Entertainment Creation Suite for Education 2012 85714ESEC_2012_0F
Autodesk Entertainment Creation Suite Ultimate 2012 85806ENCSU_2012_0F
Autodesk Factory Design Suite Premium 2012 85789FDSPRM_2012_0F
Autodesk Factory Design Suite Standard 2012 85804FDSS_2012_0F
Autodesk Factory Design Suite Ultimate 2012 85790FDSADV_2012_0F
Autodesk GM CAD Convertors 2012 85842GMCADC_2012_0F
Autodesk Infrastructure Design Suite for Education 2012 85771ESCSE_2012_0F
Autodesk Infrastructure Design Suite Premium 2012 85799IDSP_2012_0F
Autodesk Infrastructure Design Suite Standard 2012 85800IDSS_2012_0F
Autodesk Infrastructure Design Suite Ultimate 2012 85798IDSU_2012_0F
Autodesk Infrastructure Map Server 2012 85844IMS_2012_0F
Autodesk Infrastructure Modeler 2012 85882INFMDR_2012_0F
Autodesk Inventor 2012 85768INVNTOR_2012_0F
Autodesk Inventor Engineer-to-Order Series 2012 85873INVETO_2012_0F
Autodesk Inventor Engineer-to-Order Server 2012 85877INTSER_2012_0F
Autodesk Inventor Factory Premium 2012 85766INVFPR_2012_0F
Autodesk Inventor Factory Ultimate 2012 85767INVFAD_2012_0F
Autodesk Inventor LT 2012 85765INVLT_2012_0F
Autodesk Inventor OEM 2012 85849INVOEM_2012_0F
Autodesk Inventor Professional 2012 85846INVPROSA_2012_0F
Autodesk Inventor Publisher 2012 85781INVPUB_2012_0F
Autodesk Kynapse 2012 85868KYNGMS_2012_0F
Autodesk Maya 2012 85694MAYA_2012_0F
Autodesk Maya Entertainment Creation Suite Premium 2012 85718MYECSP_2012_0F
Autodesk Maya Entertainment Creation Suite Standard 2012 85716MYECS_2012_0F
Autodesk Moldflow Adviser Advanced 2012 85816MFAA_2012_0F
Autodesk Moldflow Adviser Design 2012 85818MFAD_2012_0F
Autodesk Moldflow Adviser Manufacturing 2012 85819MFAM_2012_0F
Autodesk Moldflow CAD Doctor 2012 85817MFCD_2012_0F
Autodesk Moldflow Design Link for CATIA V5 2012 85820MFDLC_2012_0F
Autodesk Moldflow Design Link for Parasolid 2012 85821MFDLP_2012_0F
Autodesk Moldflow Design Link for Pro/ENGINEER 2012 85822MFDLPE_2012_0F
Autodesk Moldflow Insight Advanced 2012 85823MFIA_2012_0F
Autodesk Moldflow Insight Basic 2012 85825MFIB_2012_0F
Autodesk Moldflow Insight Performance 2012 85824MFIP_2012_0F
Autodesk Moldflow Synergy 2012 85826MFS_2012_0F
Autodesk MotionBuilder 2012 85702MOBPRO_2012_0F
Autodesk Mudbox 2012 85696MBXPRO_2012_0F
Autodesk Navisworks Manage 2012 85839NAVMAN_2012_0F
Autodesk Navisworks Simulate 2012 85837NAVSIM_2012_0F
Autodesk Opticore Studio Professional 2012 85854OSPRO_2012_0F
Autodesk Plant Design Suite Premium 2012 85785PDSPRM_2012_0F
Autodesk Plant Design Suite Standard 2012 85802PLTDSS_2012_0F
Autodesk Plant Design Suite Ultimate 2012 85786PDSADV_2012_0F
Autodesk Product Design Suite for Education 2012 85773ESME_2012_0F
Autodesk Product Design Suite Premium 2012 85795PDSP_2012_0F
Autodesk Product Design Suite Standard 2012 85794PDSS_2012_0F
Autodesk Product Design Suite Ultimate 2012 85796PDSU_2012_0F
Autodesk Quantity Takeoff 2012 85833AQTO_2012_0F
Autodesk Real-Time Ray Tracing Cluster 2012 85852RTRTCL_2012_0F
Autodesk Revit Architecture 2012 85747REVIT_2012_0F
Autodesk Revit MEP 2012 85748RVTMPB_2012_0F
Autodesk Revit Structure 2012 85749REVITST_2012_0F
Autodesk Robot Structural Analysis 2012 85777RSA_2012_0F
Autodesk Robot Structural Analysis Professional 2012 85778RSAPRO_2012_0F
Autodesk Showcase 2012 85704SHOWCASE_2012_0F
Autodesk Showcase Professional 2012 85847SHOWPRO_2012_0F
Autodesk Simulation CFD 2012 85902SCFD_2012_0F
Autodesk Simulation CFD 2012 Advanced 85903SCFDA_2012_0F
Autodesk Simulation CFD 2012 Connection for ACIS 85904SCACIS_2012_0F
Autodesk Simulation CFD 2012 Connection for Catia V5 85905SCCV5_2012_0F
Autodesk Simulation CFD 2012 Connection for CoCreate 85906SCCOC_2012_0F
Autodesk Simulation CFD 2012 Connection for Discrete 85907SCFDCD_2012_0F
Autodesk Simulation CFD 2012 Connection for Inventor 85908SCFDCI_2012_0F
Autodesk Simulation CFD 2012 Connection for NX 85909SCFDNX_2012_0F
Autodesk Simulation CFD 2012 Connection for Parasolid 85910SCFDP_2012_0F
Autodesk Simulation CFD 2012 Connection for Pro/ENGINEER 85911SCPROE_2012_0F
Autodesk Simulation CFD 2012 Connection for Revit 85912SCFDCR_2012_0F
Autodesk Simulation CFD 2012 Connection for SolidEdge 85913SCFDSE_2012_0F
Autodesk Simulation CFD 2012 Connection for SolidWorks 85914SCFDSW_2012_0F
Autodesk Simulation CFD 2012 Connection for SpaceClaim 85915SCFDSC_2012_0F
Autodesk Simulation CFD 2012 Design Study Environment 85916SCDSE_2012_0F
Autodesk Simulation CFD 2012 Motion 85917SCFDM_2012_0F
Autodesk Simulation Mechanical 2012 85726ASMES_2012_0F
Autodesk Simulation Multiphysics 2012 85728ASPRO_2012_0F
Autodesk SketchBook Designer 2012 85828ALSK_2012_0F
Autodesk Smoke 2012 for Mac OS X 85737SMKMAC_2012_0F
Autodesk Softimage 2012 85705SFTIM_2012_0F
Autodesk Softimage Entertainment Creation Suite Standard 2012 85720SIECS_2012_0F
Autodesk Vault Base Server 2012 85853ACD_2012_0F
Autodesk Vault Collaboration 2012 85750VLTC_2012_0F
Autodesk Vault Collaboration AEC 2012 85856VTCAEC_2012_0F
Autodesk Vault Office 2012 85843PCOFFI_2012_0F
Autodesk Vault Professional 2012 85753VLTM_2012_0F
Autodesk Vault Workgroup 2012 85752VLTWG_2012_0F
mental ray Standalone 2012 85831MRSTND_2012_0F
T1 Enterprise Multi-flex 2012 85897T1MF_2012_0F
T1 Enterprise Multi-flex Prior Version 2012 85899T1MFPV_2012_0F
Turtle For Maya Premium 2012 85860TRTLP_2012_0F
Turtle For Maya Standard 2012 85859TRTLS_2012_0F


Now Shipping! AutoCAD /LT 2012 for Mac

As announced last week, AutoCAD® 2012 for Mac® is now available for design professionals who want the power and flexibility of AutoCAD® software in a native Mac® application.

AutoCAD 2012 for Mac software incorporates many of the usability, design, documentation, communication, and licensing upgrades made to AutoCAD 2012 software, including:

  • Auto-complete command entry
  • Multi-function grips
  • Editable UCS icon 
  • External reference visor
  • Associate array functionality
  • Mleader enhancements
  • Native DWG™ file support
  • Licensing – network and cross-platform

AutoCAD LT 2012 for Mac

Understanding a Civil 3D and Infrastructure Suite mixed license environment

source

Issue:

You have a mixture of Civil 3D network licenses and Infrastructure Suite Premium or Ultimate network licenses and you are wondering which license AutoCAD Civil 3D 2012 will pull first.

Solution:

It does not matter if AutoCAD Civil 3D 2012 was installed as part of one of the Autodesk Infrastructure Design Suites or as a point product (not as part of the suite). When you have a mixed license environment, AutoCAD Civil 3D 2012 will always look to pull a Civil 3D license first. If no Civil 3D licenses are available, it will then look to pull an Infrastructure Design Suite Premium or Ultimate license.

The following diagram shows this sequencing:

In the event that you first pull a Civil 3D network license and later, while that license is still in use, you pull one of the Infrastructure Design Suite licenses by launching a different product in that suite, the Civil 3D license will be returned and you will only consume the one suite license. The same thing applies if you first pull a suite license and then launch AutoCAD Civil 3D 2012.

******************************
Note: To allow this expected behavior, you must first apply the Autodesk Infrastructure Design Suite Network License Hotfix to the machine running AutoCAD Civil 3D 2012
******************************

2012 Autodesk Infrastructure Design Suite Network License Hotfix

source

In a continued effort to improve, we are releasing this hotfix for network license environments where both AutoCAD Civil 3D and Autodesk Infrastructure Design Suite Premium or Ultimate license exist.

This hotfix addresses a possible issue with AutoCAD Civil 3D 2012 pulling the incorrect license at launch.  This hotfix should be applied to all machines that have AutoCAD Civil 3D 2012 installed, regardless of whether it was installed as part of a suite or as a point products (not part of a suite).

From the options below, select the appropriate executable file for your operating system:

 
C3D2012_Cascade_HF_Win32.exe (exe – 11212Kb)
C3D2012_Cascade_HF_x64.exe (exe – 12623Kb)

2012 Product Extensions and Content

source: autodesk subscription

see also: newly added advantage packs

Make sure your product is up to date with product extensions, and documentation files at subscription.autodesk.com.  Keep checking new items are placed here during the year.

Etransmit for Revit 2012

GET IT: Autodesk Labs

Which version of LMTOOLS does AutoCAD Need? Download 11.9

AutoCAD 2012 – Version 11.9.0.0
AutoCAD 2011 – Version 11.7.0.0
AutoCAD 2010 – Version 11.5.0
AutoCAD 2009 – Version 11.4.100.0
AutoCAD 2008 – Version 11.4.0.0
AutoCAD 2007 – Version 10.8.0
AutoCAD 2006 – Version 10.1.5
AutoCAD 2005 – Version 9.2.2
AutoCAD 2004 – Version 8.3a
AutoCAD 2002 – Version 7.1f

Download v11.9.0.0
===========Ipv4
32 bit ipv4
readme
===========
64 bit ipv4
readme
===========Ipv6
32 bit ipv6
readme
===========
64 bit ipv6
readme

2012 and AutoCAD Verticals Performance Slowdown Hotfix (32/64 bit)


This hotfix is suitable for all AutoCAD 2012 verticals and will fix the slowdown caused by the layer control update available in the ribbon.

Error -125,147: This license cannot be checked out because: A PACKAGE component must be specified

source: TS1093987

Issue

When you ran a diagnostic check by clicking the Perform Diagnostics button on the Server Diags tab in LMTOOLS, the report contained the following error message:
This license cannot be checked out because: A PACKAGE component must be specified. Error -125,147

Solution

The diagnostic check on the Server Diags tab of LMTOOLS does not function properly with the packaged licenses introduced in the 2009 line of AutoCAD products, and the resulting report does not reflect how the license server is actually operating.  
As an alternative, you can click Status Enquiry on the Server Status tab in FLEXlm® to verify that the license file is being read successfully and to check the number of available licenses.

Civil 3D 2012 Where is my Reset User Settings?

Source: Being Civil Tip

****************

Note: Secondary Installer Civil 3D 2012 Manual Instructions

****************

First thing we need to do is to create a shortcut in the directory where program has other shortcuts listed.

  1. Go into C:\ProgramData\Microsoft\Windows\Start Menu\Programs\Autodesk\AutoCAD Civil 3D 2012
  2. Right-click in it and chose New and Shortcut
  3. In the next dialog paste following text (including quotes) “C:\Program Files\Autodesk\AutoCAD Civil 3D 2012\AdMigrator.exe” /reset and click Next
  4. Then type Reset User Settings (or anything you wish) for a name of this shortcut and hit Finish
  5. Now go to Start>All Programs>Autodesk>AutoCAD Civil 3D 2012 and note that Reset User Settings is listed

Final

6. Now go ahead and run it if you wish

7. In case you have performed some changes you will be greeted by this dialog

Reset

If you choose Reset custom settings, you will get what was equivalent of “reinitiating secondary installer” or resetting user settings

Network License Troubleshooting Environment Variable FLEXLM_DIAGNOSTICS

You have a network product that will not launch because if can’t find a license.  You would like additional information to display on the screen during launch.

If you want to a verbose report of the communication between a product and the license manager during the launch of a product, creating and setting the FLEXLM_DIAGNOSTICS environment variable on the client to a value of 3 will have this effect. 

in XP

1. On the Start menu (Windows), click Settings > Control Panel.
2. Double-click System.
3. In the System Properties dialog box, click the Advanced tab.
4. Click Environment Variables.
5. Under System Variables, click New.
6. In the Variable Name box, enter FLEXLM_DIAGNOSTICS
7. In the Variable Value box, enter the number 3

in vista/win 7

1. On the Start menu (Windows), right click Computer
2. Advanced System Settings.
3. In the System Properties dialog box, click the Advanced tab.
4. Click Environment Variables.
5. Under System Variables, click New.
6. In the Variable Name box, enter FLEXLM_DIAGNOSTICS
7. In the Variable Value box, enter the number 3

Can you Launch mixed standalone versions of products within a suite license on subscription?

Currently Researching:

You have the right to launch previouly owned versions (covered on subscription).  When you install these products make surre you use the correct Serial Number for each version of the suite.  The following scenario presents the situation to test the question at the bottom.

Question:
Customer has:
1 Standalone seat Revit Architecture Suite 2012 on subscription. (which contains..)
        1 Autodesk Revit Arch      (2012, 2011, 2010, 2009)
        1 AutoCAD Architecture   (2012, 2011, 2010, 2009)
        1 AutoCAD                       (2012, 2011, 2010, 2009)
=========
User 1 has installed software
        1 Autodesk Revit Architecture 2012 (installed with the 2012 suite serial number)
        1 AutoCAD 2010 (installed with the 2010 suite serial number)
=========
Can User 1 launch both of these products simultaneously? 

        AutoCAD 2010                                       (will consume 1 standalone suite 2010 license)
        Autodesk Revit Architecture 2012         (will consume 1 standalone suite 2012 license)
================================================================
                                                                                 Total = 2 Suite Licenses
================================================================
The question is that User 1 legally has 1 suite seat.  Can User 1 launch both both suite licenses at the same time?

================================================================
Response from Autodesk:
Standalone licenses work differently than Network licenses. With network licenses a license is utilized when the user launches the software (e.g. a user launches Revit Architecture 2012 and 2010, and this would use two licenses). With Standalone licenses a license is used when they activate the software and this license is locked to the system. In order to allow the installation of the current version and three prior versions (on subscription) additional prior version licenses will be used at the time of activation. Once activated, the user should be able to launch any of the activated applications.

Autodesk Main Support Page

click here for Autodesk Product Support Page

Each Tab has additional support links.  Updates and Service Packs, Utilities , Drivers, Data and Downloads, Knowledgebases, Documentation, On-line Help Fles, System Requirements, Operating System Compatibility, Installation Tutorial Videos, On-line Installation Help, Free Viewers, Web and Mobile Viewers, AutoCAD WS, DWF and DWG Viewers, Autodesk Design Review, DWG Trueview, Autodesk Inventor View, Autodesk Moldflow Communicator, Autodesk Navisworks Freedom, Autodesk Showcase Viewer, Microsoft Windows 7 and Vista Compatibility, MAC – OS compatibility, Installation and Licensing Discussion Group……much more…..

2012: Clean Uninstall of Revit Products

source

2011 clean uninstall of Autodesk Revit products
2010 clean uninstall of Autodesk Revit products

Issue
There may be circumstances where Autodesk Revit® 2012 products need to be removed from the workstation to allow for a clean installation. The following process will ensure all residual files are properly removed as well.

Solution
To uninstall Revit 2012 products and remove any remnants from your system, use the following procedure. The end result is a clean system on which you can reinstall. Please ensure to backup any custom family or template files prior to following this procedure:
Log on as a Local System Administrator and disable any Antivirus programs.
In the Windows XP Control Panel > Add or Remove Programs > remove the specific Revit 2012 product. For Windows Vista & Windows 7, Control Panel > Programs and Features > Uninstall.
In the Windows XP Control Panel > Add or Remove Programs > remove the Autodesk Material Library 2012. For Windows Vista & Windows 7, Control Panel > Programs and Features > Uninstall the Autodesk Material Library 2012
After the product is uninstalled, use Windows Explorer to locate and delete the following folders as appropriate. For steps 3 & 4 substitute the product name below based on which Revit 2012 product you are uninstalling; all paths listed by default are for Revit Architecture 2012:

Autodesk Revit Architecture 2012 & RAC 2012
Autodesk Revit Structure 2012 & RST 2012
Autodesk Revit MEP 2012 & RME 2012
Where %username% is present below substitute the current Windows login name.

For Windows XP installations (32 and 64 bit):

• C:\Program Files\Autodesk\Revit Architecture 2012
• C:\Documents and Settings\%username%\Application Data\Autodesk\REVIT\2012
• C:\Documents and Settings\%username%\Local Settings\Application Data\Autodesk\Revit\Autodesk Revit Architecture 2012
• C:\Documents and Settings\All Users\Application Data\Autodesk\RAC 2012

For Windows Vista and Windows 7 installations (32 and 64 bit):
• C:\Program Files\Autodesk\Revit Architecture 2012
• C:\ProgramData\Autodesk\RAC 2012
• C:\Users\%username%\AppData\Local\Autodesk\Revit\Autodesk Revit Architecture 2012
• C:\Users\%username%\AppData\Roaming\Autodesk\Revit\Autodesk Revit Architecture 2012

Open the system registry and locate then delete the following registry keys listed below as appropriate (Windows Start menu > Run > Regedit).

Warning! Problems caused by improperly editing the Windows registry could render your computer operating system unusable. Microsoft provides a wealth of critical information that you need to know about the registry in the Microsoft Knowledge Base at http://support.microsoft.com.
Use the Microsoft® Registry Editor only at your own risk and only after backing up the registry as well as the system.dat and user.dat files as outlined for your operating system in the Microsoft Knowledge Base and in the related solution, TS66513. Additional information about the registry is also contained in the Help topics in the Microsoft Registry Editor.

For 32-bit versions of Windows XP, Vista and Windows 7
• HKEY_CURRENT_USER\Software\Autodesk\Revit\Autodesk Revit Architecture 2012
• HKEY_LOCAL_MACHINE\SOFTWARE\Autodesk\Revit\Autodesk Revit Architecture 2012
• HKEY_LOCAL_MACHINE\SOFTWARE\Autodesk\RAC 2012

For 64-bit versions of Windows XP, Vista and Windows 7
• HKEY_CURRENT_USER\Software\Autodesk\Revit\Autodesk Revit Architecture 2012
• HKEY_LOCAL_MACHINE\SOFTWARE\Autodesk\RAC 2012
• HKEY_LOCAL_MACHINE\SOFTWARE\Autodesk\Revit\Autodesk Revit Architecture 2012

Restart the workstation.

Before reinstalling Revit products
• In Windows Explorer, delete the contents of your Windows Temp folder, but do not delete the Windows Temp folder itself. You can locate the Temp folder by entering %TEMP% in the Address bar of Windows Explorer.
• Use the End Task feature to end any anti-virus programs.

Note:
Disabling anti-virus programs from the system tray may not be sufficient. Virus checking programs may block certain activities that are seen as suspicious (for example, accessing the registry, adding/removing/updating DLL files, and so on), even though these activities are common when installing or removing programs.

Several anti-virus programs can be disabled by right-clicking the taskbar icon and selecting Disable from the shortcut menu. For more information about disabling your anti-virus software, refer to the vendor of that software.

Important!
It is important that you not only disable the anti-virus software but also use the End Task feature to end the anti-virus software.

To verify that an anti-virus program is not still running in the background as a TSR (Terminate and Stay Resident Program):

Windows XP, Windows Vista and Windows 7
• Press [Ctrl] + [Alt] + [Delete].
• Click Task Manager.
• On the Processes tab of the Task Manager, select the process for the anti-virus program and then click End Process.

You are now ready to install Revit 2012 products on the clean system.

2012 Revit Products – Repopulating types when reloading a family

source

Issue

You have purged types from a family in a project. When you reload the family the purged types do not repopulate.

Solution

The following method is an approach to reload the purged types:

  1. Open the family in question.
  2. Inside the Family Editor, go to Create > Types.
  3. In the Family Types dialog, under Family Types, click New.
  4. Create a new Family Type. This will be a temporary type, so you can name it anything.
  5. Click OK to exit the dialogs.
  6. Reload this family back into the project.

Now the purged types should be reloaded back into the project. To remove the temporary type, you can go to Manage > Purge Unused, or delete it from the Families section of the Project Browser.

2012 Autodesk Suites and their Products

Note:
==============================================
Unless otherwise noted the Premium Editions contain all the Products listed in the Standard Editions, and the Ultimate Edition contains all the products in both the Premium and Standard Editions.
==============================================

Autodesk Building Design Suite:
      Standard
            AutoCAD®
            AutoCAD® Architecture
            AutoCAD® MEP
            AutoCAD® Structural Detailing
            Autodesk® Showcase®
            Autodesk® SketchBook® Designer
      Premium (contains products in Standard)
            Autodesk® Revit® Architecture
            Autodesk® Revit® MEP
            Autodesk® Revit® Structure
            Autodesk® 3ds Max® Design
      Ultimate (contains products in Premium and Standard)
            Autodesk® Navisworks® Manage
            Autodesk® Quantity Takeoff
            Autodesk® Inventor®

Autodesk Design Suite:
      Standard
            AutoCAD®
            Autodesk® SketchBook® Designer (formerly Autodesk® Alias® Sketch)
            Autodesk® Showcase®
            Autodesk® Mudbox™
      Premium (contains products in Standard)
            Autodesk® 3ds Max® Design
      Ultimate (contains products in Premium and Standard)
            Autodesk® Alias® Design

Autodesk Entertainment Creation Suites:
      Standard
            Autodesk® 3ds Max® or Autodesk® Maya®
            Autodesk® MotionBuilder®
            Autodesk® Mudbox™
      Premium (contains products in Standard)
            Autodesk® Softimage®

Autodesk Factory Design Suite Standard:
      Standard
            AutoCAD® Architecture
            AutoCAD® Mechanical
            Autodesk® Showcase®
            Autodesk® Vault
            Autodesk® Factory Design Utilities
      Premium (contains products in Standard)
            Autodesk® Inventor®
            Autodesk® 3ds Max® Design
            Autodesk® Navisworks® Simulate
      Ultimate (contains products in Premium and Standard)
            Autodesk® Inventor® Professional (instead of Inventor)
            Autodesk® Navisworks® Manage (instead of simulate)

Autodesk Infrastructure Design Suite:
      Standard
            AutoCAD® Map 3D
            Autodesk® Navisworks Simulate
            AutoCAD®
      Premium (contains products in Standard)
            AutoCAD® Civil 3D
            Autodesk® 3ds Max Design
      Ultimate (contains products in Premium and Standard)
            Autodesk® Navisworks Manage (instead of simulate)

Autodesk Plant Design Suite:
      Premium
            AutoCAD®
            AutoCAD® P&ID
            AutoCAD® Plant 3D  
            Autodesk® Navisworks® Simulate
      Advanced (contains products in Premium)
            Autodesk® Navisworks Manage (instead of simulate)

Autodesk Product Design Suite:
      Standard
            AutoCAD® Mechanical
            Autodesk® Showcase®
            Autodesk® SketchBook® Designer
            Autodesk® Vault®
            Autodesk® Mudbox™
      Premium (contains products in Standard)
            Autodesk® Inventor®
            Autodesk® 3ds Max® Design
      Ultimate (contains products in Premium and Standard)
            Autodesk® Inventor® Professional (instead of Inventor)
            Autodesk® Alias® Design

AutoCAD Inventor LT Suite:
            AutoCAD LT®
            AutoCAD ® Inventor LT

AutoCAD Revit Architecture Suite:
            Autodesk® Revit® Architecture
            AutoCAD® Architecture
            AutoCAD®

 AutoCAD Revit Architecture Visualization Suite:
            Autodesk® Revit® Architecture
            Autodesk® Navisworks® Review
            Autodesk® 3ds Max® Design

 AutoCAD Revit MEP Suite:
            Autodesk® Revit® MEP
            AutoCAD® MEP

 AutoCAD Revit Structure Suite:
            Autodesk® Revit® Structure
            AutoCAD® Structural Detailing

2010 2011 2012 VBA for AutoCAD (32 and 64 bit)

source

NOTE: After installing visit Windows updates and apply all security updates.

Download the Microsoft Visual Basic for Applications Module
Please read the frequently asked questions before downloading the Microsoft® Visual Basic® for Applications (VBA) module for AutoCAD® 2010, AutoCAD® 2011, and AutoCAD® 2012 products.

AutoCAD 2010 VBA module 32-bit (exe – 91158Kb)
AutoCAD 2010 VBA module 64-bit (exe – 91433Kb)
AutoCAD 2011 VBA module 32-bit (exe – 72064Kb)
AutoCAD 2011 VBA module 64-bit (exe – 72304Kb)
AutoCAD 2012 VBA module 32-bit (exe – 123941Kb)
AutoCAD 2012 VBA module 64-bit (exe – 123991Kb)
  1. Close all programs.
  2. In Windows Explorer, double-click the downloaded self-extracting EXE file.
  3. Unzip the file to the location of your choice, or use the default location.
  4. Follow the on-screen instructions.

For OEM Developers:
The Visual Basic for Applications (VBA) engine is no longer provided with your AutoCAD OEM installation media. Please contact your Autodesk ISV partner representative for more information.

Important VBA Security Bulletin:

Vulnerability in Microsoft Visual Basic for Applications Could Allow Remote Code Execution (978213). VBA Security Bulletin MS10-031 has been integrated into the 2012 VBA modules, so it is not needed for the 2012 VBA modules.

Microsoft Security Bulletin MS10-031 – Critical

Resetting the Autodesk Revit 2012 user interface

source

You would like to reset the Autodesk® Revit® 2012 user interface (i.e. the Ribbon, Quick Access Toolbar, and Project Browser) back to the out-of-the-box version and remove any customization that has been applied. 
 
Automating this proceedure: (download and run this script on your computer)
 
 
Do It Yourself:
Warning! This script may delete a file on your computer. It also removes a Windows Registry key. Do not use it without consulting your system administrator first. 
 
To reset the ribbon and Quick Access Toolbar:
  • Rename or delete the UIState.dat file located in the Autodesk Revit 2011 folder (rename to anything of your choice, like UIState.old), which can be found in one of the following locations, depending on your operating system:
     
    Windows XP

    %USERPROFILE%\Local Settings\Application Data\Autodesk\Revit\Autodesk Revit {Product Name} 2012 
     
    Windows Vista or Windows 7
    %APPDATA%\Autodesk\Revit\Autodesk Revit {Product Name} 2012
To reset your Project Browser to the default location:
  • Using the Windows Registry editor, rename the following registry key to anything of your choice (Panels_backup for example):
     
    HKEY_CURRENT_USER\Software\Autodesk\Revit\Autodesk Revit {Product Name} 2012\Components\Panels

Replace {Product Name} with Architecture, Structure, or MEP

Warning! Problems caused by improperly editing the Windows registry could render your computer operating system unusable. Microsoft provides a wealth of critical information that you need to know about the registry in the Microsoft Knowledge Base at http://support.microsoft.com/support.

Use the Microsoft® Registry Editor only at your own risk and only after backing up the registry as well as the system.dat and user.dat files as outlined for your operating system in the Microsoft Knowledge Base and in the related solution, TS66513. Additional information about the registry is also contained in the Help topics in the Microsoft Registry Editor.

Autodesk Blogs

source

AutoCAD
AutoCAD Insider – Heidi Hewett
Between the Lines – Shaan Hurley
Lynn Allen’s Blog – Lynn Allen
Through the Interface – Kean Walmsley
What a Mesh! – Guillermo Melantoni

Without A Net – Tom Stoeckel, Dan Scales, Tom Bradley

AutoCAD Architecture
Between the Walls – Shaan Hurley

AutoCAD Civil 3D
Being Civil – Almas Suljevic, Jason Hickey, Justin Ziemba, Seth Hall
BIM on the Rocks – Dana Probert
Civil—Made in France – Willy Luce
From the Ground Up – Ove Cervin, Jack Strongitharm
The Dirt – Pete Kelsey
German BIM Blog

AutoCAD Map 3D
Between the Poles – Geoff Zeiss
CADnGIS – Neal Niemiec
GeoExpressions – Mike Schlosser
Geospatial—Made in France – Gwenaël Bachelot
GIS Exchange – Katie Jacques
The Geospatial Navigator – Matthias Liechti, Marcus Briglmeir

AutoCAD LT
LT Unlimited – Kate Morrical

AutoCAD P&ID and AutoCAD Plant 3D
In the Pipes – Ursula Sadiq

AutoCAD WS
AutoCAD WS Blog

3ds Max & 3ds Max Design
3D Roadie – Shawn Hendriks
Jamie’s Jewels – Jamie Gwilliam
Louis Marcoux Blog – Louis Marcoux
Maxed Out – Ken Pimentel
Taking it to the Max! – Shane Griffith
The 3ds Max SDK Blog – Christopher Diggins

Autodesk Alias
DaVinci – Michal Jelinek
Morphorm – Kevin Richards, Jamie Gilchrist, Chris Hall

Autodesk Design Review
Beyond the Paper – Volker Joseph

Autodesk Flame
Flame can do that – Bill Ennis
The 4K Story – Grant Kay

Autodesk Inventor
Autodesk Manufacturing, Northern Europe – Steve Bedder
Being Inventive – Bob Van der Donck, Rajesh Sivaswamy, Vinod Kumar Balasubramanian, Jon Dean
Ellipsis – Rob Cohee, Justin Hoey, Jay Tedeschi, Brian Sather, Chris Hall
In the Machine – Garin Gardiner
Mod the Machine – Brian Ekins

Autodesk LandXplorer
At Land’s End – Chris Andrews, Andreas Lippold, Lynda Sharkey
Geospatial—Made in France – Gwenaël Bachelot
GIS Exchange – Katie Jacques
The Geospatial Navigator – Matthias Liechti, Marcus Briglmeir

Autodesk MapGuide Enterprise
Between the Poles – Geoff Zeiss
CADnGIS – Neal Niemiec
GeoExpressions – Mike Schlosser
Geospatial—Made in France – Gwenaël Bachelot
GIS Exchange – Katie Jacques
The Geospatial Navigator – Matthias Liechti, Marcus Briglmeir

Autodesk Maya
Duncan’s Corner – Duncan Brimsmead
Mayalicious – Cory Mogk
Maya Station – Owen Burgess, Ash Aiad, Annick Harmel-Tourneur, Kristine Middlemiss

Autodesk MotionBuilder
Mayalicious – Cory Mogk

Autodesk Mudbox
The MudRoom – Craig Barr

Autodesk Navisworks
Beyond the Paper – Volker Joseph

Autodesk Revit
BIM & BEAM – Nicolas Mangon, Wai Chu, Tom Culotta 
Family Jewels-Creating Quality BIM Content – William Spier, Ian McGaw, Martin J. Schmid, Jason A. Spleha
Inside the Factory – Tom Vollaro, Erik Egbertson
Inside the System – Kyle Bernhardt
The Building Coder – Jeremy Tammik
The Revit Clinic – Harlan Brumm, Kathryn Langan, Jeremy Smith, Ryan Duell 
German BIM Blog

Autodesk Smoke
The 4K Story – Grant Kay

Autodesk Topobase
Geospatial—Made in France – Gwenaël Bachelot
GIS Exchange – Katie Jacques
The Geospatial Navigator – Matthias Liechti, Marcus Briglmeir
The Topobase Insiders – Andreas Boos, Derrick Oswald, Jeff Saunders

Autodesk Vault
Cracking the Vault – Richard Rankin, Jason Summerfield, Francesco Tonioni
It’s All Just Ones and Zeros – Doug Redmond
Under the Hood – Brian Schanen

Autodesk Construction and Design
dODDS and Ends – Jason Dodds
Phil Bernstein’s Blog – Phil Bernstein
BIM Apps – Emile Kfouri

Autodesk Labs
It’s Alive in the Lab – Scott Sheppard

Community & Social Media
Voice of Community – Ray Eisenberg

Developers
It’s All Just Ones and Zeros – Doug Redmond
Mod the Machine – Brian Ekins
The 3ds Max SDK Blog – Christopher Diggins
The Building Coder – Jeremy Tammik
Through the Interface – Kean Walmsley

Education

Classroom Connection – Brian Donnelly
Engineering Education for Mechanically Inclined – Thom Tremblay

Events & Initiatives
Autodesk University – Joseph Wurcher
Easter Island Mapping Project Diary

International Blogs
Civil—Made in France – Willy Luce
Geospatial—Made in France – Gwenaël Bachelot
The Geospatial Navigator – Matthias Liechti, Marcus Briglmeir
What a Mesh! – Guillermo Melantoni
Estos son Prototipos Digitales – Juan Carlos Alfonso
Inventor по-русски – Andrey Vinogradov, Anton Fedoseyev
Po prostu Inventor – Przemek Sokołowski
Revit w Polsce – Andrzej Samsonowicz
CAD Botequim – Jeferson Stutz
Isto é Protótipo Digital – Rodrigo Girardi
German BIM Blog 

Product Support
Being Civil – Almas Suljevic, Jason Hickey, Justin Ziemba, Seth Hall
Being Inventive – Bob Van der Donck, Rajesh Sivaswamy, Vinod Kumar Balasubramanian, Jon Dean
Cracking the Vault – Richard Rankin, Jason Summerfield, Francesco Tonioni
GIS Exchange – Katie Jacques
Maya Station – Owen Burgess, Ash Aiad, Annick Harmel-Tourneur, Kristine Middlemiss
Max Station – Nicolas Holst, Lee Montgomery, Vishnu Ramdass and Anil Choudhary
The Revit Clinic – Harlan Brumm, Kathryn Langan, Jeremy Smith, Ryan Duell 
Without A Net – Tom Stoeckel, Dan Scales

Technical Evangelists
Between the Lines – Shaan Hurley
Beyond the Paper – Volker Joseph
Ellipsis – Rob Cohee, Justin Hoey, Jay Tedeschi, Brian Sather, Chris Hall
It’s Alive in the Lab – Scott Sheppard
Lynn Allen’s Blog – Lynn Allen
Morphorm – Kevin Richards, Jamie Gilchrist, Chris Hall
The Dirt – Pete Kelsey

User Experience
Designing the User Experience at Autodesk

2012 Secondary Installer – included in product install

It appears that the 2012 AutoCAD and AutoCAD verticals have the secondary installer automated by clicking an option called “Reset Settings to Default”.  You will find this tool on the Start > All Programs > Autodesk > YourProductName 2012 > Reset Settings to Default.

This will perform the full secondary installer.  We recommend you back up your software first.  click here for steps

NOTE: The secondary installer can be triggered by doing a Registry only deletion and then launching your product, this will essentially repaint your registry entries.  If that fails to resolve the issue, then do the full secondary installer now included in the 2012 product install.

Which .NET Framework does AutoCAD Need?

AutoCAD 2008/AutoCAD LT 2008 requires .NET Framework 2.0
AutoCAD 2009/AutoCAD LT 2009 requires .NET Framework 3.0
AutoCAD 2010/AutoCAD LT 2010 requires .NET Framework 3.5 Service Pack 1
AutoCAD 2011/AutoCAD LT 2011 requires .NET Framework 3.5 Service Pack 1
AutoCAD 2012/AutoCAD LT 2012 requires .NET Framework 4.0

Microsoft .NET 4.0 pre-requisite for Autodesk 2012 product installations

source doc

Problem

Many of the Autodesk 2012 products require the installation of Microsoft .NET 4.0. In many cases .NET 4.0 will automatically be installed by the Autodesk 2012 installer however there are system-specific conditions where .NET cannot be installed by the Autodesk installer and will need to be installed manually.

This typically happens on systems running Windows XP without certain Windows updates or Vista and Windows 7 systems that are not up-to-date. In cases where a manual installation of .NET 4.0 is required, you will see the following alert dialog when you click the Install button to begin the the installation process:


Clicking the Update button will automatically terminate your Autodesk product installer and begin the .NET 4.0 installation.
 

Solution

To ensure that the Autodesk product installation is not interrupted by .NET 4.0 installation requirements, we strongly recommend manually installing Microsoft .NET 4.0 before beginning installation of your Autodesk 2012 product.

Note: This is especially important for systems that will be receiving an Autodesk 2012 product via silent installation of a deployment. Deployments will not check for .NET 4.0 and will not install if .NET 4.0 is not present on the system.

Microsoft .NET 4.0 is available on the Autodesk 2012 product media in the following location:

\3rdParty\NET\4\wcu\dotNetFramework\dotNetFx40_Full_x86_x64.exe

If you do not have access to the original Autodesk 2012 product media, you can download the Microsoft .NET 4.0 installer at the following location (refer to the Microsoft-supplied readme and documentation for additional information and prerequisites):

Microsoft .NET Framework 4 (Web Installer)

After .NET 4.0 has been installed, you must reboot your computer. You should perform this step even if you are not prompted to reboot. After your system has restarted, you can begin the installation of your Autodesk 2012 product.

Failure Creating Deployment for Autodesk Building Design Suite Ultimate 2012 on Windows 7 x64 or Vista x64 Editions

source material

**********************************
IMPORTANT LINK: New Information
This link contains sample INI files at the bottom!
**********************************

Issue

You attempt to create a deployment of the Autodesk Building Design Suite Ultimate 2012 and it fails to create the deployment. One of the folllowing error messages are displayed during the deployment creation:

========UPDATE from Autodesk Technical Support ***(See below for the latest from Autodesk Technical Support) 
Thank you for your patience while I further researched this issue. I was also able to reproduce the behavior that you described so I discussed this case with the development team. There is currently a known issue which is being investigated and as a result, I have attached the Change Request to this case.

As a workaround, the development team suggested copying the Suite install image from the media to a location on the hard drive or on a network share, then modifying the setup.ini in the original install image to contain fewer products.
==========

The copy functions cannot be used.

Copy Function cannot be used

The system cannot open the device or file specified.

system cannot open the device or file specified

===========

Autodesk Technical Support:  Instructions for editing the SETUP.INI file.

NOTES on procedure:

1)      The primary issue isn’t that a single product is causing the failure, it is with the number of products included.

  1. The main strategy is to reduce the number of products included in each deployment.
  2. That being said, we will create multiple setup.ini files and use them to install the products.

2)      The following isn’t guaranteed to work 100% of the time.
3)      This is a known issue that Autodesk development is currently working.
4)      The following came from Autodesk Development
5)      The snapshots used in this post are a typical SETUP.INI file and will not represent the exact INI file you will be editing.
6)      It may be wise to test deploy this first

Steps

1)      Copy the contents of the USB drive to the hard drive.
2)      Make backup of the SETUP.INI file (make a copy of it)
3)      Open the SETUP.INI in notepad
4)      Search for  the EXE_SEQUENCE=

  1. The next 2 lines underneath are the
  2. INSTALL_SEQUENCE=
  3. UI_SEQUENCE=

5)      There will be a semicolon separated list of product abbreviations after the “=” sign.

  1. To determine the product name from the abbreviation in the listing do a word search (from the edit pull down select find) -see figure.
  2. There should be a line starting with PRODUCT_NAME=product name (see figure)

6)      Remove this abbreviation including the semicolon after it.

  1. Please note the end of each of these lines there is NO SEMICOLON (that is important)

7)      When these items have been removed from all three lines then SAVE SETUP.INI and continue with the deployment.

  1. Please note that the exact number of products to be removed isn’t known at this time.
  2. I suggest cutting the list in half and creating 2 SETUP.INI files each containing one half of the products.

===========
Notes From Brian Winterscheidt (many thanks for testing the above workaround with his notes)

As we discussed last week, care is needed in reducing the number of products, to be left with something that will still function.

Here are my notes so far on the various components listed in the ini file for BDS-U.  The Deployment Notes/Requirements column outlines the relationships I have established, which affect the success or failure of deployment creation or functionality of the subsequent installation.

Components noted as “Required” either do not appear at all in the deployment configuration dialog for the indicated products (but are silently installed), or are presented as checked options, disabled from being unchecked.  “Option” installs are presented as checkboxes or radio buttons in the deployment configuration options for the indicated products, selected by default, but can be deselected.  The “Separate install” components do not appear to get include in actual deployments at all.
============================
Abbreviation 
Full Application Name 
Deployment Notes/Requirements
=============================
NLM;
Autodesk Network License Manager
Separate install from ‘Install Tools & Utilities’ button, server install for all Network licenses

CADM;
Autodesk CAD Manager Tools
Separate install from ‘Install Tools & Utilities’ button

RAC2012;
Autodesk Revit Architecture

RME2012;
Autodesk Revit MEP

RST2012;
Autodesk Revit Structure

ACAD;
Autodesk AutoCAD

NW64;
Autodesk Navisworks

NW32;
Autodesk Navisworks

QTO;
Autodesk Quantity Takeoff

MAX;
Autodesk 3DS Max Design

SHOWCASEx86;
Autodesk Showcase

SHOWCASEx64;
Autodesk Showcase

ACA;
Autodesk AutoCAD Architecture

MEP;
Autodesk AutoCAD MEP

ASD;
Autodesk AutoCAD Structural Detailing

ADR2012;
Autodesk Design Review

SKETCHBOOKDESIGNER2_0;
Autodesk Sketchbook Designer

INVENTOR;
Autodesk Inventor

DCLIBRARY;
Autodesk Inventor Content Center Libraries
Required for INVENTOR unless installing Vault Server (not included in BDS-U) separately.

InventorFusion;
Autodesk Inventor Fusion

ACFUSION;
Autodesk Inventor Fusion plugins for AutoCAD
Option for ACAD.

FUSION4INVADDINS;
Autodesk Inventor Fusion plugins for Inventor
Option for INVENTOR.

ASA2012;
Autodesk Sketchbook Designer for AutoCAD
Option for ACAD.

NW_EXPORTERS_64;
Autodesk Navisworks Exporter plugins
Option for RAC2012, RME2012, RST2012, ACAD, MAX, ACA, AMEP, ASD.

NW_EXPORTERS_32;
Autodesk Navisworks Exporter plugins
Option for RAC2012, RME2012, RST2012, ACAD, MAX, ACA, AMEP, ASD.

REVITSERVER;
Autodesk Revit Server
Separate install from ‘Install Tools & Utilities’ button, server install for RAC2012, RME2012, RST2012.

SDK;
Autodesk Revit Software Development Kit
Separate install from ‘Install Tools & Utilities’ button, for RAC2012, RME2012, RST2012.

CMILM2012;
Autodesk Common Materials Medium Image Library
Required for MAX, SHOWCASEx86, SHOWCASEx64.  Option for RAC2012, RME2012, RST2012.

SNAP;
Autodesk Content Service
Separate install from ‘Install Tools & Utilities’ button.

SUBSTANCE;
Allegorithmic Substance Designer
Separate install from ‘Install Tools & Utilities’ button, for MAX.

SUBSTANCE_EXTRA;
Allegorithmic Substance extra content
Separate install from ‘Install Tools & Utilities’ button, for MAX.

SUBSTANCE_PLAYER;
Allegorithmic Substance Player
Separate install from ‘Install Tools & Utilities’ button, for MAX.

RPC_CONTENT;
Archvision RPC Content
Separate install from ‘Install Tools & Utilities’ button, for MAX.

RPC;
Archvision RPC Dashboard
Separate install from ‘Install Tools & Utilities’ button, for MAX.

CIVILVIEW;
Autodesk CivilView plugin
Separate install from ‘Install Tools & Utilities’ button, for MAX.

EASYNAT;
Bionatics EASYnat for 3DS Max Design
Separate install from ‘Install Tools & Utilities’ button, for MAX.

CRAFTANIMATIONS;
Craft Director Studio Promotional Edition
Separate install from ‘Install Tools & Utilities’ button, for MAX.

OKINO_POLY_NUGRAF;
Okino PolyTrans & Nugraf Demo
Separate install from ‘Install Tools & Utilities’ button, for MAX.

OKINO_PLUGINS;
Okino Plugins Demo Superinstaller
Separate install from ‘Install Tools & Utilities’ button, for MAX.

DWGTRUEVIEW2012;
DWG TrueView
Option for QTO.

COMPOSITE;
Composite
Option for MAX.

BACKBURNER;
Backburner
Required for MAX.

DCx86;
DirectConnect
Option for SHOWCASEx86.

DCx64;
DirectConnect
Option for SHOWCASEx64.

===========Second Workaround

These errors can occur when creating a deployment for the Autodesk Building Design Suite Ultimate 2012 from a machine running Windows 7 x64 editions (Enterprise, Ultimate, Professional, or Home Premium) or Windows Vista x64 editions (Enterprise, Ultimate, Business, or Home Premium).

To resolve this issue, create the deployment from a machine running Windows XP Professional x64 or Windows XP 32 bit editions (Professional or Home).

 Also See

Is upgrading LMTOOLS for 2012 deployments REQUIRED?

Issue:
The trend over the years has been that in order to deploy the latest version of networked Autodesk products, upgrading LMTOOLS was a required step in the process. Is this the case with 2012?

Resolution with Caution: (2 customers confirmed this)
No. We received the new 2012 license, and configured it with the LMTOOLS v11.7.0.0 (the version that came with 2011) and it is properly issuing the license over the network. No upgrade was necessary.

Scope:
This license test result was limited to the 4 2012 products that were released at the time.  It is recommended to use the 2012 media to install LMTOOLS until we verify this remains true for the entire suite of 2012 networked products.  ATGUSA will test this internally and we will keep you posted on the results.

Notes:
ATGUSA had tested this scenario:
If you have installed LMTOOLS by copying the files, instead of installing them with the Autodesk media, then deleting the files to uninstall it. The 2012 media will show that LMTOOLS is already installed and will not let you select it.

2012 Product Keys

Here is an incomplete listing of 2012 Product Keys

click here for 2011 product keys

click here for 2010 product keys

Happy installations….

AutoCAD 2012  001D1
AutoCAD LT 2012  057D1
AutoCAD Architecture 2012 185D1
AutoCAD Civil 3D 2012 237D1
AutoCAD Map 3D 2012 129D1
AutoCAD Map 3D Enterprise 2012 799D1
AutoCAD MEP 2012 235D1
AutoCAD P&ID 2012 448D1
AutoCAD Raster Design 2012 340D1
Autodesk Infrastructure Map Server 2012 796D1
Autodesk Navisworks Manage 2012 507D1
Autodesk Navisworks Review 2012 504D1
Autodesk Navisworks Simulate 2012 506D1
Autodesk MapGuide Enterprise 2012 276D1
Autodesk 3DS Max Design 2012 495D1
Autodesk Productstream Prof. Pro 2012 261D1
Autodesk Revit Architecture 2012 240D1
Revit Architecture Suite 2012 241D1
Autodesk Revit Structure 2012 255D1
Autodesk Revit Structure Suite 2012 256D1
Autodesk Revit Architecture Visualization Suite 2012 595D1
Autodesk Revit MEP 2012 297D1
Autodesk Revit MEP Suite 2012 257D1
==========================================
Autodesk Building Design Suites:
      Standard 784D1
      Premium 765D1
      Ultimate 766D1
Autodesk Design Suites:
      Standard 767D1
      Premium 768D1
      Ultimate 769D1
Autodesk 3ds Studio Max Entertainment Creation Suite:
      Standard 661D1
      Premium 774D1
Autodesk Maya Entertainment Creation Suite
      Standard 660D1
      Premium 775D1
 Autodesk Factory Design Suites
      Standard 789D1
      Premium 757D1
      Ultimate 760D1
Autodesk Infrastructure Design Suites
      Standard 787D1
      Premium 786D1
      Ultimate 785D1
Autodesk Plant Design Suites
      Premium 763D1
      Advanced 764D1
Autodesk Product Design Suites:
      Standard 783D1
      Premium 782D1
      Ultimate 781D1

Creating a new paperspace viewport disables an existing one in same layout

Issue:
while in a paper space layout, when creating a new viewport, it gets created but an existing viewport in the same layout is affected by not showing anything in it.
Resolution:
MAXACTVP system variable needs to be set to a higher value. It controls the maximum number of viewports possible in a single layout.

What if flattening the machine doesn’t resolve the issue?

On this site there are many troubleshooting techniques discussed.  We cover, backing up and updating software, updating windows, updating drivers, software bugs, anti-virus, secondary installers, uninstallation.  But what if all these efforts fail?  What other options remain to try?  We discuss msconfig, isolating services, safe mode, quarantine computer from network, adding RAM, updating BIOS, swapping hard drives, mother boards, video cards.  What happens if the problem persists beyond these measures?  We discuss flattening the machine and starting over fresh.  (not in this order…)

Still wont work?  What do you do?  What options do you have, when a brand new computer exhibits the same exact problem?  Could this possibly happen? Although rarely, it has happened. 

There had to be a reason, a unique combination of software that do not like each other.  Is there a brand new version of any software you have just loaded.  There may be possible bugs that are not yet known or documented well enough to get the right key words to google.

Uninstalling third-party software meeting this description may be a good idea.  Testing the issue without their presence is recommended.

11 Autodesk MAC compatible products

source material

The current listing of all Autodesk Products that are MAC compatible are these:

AutoCAD for Mac
Autodesk Alias Automotive
Autodesk Alias Design
Autodesk Alias Surface
Autodesk FBX
Autodesk Maya
Autodesk SketchBook Designer
Autodesk Sketchbook Pro
Autodesk Smoke
Autodesk Stitcher Unlimited
Autodesk Mudbox

Can you Switch AutoCAD for AutoCAD MAC from a Revit Architecture Suite?

AutoCAD for the MAC is a separate product than AutoCAD.  It has its own serial number.  There is a cross grade path between the two.  AutoCAD is bundled in Revit Architecture Suite.  Currently there is no path to switch out AutoCAD for AutoCAD MAC within a suite product.  This may or may not change in the future.  We will keep you advised if this happens.

XP Vista Win 7 Task Bar disappears along with Start Button

Issue:
Sometimes the start button and the entire task bar disappears.

OS:
XP, Vista, Win 7

Resolution 1:
hold down the Windows key + R

Resolution 2:
Hold down the windows key+R.
This gives you the run box,
type explorer.exe and enter and your start bar will come back.

Resolution 3:
reboot

Autodesk Asset Locator Updates Version of Autodesk Product Manager : NOTE this version the current version

Autodesk® Asset Locator (AAL) is an updated version of Autodesk Product Manager. AAL searches a network and reports information about each Autodesk product installed, including programs, service packs, extensions, and object enablers. You can save the results of the search in a file for use in a spreadsheet or database application.  Located on your installation media.

*********************

IMPORTANT INSTALLATION NOTE IN README: read this first

download Locator   Download toolguide

Project Galileo : Civil 3D Conceptual Design Tool

Another Great App from Autodesk Labs for Civil 3D.

GET IT: Download Project Galileo

Oce 9400 plots smaller pen weights heaver with 2010 and 2011 than in 2004

Issue:
When printing a drawing from AutoCAD Civil 3D 2010/2011 to the Oce 9400 plotter, the smaller pen weight lines are printed heavier than desired. These lighter lines are used for things such as background contour lines.

System:
XP SP2 3GB RAM, Win7,

Software:
Civil 3D 2010 updates applied
Civil 3D 2011 updates applied

The lineweights in question in the .ctb file were:
Extra Fine – 0.004
Ultra Fine – 0.001

Resolution:
diagnosed the problem as being a setting in the plotter driver. A checkbox entitled “Thicken one-pixel Lines” was checked, and unchecking it resolved the issue. The steps below outline how to drill down to modify that setting/checkbox

1. Click on the “Settings” button in the top left corner. (I don’t have a name for this button, but it is the button that brings up what would conventionally be brought up by clicking on “File” in most Windows based applications)
2. Click on Print
3. Click on “Plotter Manager”
4. Double click on the plotter driver file that is in use (these file have a .pc3 file extension) This brings up the “plotter configuration editor” for the .pc3 file
5. click on the “Devices and Document Settings” tab
6. Click on the “Custom Properties” button
7. Click on the “Image” tab
8. Click on the “More” button
9. Deselect the check box “Thicken one-pixel line”
10. OK out of the 3 open properties dialogs
11. close the “C:\documents and settings……Plotters” window

2010 FLEXnet Feature Codes

source: tsdoc

2006-2009 FLEXnet Feature Codes
2011 FLEXnet Feature Codes
2012 FLEXnet Feature Codes

AutoCAD® 2010 71200ACD_2010_0F
AutoCAD® Architecture 2010 72200ARCHDESK_2010_0F
AutoCAD® Civil 2010 74300CIVIL_2010_0F
AutoCAD® Civil 3D® 2010 73700CIV3D_2010_0F
AutoCAD® Electrical 2010 71700ACAD_E_2010_0F
AutoCAD® Inventor® Professional Suite 2010 70500INVPRO_2010_0F
AutoCAD® Inventor® Routed Systems Suite 2010 70600INVPRORS_2010_0F
AutoCAD® Inventor® Simulation Suite 2010 70700INVPROSIM_2010_0F
AutoCAD® Inventor® Suite 2010 70400INVBUN_2010_0F
AutoCAD® Inventor® Tooling Suite 2010 73200INVMFG_2010_0F
AutoCAD® Map 3D 2010 72500MAP_2010_0F
AutoCAD® Mechanical 2010 71800AMECH_PP_2010_0F
AutoCAD® MEP 2010 73000BLDSYS_2010_0F
AutoCAD® Plant 3D 2010 72300PLNT3D_2010_0F
AutoCAD® Raster 2010 75600RSTR_2010_0F
AutoCAD® Raster Design 2010 72600ARDES_2010_0F
AutoCAD® Revit® Architecture Suite 2010 74200REVITS_2010_0F
AutoCAD® Revit® Architecture Visualization Suite 2010 81500RAVS_2010_0F
AutoCAD® Revit® MEP Suite 2010 73100REVSYP_2010_0F
AutoCAD® Revit® Structure Suite 2010 74000REVSU_2010_0F
AutoCAD® Structural Detailing 2010 82200STRDET_2010_0F
AutoCAD® Visualization Suite 2010 80000ACDDS_2010_0F
Autodesk® 3ds Max® 2010 699003DSMAX_2010_0F
Autodesk® 3ds Max® Design 2010 70000MAXDES_2010_0F
Autodesk® Building Fabrication Suite 2010 82000BDFBS_2010_0F
Autodesk® Design Academy 2010 80200DES_ACA_2010_0F
Autodesk® Ecotect Analysis 2010 78000ECOA_2010_0F
Autodesk® Education Master Suite 2010 79600EMS_2010_0F
Autodesk® Education Suite for Architecture and Engineering 2010 79800ESAE_2010_0F
Autodesk® Education Suite for Civil and Structural Engineering 2010 80900ESCSE_2010_0F
Autodesk® Education Suite for Industrial Design 2010 80400ESID_2010_0F
Autodesk® Education Suite for Mechanical Engineering 2010 80700ESME_2010_0F
Autodesk® Inventor® Automation Professional 2010 74400INVAS_2010_0F
Autodesk® Inventor® Automation Runtime 2010 83300INVAR_2010_0F
Autodesk® MapGuide® Enterprise 2010 72700MAPGE_2010_0F
Autodesk® Maya® Complete 2010 81700MAYACP_2010_0F
Autodesk® Maya® Complete 2010 Mental Ray 81700MAYACPMR_2010_0F
Autodesk® Maya® Unlimited 2010 81800MAYAUL_2010_0F
Autodesk® Maya® Unlimited 2010 Fluid Simulation 81800MAYAULFS_2010_0F
Autodesk® Maya® Unlimited 2010 Mental Ray 81800MAYAULMR_2010_0F
Autodesk® Moldflow Adviser Advanced 2010 76700MFAA_2010_0F
Autodesk® Moldflow Adviser Design 2010 76300MFAD_2010_0F
Autodesk® Moldflow Adviser Manufacturing 2010 76500MFAM_2010_0F
Autodesk® Moldflow CAD Doctor 2010 77500MFCD_2010_0F
Autodesk® Moldflow Design Link for CATIA V5 2010 75700MFDLC_2010_0F
Autodesk® Moldflow Design Link for Parasolid 2010 76100MFDLP_2010_0F
Autodesk® Moldflow Design Link for Pro/ENGINEER 2010 75900MFDLPE_2010_0F
Autodesk® Moldflow Insight Advanced 2010 77300MFIA_2010_0F
Autodesk® Moldflow Insight Basic 2010 76900MFIB_2010_0F
Autodesk® Moldflow Insight Performance 2010 77100MFIP_2010_0F
Autodesk® Moldflow Synergy 2010 77700MFS_2010_0F
Autodesk® MotionBuilder 2010 79500MOBPRO_2010_0F
Autodesk® Navisworks Manufacturing Manage 2010 82700NWMMAN_2010_0F
Autodesk® Navisworks Manufacturing Review 2010 83100NWMREV_2010_0F
Autodesk® Navisworks Manufacturing Simulate 2010 82900NWMSIM_2010_0F
Autodesk® Navisworks® Manage 2010 71400NAVMAN_2010_0F
Autodesk® Navisworks® Review 2010 71600NAVREV_2010_0F
Autodesk® Navisworks® Simulate 2010 71500NAVSIM_2010_0F
Autodesk® Plant P&ID 2010 73400PNID_2010_0F
Autodesk® Productstream™ Professional 2010 72100PCPRO_2010_0F
Autodesk® Productstream™ Professional 2010 Easy 71900PCEASY_2010_0F
Autodesk® Productstream™ Professional 2010 Office 72000PCOFFI_2010_0F
Autodesk® Revit® Architecture 2010 74100REVIT_2010_0F
Autodesk® Revit® MEP 2010 73800RVTMPJ_2010_0F
Autodesk® Revit® MEP-B 2010 82400RVTMPB_2010_0F
Autodesk® Revit® Structure 2010 73900REVITST_2010_0F
Autodesk® Robot Structural Analysis 2010 75200RSA_2010_0F
Autodesk® Robot Structural Analysis Professional 2010 75300RSAPRO_2010_0F
Autodesk® Softimage 7.5 78600SFTIM_7_5F
Autodesk® Softimage Advanced 7.5 78800SFTIMA_7_5F
Autodesk® Topobase™ Client 2010 72800TOPOBSCLNT_2010_0F
Autodesk® Topobase™ Web 2010 72900TOPOBSWEB_2010_0F
Autodesk® Toxik 2010 75100TOXIK_2010_0F
Autodesk® Utility Design 2010 73500UTLDESN_2010_0F
Autodesk® Vault Collaboration 2010 74500VLTC_2010_0F
Autodesk® Vault Manufacturing 2010 70800VLTM_2010_0F
Autodesk® Vault Workgroup 2010 74700VLTWG_2010_0F

2011 FLEXnet Feature Codes

source : tsdoc

2006-2009 FLEXnet Feature Codes
2010 FLEXnet Feature Codes
2012 FLEXnet Feature Codes

Product Feature Code
AutoCAD 2011 85536ACD_2011_0F
AutoCAD Architecture 2011 85561ARCHDESK_2011_0F
AutoCAD Civil 3D 2011 85604CIV3D_2011_0F
AutoCAD ecscad 2011 85581ECSCAD_2011_0F
AutoCAD Electrical 2011 85538ACAD_E_2011_0F
AutoCAD Inventor LT Suite 2011 85650INVLTS_2011_0F
AutoCAD Inventor Professional Suite 2011 85567INVPRO_2011_0F
AutoCAD Inventor Routed Systems Suite 2011 85569INVPRORS_2011_0F
AutoCAD Inventor Simulation Suite 2011 85571INVPROSIM_2011_0F
AutoCAD Inventor Suite 2011 85573INVBUN_2011_0F
AutoCAD Inventor Tooling Suite 2011 85575INVMFG_2011_0F
AutoCAD LT 2011 85555ACDLT_2011_0F
AutoCAD LT Civil Suite 2011 85662ACDLTC_2011_0F
AutoCAD Map 3D 2011 85557MAP_2011_0F
AutoCAD Mechanical 2011 85545AMECH_PP_2011_0F
AutoCAD MEP 2011 85562BLDSYS_2011_0F
AutoCAD P&ID 2011 85603PNID_2011_0F
AutoCAD Plant 3D 2011 85602PLNT3D_2011_0F
AutoCAD Raster Design 2011 85683ARDES_2011_0F
AutoCAD Revit Architecture Suite 2011 85623REVITS_2011_0F
AutoCAD Revit MEP Suite 2011 85624REVSYP_2011_0F
AutoCAD Revit Structure Suite 2011 85594REVSU_2011_0F
AutoCAD Structural Detailing 2011 85595STRDET_2011_0F
AutoCAD Visualization Suite 2011 85657ACDDS_2011_0F
Autodesk 3ds Max 2011 855013DSMAX_2011_0F
Autodesk 3ds Max Design 2011 85503MAXDES_2011_0F
Autodesk 3ds Max Entertainment Creation Suite 2011 85617MXECS_2011_0F
Autodesk 3ds Max Entertainment Creation Suite Premium 2011 85685MXECSP_2011_0F
Autodesk Algor Simulation 2011 85590ALGSIM_2011_0F
Autodesk Algor Simulation CFD 2011 85591ASCFD_2011_0F
Autodesk Algor Simulation MES 2011 85592ASMES_2011_0F
Autodesk Algor Simulation Professional 2011 85593ASPRO_2011_0F
Autodesk Alias Automotive 2011 84800AUTOST_2011_0F
Autodesk Alias Design 2011 85000DESNST_2011_0F
Autodesk Alias Sketch 2011 85615ALSK_2011_0F
Autodesk Alias Surface 2011 85200SURFST_2011_0F
Autodesk Animation Academy 2011 85618AAA_2011_0F
Autodesk Design Academy 2011 85625DES_ACA_2011_0F
Autodesk Design Suite Advanced 2011 85654DSADV_2011_0F
Autodesk Design Suite Premium 2011 85655DSPRM_2011_0F
Autodesk Design Suite Standard 2011 85653DSSTD_2011_0F
Autodesk DirectConnect JT 2011 85609DC_JT_2011_0F
Autodesk DirectConnect NX 2011 85611DC_UG_2011_0F
Autodesk Ecotect Analysis 2011 85672ECOA_2011_0F
Autodesk Education Master Suite 2011 85626EMS_2011_0F
Autodesk Education Suite for Architecture and Engineering 2011 85627ESAE_2011_0F
Autodesk Education Suite for Civil and Structural Engineering 2011 85628ESCSE_2011_0F
Autodesk Education Suite for Entertainment Creation 2011 85619ESEC_2011_0F
Autodesk Education Suite for Industrial Design 2011 85629ESID_2011_0F
Autodesk Education Suite for Mechanical Engineering 2011 85630ESME_2011_0F
Autodesk Factory Design Suite Advanced 2011 85636FDSADV_2011_0F
Autodesk Factory Design Suite Premium 2011 85635FDSPRM_2011_0F
Autodesk GM CAD Convertors 2011 85663GMCADC_2011_0F
Autodesk Intent Professional 2011 85668INVAS_2011_0F
Autodesk Intent Runtime 2011 85670INVAR_2011_0F
Autodesk Intent Server 2011 85671INTSER_2011_0F
Autodesk Inventor 2011 85579INVNTOR_2011_0F
Autodesk Inventor Factory Advanced 2011 85632INVFAD_2011_0F
Autodesk Inventor Factory Premium 2011 85631INVFPR_2011_0F
Autodesk Inventor LT 2011 85649INVLT_2011_0F
Autodesk Inventor Publisher 2011 85667INVPUB_2011_0F
Autodesk Inventor Runtime 2011 85648INVRT_2011_0F
Autodesk LandXplorer Studio Professional 2011 85583LDXSP_2011_0F
Autodesk MapGuide Enterprise 2011 85552MAPGE_2011_0F
Autodesk Maya 2011 85537MAYA_2011_0F
Autodesk Maya Entertainment Creation Suite 2011 85620MYECS_2011_0F
Autodesk Maya Entertainment Creation Suite Premium 2011 85687MYECSP_2011_0F
Autodesk Moldflow Adviser Advanced 2011 85637MFAA_2011_0F
Autodesk Moldflow Adviser Design 2011 85638MFAD_2011_0F
Autodesk Moldflow Adviser Manufacturing 2011 85639MFAM_2011_0F
Autodesk Moldflow CAD Doctor 2011 85640MFCD_2011_0F
Autodesk Moldflow Design Link for CATIA V5 2011 85641MFDLC_2011_0F
Autodesk Moldflow Design Link for Parasolid 2011 85642MFDLP_2011_0F
Autodesk Moldflow Design Link for Pro/ENGINEER 2011 85643MFDLPE_2011_0F
Autodesk Moldflow Insight Advanced 2011 85644MFIA_2011_0F
Autodesk Moldflow Insight Basic 2011 85645MFIB_2011_0F
Autodesk Moldflow Insight Performance 2011 85646MFIP_2011_0F
Autodesk Moldflow Synergy 2011 85647MFS_2011_0F
Autodesk MotionBuilder 2011 85554MOBPRO_2011_0F
Autodesk Mudbox 2011 85580MBXPRO_2011_0F
Autodesk Navisworks Factory Advanced 2011 85634NWFAD_2011_0F
Autodesk Navisworks Factory Premium 2011 85633NWFPR_2011_0F
Autodesk Navisworks Manage 2011 85600NAVMAN_2011_0F
Autodesk Navisworks Simulate 2011 85601NAVSIM_2011_0F
Autodesk Plant Design Suite Advanced 2011 85658PDSADV_2011_0F
Autodesk Plant Design Suite Premium 2011 85659PDSPRM_2011_0F
Autodesk Productstream Professional 2011 72100PCPRO_2010_0F
Autodesk Productstream Professional Easy 2011 71900PCEASY_2010_0F
Autodesk Productstream Professional Office 2011 85550PCOFFI_2011_0F
Autodesk Revit Architecture 2011 85587REVIT_2011_0F
Autodesk Revit MEP 2011 85614RVTMPJ_2011_0F
Autodesk Revit MEP-B 2011 85541RVTMPB_2011_0F
Autodesk Revit Structure 2011 85543REVITST_2011_0F
Autodesk Robot Structural Analysis 2011 85585RSA_2011_0F
Autodesk Robot Structural Analysis Professional 2011 85586RSAPRO_2011_0F
Autodesk Showcase 2011 85607SHOWCASE_2011_0F
Autodesk Showcase Professional 2011 85606SHOWPRO_2011_0F
Autodesk Smoke 2011 for Mac OS X 85693SMKMAC_2011_0P
Autodesk Softimage 2011 85563SFTIM_2011_0F
Autodesk Softimage Entertainment Creation Suite 2011 85621SIECS_2011_0F
Autodesk Topobase Client 2011 85559TOPOBSCLNT_2011_0F
Autodesk Topobase Web 2011 85560TOPOBSWEB_2011_0F
Autodesk Vault Collaboration 2011 85598VLTC_2011_0F
Autodesk Vault Professional 2011 85588VLTM_2011_0F
Autodesk Vault Workgroup 2011 85596VLTWG_2011_0F

Change Standalone 3ds Max 2011 or 3ds Max Design 2011 to Networked

Source: TS15198713

Issue

You have mistakenly installed 3ds Max 2011 or 3ds Max Design 2011 as a Standalone Licensed product and would like to switch to Network Licensing mode after install. You may have multiple machines installed as standalone licensed version and would like to avoid having to go through a full uninstall/reinstall to resolve the issue.

Solution

For 3ds Max 2011 and 3ds Max Design 2011, a startup option switch has been added to allow users to switch licensing mode after installation from Standalone Licensing to Network Licensing. To switch licensing mode from Standalone to Network after install, please follow the steps below:-

1. Ensure that Network License Manager is setup and configured with valid network license file for 3ds Max 2011 or 3ds Max Design 2011. Further information on Network Licensing setup can be found in the 3ds Max 2011 or 3ds Max Design 2011 documentation.

2. Close 3ds Max 2011 or 3ds Max Design 2011 on client machine.

3. Right-Click on the 3ds Max 2011 or 3ds Max Design 2011 product icon on the Windows desktop and choose Properties.

4. In the Properties Windows for the Application Shortcut, select the Target field and add –yc at end of the 3dsmax.exe’’ shortcut target. The screenshot below shows the –yc license switch added:-

In the example screenshot, the full target for the application shortcut with –yc license switch added for 3ds Max Design 2011 now reads-

“C:\Program Files\Autodesk\3ds Max Design 2011\3dsmax.exe” -yc

5. Hit OK to save the changes made and restart 3ds Max 2011 or 3ds Max Design 2011 by double-clicking on the application shortcut.

6. On restart of 3ds Max 2011 or 3ds Max Design 2011, the splash screen will be displayed and then you will be presented with a dialog window for the FLEXnet license finder. The dialog window will allow you to specify either the location of the Network License Manager on network or location of the Network License file.:-

 7. After specifying the Network license Manager or Network license file, the software will startup and continue to run in Network license mode.

Please note: This option only allows users to switch from Standalone to Network Licensing after install. It will not allow user to switch from Network to Standalone licensing after installation. As the 3ds Max 2011 and 3ds Max Design 2011 installer requires user to explicitly select Network license installation mode, you would not commonly mistakenly install the software as Network licensed.

If you have mistakenly installed 3ds Max 2011 or 3ds Max Design 2011 as Network Licensed product and wish to run as Standalone Licensed product, you will need to perform a full uninstall/reinstall with the correct Standalone license mode selected during re-installation.

Raster Design 2011 Network Installed on Standalone Software : Yes you can

source : discussion board

From Autodesk
===============================
Out of the box AutoCAD Raster Design 2011 installations can be a mix of Deployment or DVD/Download. For example there is no longer a need to build a Deployment to install a multi-seat standalone AutoCAD Raster Design 2011 on a multi-seat standalone AutoCAD 2011.

You can also use a network seat of AutoCAD Raster Design 2011 for a standalone or multi-seat standalone AutoCAD 2011.

The only mixed mode licensing that does not work is standalone or multi-seat standalone AutoCAD Raster Design 2011 on network AutoCAD 2011. Those with standalone licenses of AutoCAD Raster Design 2011 and network seats of AutoCAD 2011 can request a no cost uplift to a network license for AutoCAD Raster Design 2011 by contacting the Autodesk Business Center:
================================

AutoCAD 2011 Automating uninstallation

source: tsdoc

Issue:
You want an automated method for completely removing AutoCAD 2011 and related plug-ins from a system.

Solution
The provided VBScript will detect and uninstall 32-bit or 64-bit versions of English AutoCAD 2011 and language pack. It will also provide the option to uninstall the following plug-ins (if found):
         
          AutoCAD 2011 Subscription Advantage Pack
          AutoCAD WS plug-in for AutoCAD 2011
          AutoCAD 2011 VBA Enabler

If you have multiple AutoCAD 2011-based products installed, these modules may be in use by more than just AutoCAD 2011. Do not uninstall them if they could be in use elsewhere.
The VBScript will then remove folders and registry keys related to the uninstalled product and plug-in
http://images.autodesk.com/adsk/files/Uninstall_ACAD_2011.zip

Warning:
Although this script has been tested on multiple operating systems and environments without issue, it is provided “as-is” and with no implied warranty or guarantee. Please read the disclaimer at the top of the script and use at your own discretion

This script only uninstalls the English version of AutoCAD 2011. No other products or languages (including AutoCAD-based verticals) will be removed

We strongly recommend backing up any custom files before proceeding

Disable any Anti-virus that may be running on your machine before running the script
Ensure you are a Administrator on your machine before running this script

The above script does not remove the Autodesk Material Libraries as these may be shared with other Autodesk 2011 products. If you wish to uninstall the Material Libraries, please use the standard uninstall methods

After the script is finished, it is a good idea to reboot your system to help ensure complete cleanup

If you would like information on manually uninstalling AutoCAD, please refer to the following solution:
Clean Uninstallation of AutoCAD and AutoCAD Verticals

Some information on the .PIT file.

Source : withoutanet 

For the 2010 products, the PLIST increment is no longer include in the license file but is now stored in a new external file named ProductInformation.pit. License files will still include PLIST increments for legacy products, however 2010 products will reference the ProductInformation.pit file for the required PLIST information.

The ProductInformation.pit file is automatically created on the local machine when a product gets installed and there will only be one ProductInformation.pit file, shared by all installed products. The file is created when the first 2010 product is installed and is appended to with each subsequent product installation. Likewise, when a product is uninstalled it unregisters itself from the ProductInformation.pit file. When the last product has been unregistered from the file, ProductInformation.pit is automatically removed from the machine.

The ProductInformation.pit file is created on the workstation in the following locations:

XP: C:\Documents and settings\All Users\Application Data\Autodesk\ADLM\ProductInformation.PIT

Vista: C:\ProgramData\Autodesk\ADLM\ProductInformation.PIT

Just as with other licensing components, the ProductInformation.pit file should not be moved from its default location. In addition to the PLIST increment, the ProductInformation.pit file contains other licensing information for the installed products and a 2010 product will not run correctly without this file. We continue to deliver license files as these are still required for network licensing. With the exception of the PLIST, the ProductInformation.pit file does not contain PACKAGE information or any other information that is normally included in the license file.

Since the ProductInformation.pit file is encrypted and unreadable, you can no longer inspect the PLIST to determine the cascade order for 2010 products.

Corrupt CascadeInfo.cas file results in failure of cascading functionality

source : tsdoc

Issue
Cascading functionality is lost due to a corrupt CascadeInfo.cas file.
Solution
If the CascadeInfo.cas file is corrupt due to a power failure or any reason, cascading functionality will not be available. This issue only applies to network licensed products and does not affect stand-alone licensed products.
Example:
Given the following cascading sequence and a license server with a license for Product B & Product C:
Product A -> Product B -> Product C
Cascading failure may present itself in the following way:
Startup Problems:
Scenario 1: A product that did not have its own license and that was previously starting by using a shared license through cascading will fail to start.
Example: The Product B license is available on the server. If the CascadeInfo.cas file is corrupt, Product A will not start on license B.
Example: The Product B license is borrowed to a system where Product A is also installed. If the CascadeInfo.cas is corrupt, Product A will not run on the borrowed license.
Example: If Product B is already running and CascadeInfo.cas is corrupt, Product A will not share the B license and will fail to start.
Wasted licenses:
Scenario 2: An already running product will fail to cascade up to and share another license.
Example: Product B is already running then Product C starts up. If CascadeInfo.cas is corrupt, Product B will not switch over to share product C’s license after a few minutes.
Expected Log File output
Here is the expected log file output. You should see a fatal error message with a vendor id of 10 (eVendorIDCascade) and a vendor error of 6 (ADLM_CASCADE_STATUS_DECRYPTION_ERROR). It will also be followed by an AdlmInt error of 47 (ADLM_STATUS_ERROR_CASCADING_OPERATION) or 2 (ADLM_STATUS_INTERNAL_ERROR).
1012 2009/09/16 15:07:20 Reason=Fatal error
1012 2009/09/16 15:07:20 ComputerName=MyComputer
1012 2009/09/16 15:07:20 OS=5.2.3790.Service Pack 2
1012 2009/09/16 15:07:20 File=AdlmIntLicense.cpp,Line=xxxx
1012 2009/09/16 15:07:20 VendorID=10
1012 2009/09/16 15:07:20 VendorError=6
1012 2009/09/16 15:07:20 Reason=Fatal error
1012 2009/09/16 15:07:20 ComputerName=MyComputer
1012 2009/09/16 15:07:20 OS=5.2.3790.Service Pack 2
1012 2009/09/16 15:07:20 File=AdlmIntNWFBLicense.cpp,Line=xxx
1012 2009/09/16 15:07:20 AdlmIntError=47
WorkAround
The current workaround it to rename/remove the corrupt CascadeInfo.cas file following these steps.
Return any borrowed licenses
Check in any checked out licenses and exit all Autodesk products
Rename or delete the corrupt CascadeInfo.cas
The CascadeInfo.cas file can be found in the following locations:
Windows XP:
C:\Documents and Settings\All Users\Application Data\Autodesk\Adlm
Windows Vista and Windows 7:
C:\ProgramData\Autodesk\Adlm
Mac:
/Library/Application Support/Autodesk/Adlm/.config
Linux:
/var/opt/Autodesk/Adlm/.config

Merging Serial Numbers and Maintaining License Compliancy

Example:
1 seat standalone AutoCAD 2011 SN# A
1 seat standalone AutoCAD 2011 SN# B
——
You have the reseller merge the two standalone AutoCAD using SN# A as the master.
The results look like this.
2 seats standalone AutoCAD 2011 SN# A
——
Question 1:
What should be done about the existing installations using SN# B ?
Answer 1:
They should be converted to the SN# A
Launching AutoCAD 2011, type in about at the command line, select Product Info button, there should be an update button next to the Serial Number item.  Use this to update the software’s SN# B to SN# A.

Question 2:
What should I do with my existing Standalone Deployment Image?
Answer 2:
Delete the standalone deployment using SN# B so it will not be accidentally deployed.
Keep the standalone deployment using SN# A and use that one for deployments.

NOTES:
This would not have to be done if you are using network versions of the software.

2006 – 2009 FLEXnet Feature Codes

Source: TSD

2010 FLEXnet Feature Codes
2011 FLEXnet Feature Codes
2012 FLEXnet Feature Codes

AutoCAD

Release Feature Code
AutoCAD 2006 48800ACD_2006_0F
AutoCAD 2007 51200ACD_2007_0F
AutoCAD 2008 54600ACD_2008_0F
AutoCAD 2009 57600ACD_2009_0F

 AutoCAD Architecture

Release Feature Code
Architectural Desktop 2006 49100ARCHDESK_2006_0F
Architectural Desktop 2007 51500ARCHDESK_2007_0F
AutoCAD Architecture 2008 55800ARCHDESK_2008_0F
AutoCAD Architecture 2009 60100ARCHDESK_2009_0F

 AutoCAD MEP

Release Feature Code
Building Systems 2006 49500BLDSYS_2006_0F
Building Systems 2007 51800BLDSYS_2007_0F
AutoCAD MEP 2008 55600BLDSYS_2008_0F
AutoCAD MEP 2009 59900BLDSYS_2009_0F

 AutoCAD Mechanical

Release Feature Code
AutoCAD Mechanical 2006 49400AMECH_PP_2006_0F
AutoCAD Mechanical 2007 51900AMECH_PP_2007_0F
AutoCAD Mechanical 2008 54900AMECH_PP_2008_0F
AutoCAD Mechanical 2009 59200AMECH_PP_2009_0F

 AutoCAD Electrical

Release Feature Code
AutoCAD Electrical 2006 49600ACAD_E_2006_0F
AutoCAD Electrical 2007 52100ACAD_E_2007_0F
AutoCAD Electrical 2008 56000ACAD_E_2008_0F
AutoCAD Electrical 2009 60300ACAD_E_2009_0F

 AutoCAD Map 3D

Release Feature Code
AutoCAD Map 3D 2006 49300MAP_2006_0F
AutoCAD Map 3D 2007 51700MAP_2007_0F
AutoCAD Map 3D 2008 55900MAP_2008_0F
AutoCAD Map 3D 2009 60200MAP_2009_0F

 MapGuide

Release Feature Code
Autodesk MapGuide Enterprise 2009 61400MAPGE_2009_0F

Revit Architecture

Release Feature Code
Revit Building 8.1 50900REVIT_8_1F
Revit Building 9 52600REVIT_9_0F
Revit Architecture 2008 57100REVIT_2008_0F
Revit Architecture 2009 62100REVIT_2009_0F
AutoCAD Revit Series 8.1 50700REVITS_8_1F
AutoCAD Revit Series Building 9 52500REVITS_9_0F
AutoCAD Revit Series Building 9.1 54100REVITS_9_1F
AutoCAD Revit Architecture Suite 2008 54700REVITS_2008_0F
AutoCAD Revit Architecture Suite 2009 60900REVITS_2009_0F
AutoCAD Revit Architecture Visualization Suite 2009 78200RAV-S_2009_0F

 Revit Structure

Release Feature Code
Revit Structure 2 51000REVITST_2_0F
Revit Structure 3 53400REVITST_3_0F
Revit Structure 2008 57200REVITST_2008_0F
Revit Structure 2009 62200REVITST_2009_0F
AutoCAD Revit Series – Structure 3 53700REVSU_3_0F
AutoCAD Revit Series -Structure 4 54200REVSU_4_0F
AutoCAD Revit Structure Suite 2008 54800REVSU_2008_0F
AutoCAD Revit Structure Suite 2009 61000REVSU_2009_0F

 Revit MEP

Release Feature Code
Revit Systems 1 51100REVITSYS_0_5F
Revit MEP 2009 67800RVTMPJ_2009_0F
AutoCAD Revit Series -Systems Plus 1 53100REVSYP_1_0F
AutoCAD Revit Series -Systems Plus 2 54500REVSYP_2_0F
AutoCAD Revit MEP Suite 2008 55700REVSYP_2008_0F
AutoCAD Revit MEP Suite 2009 60000REVSYP_2009_0F

 Civil 3D

Release Feature Code
Civil 3D 2006 49700CIV3D_2006_0F
Civil 3D 2007 52200CIV3D_2007_0F
Civil 3D 2008 55400CIV3D_2008_0F
Civil 3D 2009 59700CIV3D_2009_0F

 Land Desktop

Release Feature Code
Land Desktop 2006 49200ACDLAND_2006_0F
Land Desktop 2007 51600ACDLAND_2007_0F
Land Desktop 2008 55500ACDLAND_2008_0F
Land Desktop 2009 59800ACDLAND_2009_0F

 Navisworks

Release Feature Code
Autodesk NavisWorks Review 2009 62700NAVREV_2009_0F
Autodesk NavisWorks Simulate 2009 62800NAVSIM_2009_0F
Autodesk NavisWorks Manage 2009 62900NAVMAN_2009_0F
Autodesk NavisWorks Review 2009.1 Pre-Release 68900NAVREV_2009_1P
Autodesk NavisWorks Review 2009.1 68900NAVREV_2009_1F
Autodesk NavisWorks Simulate 2009.1 Pre-Release 69000NAVSIM_2009_1P
Autodesk NavisWorks Simulate 2009.1 69000NAVSIM_2009_1F
Autodesk NavisWorks Manage 2009.1 Pre-Release 69100NAVMAN_2009_1P
Autodesk NavisWorks Manage 2009.1 69100NAVMAN_2009_1F

 Raster Design

Release Feature Code
Raster Design 2006 50500ARDES_2006_0F
Raster Design 2007 52800ARDES_2007_0F
Raster Design 2008 57000ARDES_2008_0F
Raster Design 2009 61300ARDES_2009_0F

3ds Max

Release Feature Code
3ds max R7 477003DSMAX_7_0F
3ds max R8 506003DSMAX_8_0F
3ds max R9 533003DSMAX_9_0F
3ds Max 2009 612003DSMAX_2009_0F

 VIZ

Release Feature Code
VIZ 2005 47800VIZ_2005_0F
VIZ 2006 48700VIZ_2006_0F
VIZ 2007 53500VIZ_2007_0F
VIZ 2008 56900VIZ_2008_0F

Pinging the License Server

 Source: TSDOC

Diagnostic test for client computer experiencing network licensing errors
Issue:
You are unable to obtain a license from the Autodesk Network License Manager server, and you want to perform diagnostic tests on the client computer.

Solution:
Verify that the client computer can communicate with the server. You can do this by performing a network “PING”, which is a procedure that sends a small amount of information to the server and requests that the server send a reply back to the client computer. Follow these steps:

  1. Click Start menu (Windows) > All Programs > Accessories > Command Prompt.
  2. In the Window Command Prompt window, enter PING <servername> 
    Note: Replace <servername> with the actual name of your server.
  3. If you see a response similar to the following, your computer can reach this server:Reply from 192.168.0.1: bytes=32 time=2ms TTL=128
  4. If you do not see the line above, but instead see a response similar to one of the following lines, then the server cannot be reached, and you should contact your IT department or Administrator to verify your network setup and ensure that the correct server name is in use:Reply from 192.1681.0.1: Destination host unreachable.or

    Ping request could not find host <SERVERNAME>. Please check the name and try again.

If the PING test was successful, then you have established that your client computer can create a simple network connection with the server and that the server name was resolved to the correct IP address. You should now verify that the server running the Autodesk Network License Manager is setup correctly.

License Transfer Utility exe won’t open

Source: Discussion Board
Issue:
Today when I tried to use the License Transfer Utility program to import the license I had exported the day before, the exe wouldn’t run.  I double-clicked on it and nothing happened.  I’ve tried reinstalling Max and uninstalling my anti-virus, but nothing seems to be working.   Does anyone have any idea why it would not be working?  I don’t get a window or error message or anything.

Resolution: (provided by Autodesk Technical Support)
=======================
If the license was exported from the same computer and if you dont have any other Autodesk 2010/2011 products.

please try to delete the license files, then try the LTU.

XP->C:\Documents and Settings\All Users\Application Data\FLEXnet\adskflex_*.data
win7/vista->C:\ProgramData\FLEXnet\adskflex_*.data

if this doesnt work, uninstall the product,delete the following following folder; then try reinstall

Windows XP:
C:\Documents and Settings\All Users\Application Data\Autodesk\Adlm

Windows Vista and Windows 7:
C:\ProgramData\Autodesk\Adlm
========================

Time to Upgrade XP SP2 to SP3

Issue:
Revit MEP 2011 fails to get license from LMTOOLS.

System:
XP SP2 4GB RAM

Resolution:
upgrading XP SP2 to SP3 resolved the issue without any other action.

Note:
It should have worked with SP2. We tried everything to get it to work, but didn’t. Also Microsoft has discontinued support for SP2, and we recommend upgrading SP3.
See News and Alerts category for additional info on this.

AutoCAD offers limited support multi-core processors

Source Material : TS15224826

You are using a computer with a multi-core processor, and you have noticed that the acad.exe process does not use 100% of your available CPU resources. You want to know if AutoCAD supports multi-core processors.

Answer
AutoCAD only supports multi-core technology in a couple of very specific areas of the product, including:

2D regeneration
MentalRay rendering

In order to fully benefit from multi-core processors, you need to use multi-threaded software and AutoCAD is predominatley a single-threaded application.

A CPU-intensive operation that uses 100% of the resources of a single-core processor will only use a maximum of 50% of the CPU for that same operation on a dual-core computer, and only 6% of each CPU on a 16-core computer. This is shown in the following image:

Due to the lack of multi-threading, AutoCAD is not capable of using more than 50% of the CPU on a dual-core computer, so there is no significant performance gain over a single CPU computer except for the areas noted above.

Microsoft quietly shuts down Office Genuine Advantage program

Source Material: ZDNET
click for article

Late last week, with absolutely no public announcement, Microsoft quietly retired one cog in its antipiracy machine.
An anonymous tipster informed me on Friday that Microsoft had shut down its Office Genuine Advantage (OGA) program as of Thursday, December 16. Previously, if you wanted to download an Office add-in or template, you had to pass through a validation step first, confirming that your copy of Office was “genuine.” ……

Secondary Installer AutoCAD 2009

Issue
To reset the default AutoCAD 2009 user settings, you want to initiate the secondary installer.

Solution
To reset the AutoCAD 2009 default user settings, you must first delete your application files and registry entries for the program. Follow these steps:

Note: Make sure that you back up any customized AutoCAD 2009 files before starting this procedure. CLICK HERE FOR STEPS

1. Log on to the workstation as the user.
2. On the Start menu (Windows), click Run.
3. In the Run dialog box, enter regedit.
4. In the Registry Editor, locate the following subkey and delete it:

HKEY_CURRENT_USER\Software\Autodesk\AutoCAD\ R17.2\ACAD-7001:409
5. Exit the Registry Editor.
6. In XP using Windows Explorer, locate and delete the following application folders:

C:\Documents and Settings\\Application Data\Autodesk\AutoCAD 2009 (backup this directory first)
C:\Documents and Settings\\Local Settings\Application Data\Autodesk\AutoCAD 2009

7. In Vista / Windows 7

C:\Users\\AppData\Roaming\Autodesk\ AutoCAD 2009 (backup this directory first)
C:\Users\\AppData\Local\Autodesk\ AutoCAD 2009

The user should now be able to launch AutoCAD 2009. When the product is opened, the files and folders that were deleted will be recreated by the secondary installer.
=========
Warning! Problems caused by improperly editing the Windows registry could render your computer operating system unusable. Microsoft provides a wealth of critical information that you need to know about the registry in the Microsoft Knowledge Base at http://support.microsoft.com/support.

Use the Microsoft® Registry Editor only at your own risk and only after backing up the registry as well as the system.dat and user.dat files as outlined for your operating system in the Microsoft Knowledge Base and in the related solution, TS66513. Additional information about the registry is also contained in the Help topics in the Microsoft Registry Editor.

Factoid : Autodesk book meets criteria for collectors item?

Note from Duane: This is a non technical support post: I will pull this off the site if it didn’t get more interesting by the week.
=============
I was talking with a programmer this morning, and I recommended a book I had purchased a couple years back. The book was: VB.NET Programming for AutoCAD Customization – Level 1 (Spiral-bound).
I went to Amazon to see if was still in print. There were 2 copies that were being sold. What surprised me was the price. Both copies were USED, the conditions ranged from acceptable to good. The prices were $777 the other is $895.  I just checked the site again yesterday and there is a third one that is used which is in “Very Good” condition going for $1100 dollars:  AmazonLink

32 Bit Deployments on 64 Bit OS : Longbow Software

Source Material : Autodesk Technical Support

NOTE:
This post was originally titled for Map 3D 2011 32 bit deployment on a 64 bit win 7. They had need to migrate to 64 bit box.
Bentley products they were using worked on 64 bit OS but not 64 bit Map.  The title was broadened in scope afterwards.

issue:
You have need to deploy 32 bit AutoCAD Map 3D 2011 on a 64 bit box. And you are unable to do this.

Autodesk Official Stance: unsupported combination:
=====excerpt from Autodesk Tech Support=======
I confirmed this with both the MAP and Install team. Because there are both a 32 and 64bit version of MAP available, you will only be allowed to install the correct version on your corresponding OS.
There was a similar discussion here: Ultimately, the resolution needs to come from Bentley to work on a 64bit version of MAP. Aside from this, the user may need to keep a 32bit computer to use for this workflow.
I apologize for this inconvenience.
========================================

NOTE: The possible solution is mentioned in the above link to a discussion board topic.  The link to Longbow Software referenced in the discussion board is here.
NOTE: ATG has not tested this and cannot say it will work. This is unsupported combination.  The software claims to work with the following products.

Autodesk Network License Manager on Mac and Linux

Souce Material: TechDoc
Issue
You want to know the current system requirements for running the Autodesk Network License Manager on Mac and Linux platforms.

Solution
Platform Hardware Operating System
Mac 32-bit Intel OS X v10.4.9 and higher
Mac 64-bit Intel OS X v10.4.9 and higher
Linux 32-bit   Red Hat Enterprise 5
Linux 64-bit   Red Hat Enterprise 5

Note: These requirements apply to the network license manager that ships with the 2011 products.  To find out the system requirements for older products, please refer to the Autodesk Network Licensing Guide that ships with those products.

2011: Windows system requirements for the Autodesk Network License Manager

Source material: TechSourceDoc

You want to know the current system requirements for the Autodesk Network License Manager on the Windows platform.

Solution
Harware/Software Requirement
Operating System
     Windows® 7® 32-bit
     Windows 7 64-bit
           • Windows 7 Starter (32-bit)
           • Windows 7 Home Basic (32-bit)
           • Windows 7 Home Premium
           • Windows 7 Professional
           • Windows 7 Ultimate
           • Windows 7 Enterprise
Windows Vista 32-bit SP2 or later
Windows Vista 64-bit SP2 or later
          • Windows Vista Enterprise
           • Windows Vista Business
           • Windows Vista Ultimate
           • Windows Vista Home Premium and Basic (32-bit)
           • Windows Vista Home Premium (64-bit)
Windows XP 32-bit SP2 or later
Windows XP 64-bit SP2 or later
         • Windows XP Home
         • Windows XP Professional
Windows Server 32-bit SP1 or later
Windows Server 64-bit SP1 or later
        • Windows 2008 Server R2
        • Windows 2008 Server
        • Windows 2003 Server R2
        • Windows 2003 Server
Computer Processor :Intel® Pentium® III or higher 450 Mhz (minimum)
Network Interface Card: Compatible with existing Ethernet network infrastructure
Note: The Network License Manager supports multiple network interface cards, but at least one must be an Ethernet card.
Note: NIC teaming is not supported
Communication Protocal: TCP/IP
Note: The Network License Manager uses TCP packet types
Browsers: IE6, IE7, IE8
FLEXNET version: 11.7.0.0
Virtual Machine Support (Windows)
Hardware: Intel PC 64
Virtualizer: Windows 2008 or Windows 2003R2 servers running on VMware® ESX3.5 Update 3 (License Manager Only)
Virtual OS: Vista 64-bit, Vista 32-bit, Windows XP 32-bit, Windows 7 32-bit (Home Premium, Professional, Ultimate, and Enterprise), Windows 7 64-bit,

Network License Cascading Behavior: Is cascading sequence within a suite allowed or not? YES it is

The following Network License Cascading Scenario is what is being floored with Autodesk Technical Support.  We will post their results early next week.

!!! Autodesk has confirmed this is standard behavior, with the nuance being that this dependent on the order in which the products are launched. (see below)

=========================================
NOTE:
ATG Tech support has tested the following scenario out on a laptop (setup as a network) and was able to successfully launch all three products simultaneously on the laptop. With a single seat suite license configured on LMTOOLS.  This was a singular test and no attempt to duplicate it on another computer was made.
==========================================

EXAMPLE:
Network License:
AutoCAD Revit Architecture Suite 2011 (1 seat)  [this is the only license in the file]
============
user 1 has software loaded
AutoCAD 2011
AutoCAD Architecture 2011
AutoCAD Revit Architecture 2011
============
user 1 launches the following in order:
AutoCAD 2011 (pulls AutoCAD Revit Architecture Suite 2011 1 seat)
AutoCAD Architecture 2011 (will or will not launch, being confirmed with Autodesk, cascading within suite license may not be possible)
AutoCAD Revit Architecture 2011 (will or will not launch, being confirmed with Autodesk, cascading within suite license may not be possible)
============
excerpt from Autodesk Technical Support:
According to the notes that …. included in the Service Request, your question was also about whether the products within a Suite can use the same license simultaneously. The answer is that they cannot.
============
NOTE: This response is being verified by Autodesk for accuracy.

=========================================
UPDATE: excerpt from Autodesk Technical Support:
It was very good to speak with you just now and discuss the expected behavior of the Suites license. The behavior you observed, of being able to open all the products in the Suites pulling on the one network license on the server is correct.

As we spoke about, I was able to confirm with Scott that depending on the order you launch the products (generally going from top to bottom in the Cascading order), the products will all launch. This could change if there are other licenses available as for example, an AutoCAD or some other product.
=========================================

2011 Cascading Behavior of Network Licenses

Source material: TechSource Doc

When a product is used it uses the least expensive license matching product and version.

There are other examples to be added later today.

==========================
example:Network License Contains multiple products.
AutoCAD Architecture 2011 1 seat
AutoCAD MEP 2011 1 seat
AutoCAD Revit Architecture Suite 2011 1 seat
AutoCAD Revit MEP Suite 2011 1 seat
==========================
user 1, and 2 Software Installed
AutoCAD Architecture 2011
AutoCAD MEP 2011
==========================
user 1 launches products on computer
AutoCAD Architecture 2011 (used: AutoCAD Architecture 2011 1 seat)
AutoCAD MEP 2011 (used: AutoCAD MEP 2011 1 seat)
==========================
user 2 THEN launches product on computer
AutoCAD Architecture 2011 (used: AutoCAD Revit Architecture Suite 2011 1 seat)
AutoCAD MEP 2011 (used: AutoCAD Revit MEP Suite 2011 1 seat)
==========================
NOTES:
In the above example it doesn’t matter the Serial Number of the AutoCAD Architecture 2011 (it will need to be an registered networked version)
the logic here, is that the license manager controls the seats concurrently in use, irregardless of how the product was installed, or if the product disk was packaged in a suite or not.The following is the official cascading behaviour from autodesk.

Incomplete Listing:
==========================
AutoCAD 2011 Cascading Sequence:
AutoCAD 2011
AutoCAD Mechanical 2011
AutoCAD Visualization Suite 2011
AutoCAD Revit Architecture Suite 2011
AutoCAD Revit Structure Suite 2011
AutoCAD Revit Architecture Visualization Suite 2011
Autodesk Design Suite Standard 2011
Autodesk Design Suite Advanced 2011
Autodesk Design Suite Premium 2011
Autodesk Education Master Suite 2011
Autodesk Education Suite for Architecture and Engineering 2011
Autodesk Education Suite for Civil and Structural Engineering 2011
Autodesk Education Suite for Industrial Design 2011

AutoCAD Architecture 2011 Cascading Sequence:
AutoCAD Architecture 2011
AutoCAD Revit Architecture Suite 2011
AutoCAD Revit Architecture Visualization Suite 2011
Autodesk Factory Design Suite Premium 2011
Autodesk Factory Design Suite Advanced 2011
Autodesk Education Master Suite 2011
Autodesk Education Suite for Architecture and Engineering 2011
Autodesk Design Academy 2011     

AutoCAD Civil 3D 2011 Cascading Sequence:
AutoCAD Civil 3D 2011
Autodesk Education Master Suite 2011
Autodesk Education Suite for Civil and Structural Engineering 2011
Autodesk Design Academy 2011           

AutoCAD Electrical 2011 Cascading Sequence:
AutoCAD Electrical 2011
Autodesk Education Master Suite 2011
Autodesk Education Suite for Mechanical Engineering 2011            

AutoCAD MEP 2011 Cascading Sequence:
AutoCAD MEP 2011
AutoCAD Revit MEP Suite 2011
Autodesk Education Master Suite 2011
Autodesk Education Suite for Architecture and Engineering 2011
Autodesk Design Academy 2011

AutoCAD Structural Detailing 2011 Cascading Sequence:
AutoCAD Structural Detailing 2011
AutoCAD Revit Structure Suite 2011

Autodesk 3ds Max 2011 Cascading Sequence:
Autodesk 3ds Max 2011
Autodesk 3ds Max Entertainment Creation Suite 2011
Autodesk Animation Academy 2011
Autodesk Education Suite for Entertainment Creation 2011

Autodesk 3ds Max Design 2011 Cascading Sequence:
Autodesk 3ds Max Design 2011
AutoCAD Visualization Suite 2011
AutoCAD Revit Architecture Visualization Suite 2011
Autodesk Design Suite Premium 2011
Autodesk Design Suite Advanced 2011
Autodesk Education Master Suite 2011
Autodesk Education Suite for Architecture and Engineering 2011
Autodesk Education Suite for Civil and Structural Engineering 2011
Autodesk Education Suite for Mechanical Engineering 2011
Autodesk Education Suite for Industrial Design 2011
Autodesk Design Academy 2011

Autodesk Alias Design 2011 Cascading Sequence:
Autodesk Alias Design 2011
Autodesk Design Suite Advanced 2011

Autodesk Alias Sketch 2011 Cascading Sequence:
Autodesk Alias Sketch 2011
Autodesk Design Suite Standard 2011
Autodesk Design Suite Premium 2011
Autodesk Design Suite Advanced 2011

Autodesk Ecotect Analysis 2011 Cascading Sequence:
Autodesk Ecotect Analysis 2011
Autodesk Education Master Suite 2011
Autodesk Education Suite for Architecture and Engineering 2011

Autodesk Factory Design Suite Premium 2011 Cascading Sequence:
Autodesk Factory Design Suite Premium 2011
Autodesk Factory Design Suite Advanced 2011

Autodesk Maya 2011 Cascading Sequence:
Autodesk Maya 2011
Autodesk Education Suite for Entertainment Creation 2011
Autodesk Animation Academy 2011
Autodesk Maya Entertainment Creation Suite 2011

Autodesk MotionBuilder 2011 Cascading Sequence:
Autodesk MotionBuilder 2011
Autodesk 3ds Max Entertainment Creation Suite 2011
Autodesk Maya Entertainment Creation Suite 2011
Autodesk Softimage Entertainment Creation Suite 2011
Autodesk Education Suite for Entertainment Creation 2011
Autodesk Animation Academy 2011

Autodesk Navisworks Factory Advanced 2011 Cascading Sequence:
Autodesk Navisworks Factory Advanced 2011
Autodesk Factory Design Suite Advanced 2011

Autodesk Navisworks Factory Premium 2011 Cascading Sequence:
Autodesk Navisworks Factory Premium 2011
Autodesk Factory Design Suite Premium 2011
Autodesk Factory Design Suite Advanced 2011

Autodesk Navisworks Manage 2011 Cascading Sequence:
Autodesk Navisworks Manage 2011
Autodesk Plant Design Suite Advanced 2011
Autodesk Education Master Suite 2011
Autodesk Education Suite for Architecture and Engineering 2011
Autodesk Education Suite for Civil and Structural Engineering 2011

Autodesk Navisworks Simulate 2011 Cascading Sequence:
Autodesk Navisworks Simulate 2011
Autodesk Navisworks Manage 2011
AutoCAD Revit Architecture Visualization Suite 2011
Autodesk Plant Design Suite Premium 2011

Autodesk Revit Architecture 2011 Cascading Sequence:
Autodesk Revit Architecture 2011
AutoCAD Revit Architecture Suite 2011
AutoCAD Revit Architecture Visualization Suite 2011
Autodesk Education Master Suite 2011
Autodesk Education Suite for Architecture and Engineering 2011
Autodesk Design Academy 2011

Autodesk Revit MEP-B 2011 Cascading Sequence:
Autodesk Revit MEP-B 2011
AutoCAD Revit MEP Suite 2011
Autodesk Education Master Suite 2011
Autodesk Education Suite for Architecture and Engineering 2011
Autodesk Education Suite for Civil and Structural Engineering 2011
Autodesk Design Academy 2011

Autodesk Revit Structure 2011 Cascading Sequence:
Autodesk Revit Structure 2011
AutoCAD Revit Structure Suite 2011
Autodesk Education Master Suite 2011
Autodesk Education Suite for Architecture and Engineering 2011
Autodesk Education Suite for Civil and Structural Engineering 2011

Autodesk Robot Structural Analysis Professional 2011 Cascading Sequence:
Autodesk Robot Structural Analysis Professional 2011
Autodesk Education Master Suite 2011
Autodesk Education Suite for Civil and Structural Engineering 2011

LMTOOLS report the MAC address as ffffffff on Teamed Network Adapters

Source Material: Discussion Board, Wikepedia

=======
11.7 will report the MAC address as ffffffff for teamed adapters. Teamed network adapters are not supported by FLEXlm. 11.4 and 11.5 report the correct teamed MAC address even though they do not support teamed adapters. I am uncertain on how 11.6 and 11.8 report a teamed address. Did you install the 11.8 lmgrd.exe? What was the result?
=======

Ethernet Teaming is not officially supported with licensing and cannot be guaranteed to work in all cases.  Basically, the customer wants to set up more bandwidth by combining 2 network cards into 1 card.

Recommendation:
You should un-team these adapters, enable a disabled adapter, or install an additional adapter and acquire a new license file for that MAC address.

Microsoft Upgrades VBA to 64 Bit : ADN Migration Assistance Utility and Video

Source Material : Wikepedia , FAQ

link to followup post with vba download links for 2010 11 12 both 32 and 64 bit

After a decade of neglect, Microsoft has announced that VBA will at last be upgraded to 64 bits, as well as other improvements. This will break compatibility in some cases, such as calls to the 32 bit Windows API, though this is trivial to fix. 

NOTE: The following video was made before this was available.

DevTV: AutoCAD VBA to VB.NET Migration Basics
To assist in migrating your AutoCAD VBA code to VB.NET, the Autodesk Developer Network team has created a simple migration assistance utility and accompanying video:

English: view | download (44.7 MB)

Revit Server Troubleshooting

Source Material:
Revit Clinic: Revit Server Troubleshooting
============

With the addition of Revit Server in the Revit 2011 Subscription Advantage Pack, you might encounter some instances where you need to do some troubleshooting on the server.   For example, if you are getting something like this when you attempt to connect to the Server:

Revit_Server_Error

To troubleshoot something like this, I’ve put together a couple of steps to make sure that the Revit Server is setup correctly, where log files are stored and what to do to bring the server down .

  1. The first thing to check is to verify and make sure that all the pre-requisites are properly installed.  Check out this video for the steps to setup IIS7.One of the easiest pre-requisites to miss is “Web Server (IIS) Support”.  Make sure if you see that as an option to select when adding roles to the Server, that you check it (or it is already).  What is possibly confusing here is that there is a difference between the “Web Server (IIS)” role and the “Web Server (IIS) support” role service.  Revit server needs the role service, but there is a temptation to choose the role because it is available on the same page as the Application Server role and sounds so similar.

    Local and Central Servers need the same pre-requisites for Revit Server.  Make sure they both are setup correctly.

  2. Revit Server also stores log files on the Server.  The log files are stored typically at C:\logfiles.  These log files can be helpful in understanding what is happening and if the server is running correctly and Support may ask you for them if you report a problem.
  3. Along the way, you may need to bring the server down for maintenance, gathering log files or for other troubleshooting.  Bringing down the server allows you to delete or archive the existing log files so that new logs are created.  Before bringing down the server, if you have already setup a project, make sure to lock the server in the Revit Server Administrator so that no one can access it.  Bringing down the server means doing three things (the order is not important) :
    • Go to the Start Menu and go to Administrative Tools, open the Internet Information Services (IIS) Manager.  Select the RevitServerAppPool and in the sidebar select Stop.
    • Go to Administrative Tools and select Services.  Shut down the AutoSync Service in Service by right clicking on it and choose stop.
    • Bring up the Task Manager and switch to the processes tab.  Check for any instances of w3wp.exe in the system process list and end those tasks.
  4. When you are ready to start Revit Server back up, go back to number 3 above and reverse the first two items by starting the RevitServerAppPool and starting the Autosync Service.

You can also verify from the Server if the running by attempting to access the Revit Server Administrator tool from the Server host.  Navigate to Revit Server Administrator the same way you would from a workstation.  This will help check if the Server is running correctly, but perhaps a firewall is in the way from the workstations.

The biggest item in this list is number 1.  Making sure you have all the pre-requisites installed correctly is uber critical to getting Revit Server up and running correctly.

Revit Server 10 Things

Source Material:
Revit Clinic : Ten things to know about Revit Server
================

There seems to be a lot of questions and excitement about the new Revit Server extension out there. Today, I’d like to talk about some of the differences between using Revit Server and using the typical file based worksharing method.

Here are 10 things that are different about Revit Server. I’d love to hear what you think of these.

1.Creating Local files –
The only way to create a local file from a Central model on Revit Server, is through the Revit open dialog. You cannot create a local file using Windows Explorer or any other way other than the check box to create new local. This means that any scripts you have for copying a central file to create a local file will not work with Revit Server.

2.Editing Request –
With a project using Revit Server, the Editing Request button is grayed out and not available.

3.Worksharing Monitor –
With Revit Server, in part because editing requests are not available, the worksharing monitor will not function to give you notications about the model. To handle times when you would normally place a editing request, you can use a Instant Messaging Application to communicate with others on the project.

4.Working at Risk
Otherwise known as taking a local file home and working on it and being able to bring in back and syncing with center, is not fesible with a Revit Server project.

5.Thumbnails of the Central Model –
When you are creating a local model or opening the central model from Revit Server, thumbnail previews are not available for the file.

6.No right click in the open dialog for the Revit Server –
Unlike the normal open dialog in Revit, you will not be able to right click within the Revit Server window. Also, the meta data available on a central model in Revit Server is limited to only the Name, Type, and Date of the file.

7.Folder Management must be done with the Revit Server Adminstrator –
You must use the adminstrator to create new folders, move or copy/cut/paste projects for Revit Server. These options are not available via the open dialog in Revit.

8.Overwriting the Central model –
Perviously it was possible to save over a central file using the same name, with Revit Server, this is not possible. You must save the central model with a new name or delete or rename the orignal central model.

9.Recent Files List –
Only Local files will appear on the Recently used files list for Revit. Central models will not appear.

10.Restore Backups of Central –
You cannot roll back to a backup of the Central file using the Restore backups tool within Revit. Local files can be rolled back to a previously saved version, but Central Models cannot.
Revit Server worksharing is about sharing models across a WAN with mutliple offices. Typical file based worksharing is still available for use if you feel it is the right option for you.

To get a better idea about Revit Server, check out this video

Autodesk Software with 64 bit Deployments

What versions of Autodesk software have 64 bit deployments?

AutoCAD 2008 and later
AutoCAD LT 2009 and later
AutoCAD Architecture 2009 and later
AutoCAD Civil 3D 2011
AutoCAD Map 2010 and later
AutoCAD MEP 2009 and later
Autodesk Revit Architecture 2009 and later
Autodesk Revit MEP 2009 and later
Autodesk Revit Structure 2009 and later
Autodesk Raster Design 2009 and later

Double Clicking Mtext Fails to Launch Editor : Can’t Rotate Mtext

issue:
1) Cannot access the Mtext Editor by double clicking on the Mtext object.
2) Also cannot rotate mext by using the normal rotate command.

Scope:
single computer

Resolution:
1) MTEXTED = INTERNAL and DBLCLKEDIT = ON
2) Match Orientation to Layout unchecked

View Cube Flashing non stop after applying Update 1 to Civil 3D 2011

Issue:
You notice the ViewCube is constantly flashing.

Software:
Civil 3D 2011, Cube behaviour started immediately after applying Update 1.

System:
XP Pro SP3, 4GB Ram

Attempted:
Turning hardware acceleration off had no affect.

Resolution:
Toggle Hardware Acceleration on and off SEVERAL TIMES, close AutoCAD and launch

Secondary Installer AutoCAD LT 2011

Issue

To reset the default AutoCAD LT® 2011 user settings, you want to initiate the secondary installer.

Solution

To reset the AutoCAD LT 2011 default user settings, you must first delete your application files and registry entries for the program. Follow these steps:

Note: Make sure that you back up any customized AutoCAD LT 2011 files before starting this procedure. CLICK HERE FOR STEPS

1. Log on to the workstation as the user.
2. On the Start menu (Windows), click Run.
3. In the Run dialog box, enter regedit.
4. In the Registry Editor, locate the following subkey and delete it:

HKEY_CURRENT_USER\Software\Autodesk\AutoCAD LT\R16\ACADLT-9001:409

5. Exit the Registry Editor.
6. In XP using Windows Explorer, locate and delete the following application folders:

C:\Documents and Settings\\Application Data\Autodesk\AutoCAD LT 2011 (backup this directory first)
C:\Documents and Settings\\Local Settings\Application Data\Autodesk\AutoCAD LT 2011

7. In Vista / Windows 7

C:\Users\\AppData\Roaming\Autodesk\ AutoCAD LT 2011 (backup this directory first)
C:\Users\\AppData\Local\Autodesk\ AutoCAD LT 2011

The user should now be able to launch AutoCAD LT 2011. When the product is opened, the files and folders that were deleted will be recreated by the secondary installer.
=========
Warning! Problems caused by improperly editing the Windows registry could render your computer operating system unusable. Microsoft provides a wealth of critical information that you need to know about the registry in the Microsoft Knowledge Base at http://support.microsoft.com/support.

Use the Microsoft® Registry Editor only at your own risk and only after backing up the registry as well as the system.dat and user.dat files as outlined for your operating system in the Microsoft Knowledge Base and in the related solution, TS66513. Additional information about the registry is also contained in the Help topics in the Microsoft Registry Editor

Updates for AutoCAD Structural Detailing

Structural Detailing 2011

asd2011sp2_32bit.exe (exe – 44151Kb)
asd2011sp2_64bit.exe (exe – 54857Kb)
Readme

autodesk_materials_library_2011_update_1.exe (exe – 925Kb)

Structural Detailing 2009 (* there were no updates for 2010)

asd2009_mp1.exe (exe – 20994Kb)
Readme PDF

ATG Support of the AutoCAD for the MAC

Applied Technology Group will be providing technical support on the newly released AutoCAD for the MAC.  The posts on Tech Solutions will focus on the topics of clean installations, clean uninstallations, backing up software settings, restoring settings, bug reports, updates, workarounds, troubleshooting techniques, product performance tweaking and other technically related topics.

AutoCAD for the MAC HERE NOW

Autodesk Releases AutoCAD for the MAC

Click Here to Get AutoCAD for the MAC

Revit Architecture 2011 Error when hovering cursor over Modify Ribbon Panel

Source: Autodesk Technical Support

Issue:
when hovering the cursor over some commands in the modify ribbon panel the following error message pops up.

Error message:
C:\Windows\System32\WMADMOD.DLL is either not designed to run on windows or it contains an error. Try installing the program again using the original installation media or contact your system administrator or the software vendor for support.

System:
win 7 64 6GB RAM

Scope:
single computer
random but often, associated with move copy commands

Research:
The WMADMOD.DLL file is a Windows file related to audio decoding for Windows Media Player. I am not sure why the help pop up for certain tools would trigger this error. However, from the message I would think that there is an issue with the DLL or Media Player that is not directly related to Revit.
See if they can open and use Windows Media Player for opening and playing audio files.

confirmed resolved by customer:
Somehow either by 3rd party software, a video or whatever, had made changes to and moved this file to another location. By restoring this file to its original state and location resolved this issue with Revit.

Secondary Installer AutoCAD LT 2009

Issue

To reset the default AutoCAD LT® 2009 user settings, you want to initiate the secondary installer.

Solution

To reset the AutoCAD LT 2009 default user settings, you must first delete your application files and registry entries for the program. Follow these steps:

Note: Make sure that you back up any customized AutoCAD LT 2009 files before starting this procedure. CLICK HERE FOR STEPS

1. Log on to the workstation as the user.
2. On the Start menu (Windows), click Run.
3. In the Run dialog box, enter regedit.
4. In the Registry Editor, locate the following subkey and delete it:

HKEY_CURRENT_USER\Software\Autodesk\AutoCAD LT\R14\ACADLT-7009:409

5. Exit the Registry Editor.
6. In XP using Windows Explorer, locate and delete the following application folders:

C:\Documents and Settings\\Application Data\Autodesk\AutoCAD LT 2009 (backup this directory first)
C:\Documents and Settings\\Local Settings\Application Data\Autodesk\AutoCAD LT 2009

7. In Vista / Windows 7

C:\Users\\AppData\Roaming\Autodesk\ AutoCAD LT 2009 (backup this directory first)
C:\Users\\AppData\Local\Autodesk\ AutoCAD LT 2009

The user should now be able to launch AutoCAD LT 2009. When the product is opened, the files and folders that were deleted will be recreated by the secondary installer.
=========
Warning! Problems caused by improperly editing the Windows registry could render your computer operating system unusable. Microsoft provides a wealth of critical information that you need to know about the registry in the Microsoft Knowledge Base at http://support.microsoft.com/support.

Use the Microsoft® Registry Editor only at your own risk and only after backing up the registry as well as the system.dat and user.dat files as outlined for your operating system in the Microsoft Knowledge Base and in the related solution, TS66513. Additional information about the registry is also contained in the Help topics in the Microsoft Registry Editor.

Reactivating an expired Subscription Home Use license

Published date: 2010-Sep-08
ID: TS13845691

Applies to:
AutoCAD® 2011
AutoCAD® 2010
AutoCAD® 2009
AutoCAD® 2008
AutoCAD® 2007
AutoCAD LT® 2011
AutoCAD LT® 2010
AutoCAD LT® 2009
AutoCAD LT® 2008
AutoCAD LT® 2007

Issue
Your Subscription Home Use License has expired and you would like to know how to reauthorize it to continue working in the product.

Solution 
The reauthorization process requires completing a new Subscription Home Use License Agreement and submitting it to www.autodesk.com/register for approval.  If approved, the Home Use License will be extended for another term.  The serial number will remain the same, however the product will need to be reactivated on the client machine.
To reactivate the product, you will need to contact Product Support to obtain the name and location of the license .DAT file corresponding to the product you want to reactivate.

Once you receive the file name, proceed as follows:
Locate and delete the .DAT file name provided by Product Support. 
Note: Starting with 2010, this will be a .DATA file and deleting this file will delete all existing activations for 2010 products or later.
Launch the product
Follow the standard activation process
The product will now be reactivated for a new period.

Force Return of Borrowed Network License

Source:
Autodesk Technical Support

Issue:
Network license was borrowed, the computer that was issued the license had the hard drive crash, and now the license needs to be returned early. The question is how to force LMTOOLS, Flexnet license manager to return the license to the pool.

Resolution:
There is no way to force the return of a borrowed license if the client machine is dead.

Workarounds:

Option 1:
Per TS1053290, the customer can wait out the borrow period for the license to expire. At this point the license will be automatically returned to the license manager.

Option 2:
They can rebuild a computer with the exact same name as the dead laptop (case is important, check Server Status in LMTOOLS to confirm the exact case). Then log in as the same user who borrowed the license (again, case is important). Borrow the license again and return it.

Options 3:
a) In the case your license is on subscription, and you have not updated your license on the server, updating your license may resolve this.  For example, you have 2011 on your current server license, getting a new 2012 license and updating LMTOOLS with it.

b) In the case that the product borrowed is a serial number that can be merged with another serial number, merging the borrowed serial number into the other serial number, and updating your license may resolve this issue.

Option 4: Autodesks discretion / per case basis
They can install AutoCAD as standalone on a machine OR configure a second license manager machine and I can issue a temporary activation or license file. I will need to know their best estimate on how long the license was borrowed for along with the serial number and request code (if standalone) or servername and MAC address (if another license manager).
If the license was borrowed for a long time I recommend the customer consider implementing an options file which will reduce the maximum borrow period (see TS1055247). If users are consistently needing to borrow licenses for extended time periods (months) I recommend using a standalone license on these machines.

If you have a license showing as being issued (not borrowed) on the network but isn’t.
Click for Force Return Network License

Updates for AutoCAD LT

AutoCAD LT 2012
autocadlt2012sp1.exe
autocadlt2012sp1x64.exe
Readme 

AutoCAD LT 2011
NOTE: if you already installed update 1 and the hotfix then you do NOT need to install update 1.1.
AutoCADLT2011Update1.1.exe
AutoCADLT2011Update1.1×64.exe
Readme

AutoCAD LT 2010
NOTE
:
To determine which update 2 to install you must first determine the version of the following file on your computer.

      file name: proddata.dll
      file location: C:\Program Files\AutoCAD LT 2010
      file version: right click on file in windows explorer and choose the Version tab.

      Note: If The file version number for proddata.dll is 18.0.309.0.0 THEN Update 2 is already applied.

Version IS 18.0.55.0 OR 18.0.215.0 then
autocadlt2010update2.exe
autocadlt2010update2x64.exe

Version IS 18.0.59.0 OR 18.0.215.20 then
autocadlt2010update2mld.exe
autocadlt2010update2mldx64.exe
Version IS 18.0.221.0 then
autocadlt2010update2sld.exe
Update Readme

Mouse jumping around after installing Civil 3D 2011 Update 1

Software:
Civil 3D 2011

Issue:
Mouse jumping around erratically after installing Update 1 for Civil 3D 2011.

Resolution:
Turn off hardware acceleration.

AutoCAD seems to lock up – Escape Key unlocks AutoCAD

source Civil3D.com

issue summary:

Issue
AutoCAD seems to lock up, pressing the ESC key on the keyboard unlocks AutoCAD.

System:
Multiple OS
Multi-Monitor Setup

Software
AutoCAD / AutoCAD Vertical – Multi-Versions

Possible cause:
a modal dialogue box has appeared off the screen where you cannot see it, you don’t know its there, AutoCAD appears to be locked up.  It can be dismissed by selecting ESC key. This dialogue box may or may not appear at any screen resolution.

Resolution:
Click here for instructions for backup your computer registry
click here to find your products registry key

delete the following registry key.
HKEY_CURRENT_USER \ Software \ Autodesk \ AutoCAD \ RXX.X \ ACAD-XXXX:XXX \ Profiles \ ACADPROFILENAME\ “Dialogs

===
Warning! Problems caused by improperly editing the Windows registry could render your computer operating system unusable. Microsoft provides a wealth of critical information that you need to know about the registry in the Microsoft Knowledge Base at http://support.microsoft.com/support.

Use the Microsoft® Registry Editor only at your own risk and only after backing up the registry as well as the system.dat and user.dat files as outlined for your operating system in the Microsoft Knowledge Base and in the related solution, TS66513. Additional information about the registry is also contained in the Help topics in the Microsoft Registry Editor.

Updates for Civil 3D

Civil 3D 2011

NOTE: Update 2 in NOT historical, it requires update 1 to be applied first

Civil 3D 2011 Update 2 32bit
Civil 3D 2011 Update 2 64bit
Readme

Civil 3D 2011 Update 1 32bit (exe – 32048Kb)
Civil 3D 2011 Update 1 64bit (exe – 45070Kb)
Readme

Civil 3D 2010:

NOTE: update 3.1 is NOT historical, it requires update 2 to be applied first

c3d2010sp2.exe
c3d2010_sp30.1.exe
Readme

Updates for AutoCAD

AutoCAD 2012:
autocad2012sp1.exe
autocad2012sp1x64.exe
Readme   

AutoCAD 2011:
NOTES:
if you already applied autocad 2011 update 1 – and then the hotfix afterwards you DO NOT NEED to install update 1.1.
AutoCAD2011Update1.1.exe (exe – 11025Kb)
AutoCAD2011Update1.1×64.exe (exe – 16072Kb)
Readme

AutoCAD 2010:
autocad2010update2.exe (exe – 30814Kb)
autocad2010update2x64.exe (exe – 42094Kb)
Readme

Subscription Advantage Packs for 2011 Products are now Available : Video Overviews

Autodesk has released their Subscription Advantage Packs for 11 different 2011 products.
===========
Platform
AutoCAD 2011
Video 3: AutoCAD® 2011 Products
===========
Architecural:
AutoCAD Architecture 2011
Video 1: Autodesk Green Building Studio
Video 2: AutoCAD® 2011 Products
===========
AutoCAD MEP 2011
Video 1: Autodesk Green Building Studio
Video 2: AutoCAD® 2011 Products
===========
Autodesk Revit Architecture 2011
Video 1: Autodesk® Revit® Server Extension
Video 2: Autodesk® Revit® Conceptual Energy Analysis
===========
Autodesk Revit MEP 2011
Video 1: Autodesk® Revit® Server Extension
Video 2: Autodesk® Revit® Conceptual Energy Analysis
===========
Autodesk Revit Structure 2011
Video 1: Autodesk® Revit® Server Extension
Video 2: Revit® Extensions for Autodesk® Revit® Structure 2011
===========
Geospacial:
AutoCAD Map 3D 2011
Video 2: Autodesk® FDO Provider for ArcGIS®
Video 3: AutoCAD® 2011 Products
===========
Civil:
AutoCAD Civil 3D 2011 (Yes it is AVAILABLE now)
Includes The Autodesk FDO PROVIDER FOR ArcGIS
Video 1: Production Enhancements
Video 2: Autodesk® FDO Provider for ArcGIS®
Video 3: AutoCAD® 2011 Products
===========
Rendering / Animation
Autodesk 3ds Max Design 2011
Video: Autodesk 3ds Max 2011 and 3ds Max Design 2011
===========
Mechanical:
===========
AutoCD Electrical 2011
Video 3: AutoCAD® 2011 Products
===========
AutoCAD Mechanical 2011
Video 3: AutoCAD® 2011 Products

Civil 3D 2011 Smooth Surface Crash: Unconfirmed :update 1 may have resolved this issue

click for Update 1 Civil 3D 2011

Issue:
When performing a smooth surface command using the prospector Civil 3D 2011 crashes.

Systems:
Vista 32bit
Win 7 64 bit

Workaround:
Initiate the smooth surface command using the ribbon and not the prospector.

Backing up your AutoCAD and AutoCAD vertical software in an organized fashion

Issue:
you are about to do one of the following:
1) clean uninstall your AutoCAD or AutoCAD vertical
2) update your AutoCAD or AutoCAD vertical
3) install / or uninstall a service pack or update to your AutoCAD or AutoCAD vertical
4) after you make changes to your user interface of AutoCAD or AutoCAD vertical

and you want to make sure you do a complete backup of your software

Solution:

=======
For an AUTOMATED way of backing up your software that will back up your custom palletes as well as all your custom settings do this:

Start >> All Programs >> Autodesk >> ProductName >> Migrate Custom Settings >> export…

also you will need to export your profiles:

launch product >> OPTIONS >> profile tab >> select profile you want to back up >> EXPORT
=======

Video Backing up your AutoCAD

Click for Backing up system registry – another example with written steps
Click for Restoring your software – another example with written steps

Starting with the 2010 products the installations automatically detect updates and allows you to download them from the internet to be applied automatically during the installation. If you choose to download them and install them manually here are some links that apply to these situations.

Click for Determining which Product Updates you need to apply
Click for Service Packs and Updates Category
Click for Autodesk Product Update Site at Autodesk

AutoCAD : Unable to save DWG file as it is being accessed by another session. Drawing saved to .tmp

Source Autodesk Technical Support
========================
1. When the error occurs, use the following steps to save the drawing:
     a. Enter qsave at the command prompt.
     b. When prompted to replace the existing drawing select Yes.
     c. Close and re-open the drawing.
     d. Did it work correctly?
2. Confirm that the user having the problem has full permissions to the network location where they’re trying to save. This is one of the most common reasons we see this issue is a lack of sufficient rights to the folder.
3. AutoCAD tells if a drawing is in use by the existence of a DWL and DWL2 file. These are hidden, system files so you will need to set your folder options accordingly in Windows Explorer to see them. In some cases these DWL files can become ‘stuck’ and this may not allow the file to be saved. In these cases deleting the DWL files should restore the ability to save the files. Please close AutoCAD and then browse to the folder where your files are located. Delete any DWL files that are in existence. Can you now open and save the DWG files?
4. AutoCAD itself does not have any settings to control this behavior as it is managed by the operating system. We have encountered the scenario you are describing, however in all cases it was an issue with the server or network that was causing the problem. Can you please confirm this by copying the file locally and trying the save operation again. Does it then save correctly?
5. If the files are on a file server, which type is it? The root cause is typically some amount of lag between the client and the server. Try disabling the option to create backup files with each save and try the save operation again. This setting is available in Tools menu > Options > Open and Save tab.
6. Clear out all files in the %TEMP% folder in Windows. This folder is typically found in C:\Documents and Settings\%username%\Local Settings.
7. Is there only one user experiencing this problem? If only one person logs into the problem machine, have a second person log into the machine and see if the problem is persistent with the new user.
8. Disable the antivirus software and try to save the file. If it works, you may need to add an exception for DWG files into your antivirus software.
9. If they are using Novell Server, please refer to the attached link for more information,
TS84335

Secondary Installer AutoCAD 2006

Issue
To reset the default AutoCAD 2006 user settings, you want to reinitiate the secondary installer.

Solution
To reset the AutoCAD 2006 default user settings, you must first delete your application files and registry entries for the program. Follow these steps:
Note: Make sure that you back up any customized AutoCAD 2006 files before starting this procedure. CLICK HERE FOR STEPS

1.Log on to the workstation as the user.
2.On the Start menu (Windows), click Run.
3.In the Run dialog box, enter regedit.
4.In the Registry Editor, locate the following subkey and delete it:
HKEY_CURRENT_USER\Software\Autodesk\AutoCAD\R17.1\ACAD-4001:409
5.Exit the Registry Editor.
6.In Windows Explorer, locate and delete the following application folders:
XP———————————————

C:\Documents and Settings\\Application Data\Autodesk\ AutoCAD 2006
C:\Documents and Settings\\Local Settings\Application Data\Autodesk\ AutoCAD 2006

VISTA—————unsupported configuration————————-

C:\Users\username\AppData\Roaming\Autodesk\ AutoCAD 2006
C:\Users\username\AppData\Local\Autodesk\ AutoCAD 2006

The user should now be able to launch AutoCAD 2006. When the product is opened, the files and folders that were deleted will be recreated by the secondary installer.

Warning! Problems caused by improperly editing the Windows registry could render your computer operating system unusable. Microsoft provides a wealth of critical information that you need to know about the registry in the Microsoft Knowledge Base at http://support.microsoft.com/support.

Use the Microsoft® Registry Editor only at your own risk and only after backing up the registry as well as the system.dat and user.dat files as outlined for your operating system in the Microsoft Knowledge Base and in the related solution, TS66513. Additional information about the registry is also contained in the Help topics in the Microsoft Registry Editor.

AutoCAD 2010 : Layer Properties Manager Right Hand Part is transparent

Issue:
Sometimes the right pane of the layer properties manager can become transparent and you can see through it.
=======================
2 Causes:
The .NET Framework was damaged (uninstall and reinstall using windows update)
AutoCAD program file became damaged. (repair reinstall, or clean uninstall / reinstall)
========================
uninstall .NET Framework using removal too:
dotnet framework removal tool

reinstall the .NET Framework Using Windows Update (the latest version is 4)

Distributed and Redundant License Server Models – Notes

Distributed License Server Model
===================
Licenses distributed across multiple servers
Unique license file for each server
Servers can be distributed across a WAN
If one server fails, licenses are still available

Redundant License Server Model
===================
Three servers on one system
One master, two backups
Same license file on all servers
Provides backup if one server fails
Same subnet – close proximity

Revit MEP 2010 Windows Installer asking for installation media disk 1

When the user gets the prompt to browse for the source for the installer (1st message) have them browse to the following location on the installation media:

“\Autodesk\RME_2010_English_Win_64bit\RevitSetup\RevitMEP”

If that does not work, browse to “\Autodesk\RME_2010_English_Win_64bit\msi” instead.
That should enable the user to go through the installation/repair process.
If that does not fix the issue, I suggest going through the process to cleanly uninstall and reinstall Revit found below:

click for clean uninstall Revit MEP 2010

Revit network license troubleshooting

Published date: 2010-Sep-03
ID: TS13744786

Applies to:
Autodesk® Revit® Architecture 2011
Autodesk® Revit® Architecture 2010
Revit® Architecture 2009
Revit® Architecture 2008
Autodesk® Revit® MEP 2011
Autodesk® Revit® MEP 2010
Revit® MEP 2009
Revit® MEP 2008
Autodesk® Revit® Structure 2011
Autodesk® Revit® Structure 2010
Revit® Structure 2009
Revit® Structure 2008

Issue

When launching Revit you are unable to obtain a network license on a specific workstation but other workstations can obtain a license.

Solution

The following process should help isolate or resolve this behavior:

  1. Rename the CascadeInfo.cas file.
    •  Navigate to the following folder:
    Windows XP > C:\Documents and Settings\All Users\Application Data\Autodesk\Adlm
    Windows Vista > C:\ProgramData\Autodesk\Adlm
    •  Rename the CascadeInfo.cas file to CascadeInfo.cas-backup
  2. Verify the license server can be pinged from the workstation.
    Diagnostic test for client computer experiencing network licensing errors
  3. Create or verify the workstation ADSKFLEX_LICENSE_FILE environment variable.
    Specifying license servers using the ADSKFLEX_LICENSE_FILE environment variable
  4. Delete the Revit licpath.lic file.
    •  File is located > C:\Program Files\Revit Product\Program\Licpath.lic. For 32-Bit versions of Revit running on a 64-Bit operating system the file will be located > C:\Program Files (x86)\Revit Product\Program\Licpath.lic.
    •  Substitute Revit Product with the specific Revit folder name.  This file can be restored from the Recycle Bin after testing if needed.
  5. Export and then clear out the ADSKFLEX_LICENSE_FILE registry key.
    •  Close all applications.
    •  Open the Registry Editor > Windows Start > Run > Regedit.
    •  Locate the following key > HKEY_LOCAL_MACHINE\SOFTWARE\FLEXlm License Manager\.
    •  Delete the ADSKFLEX_LICENSE_FILE key.
    •  Close the Registry Editor.

    Warning! Use the Microsoft® Registry Editor only at your own risk and only after backing up the registry as well as the system.dat and user.dat files as outlined for your operating system in the Microsoft Knowledge Base and in the related solution, TS66513. Additional information about the registry is also contained in the Help topics in the Microsoft Registry Editor.

    After the steps above are complete restart the workstation and launch Revit.  If the workstation cannot obtain a license move onto the steps below:

  6. Delete the AdskNetSrv.dat file.
    •  Close all applications.
    •  Locate the AdskNetSrv.dat file on Windows XP > C:\Documents and Settings\All Users\Application Data\Autodesk\NetService\AdskNetSrv.dat.  For Windows Vista the file is located > C:\ProgramData\Autodesk\NetService\AdskNetSrv.dat.
    •  Make a copy of this file for backup purposes.
    •  Delete the AdskNetSrv.dat file.
  7. Create an environmental variable for FLEXLM_TIMEOUT.
    Error: A valid license could not be obtained by the network license manager

    Restart the workstation and launch Revit.  If the workstation still cannot obtain a license please collect the following files and log a support request through Subscription Center or contact your reseller:

    •  3 latest Revit journal files from workstation:  Location of journal files
    •  Debug.log file from license server:  Locate debug.log file for license server
    •  License server status enquiry:  LMTOOLS > Server Status tab > Perform Status Enquiry
    •  Copy of license file.
    •  For Revit 2011, REVIT2011ENUAdlm.log file from the following folder:
    Windows XP > C:\Documents and Settings\All Users\Application Data\Autodesk\Adlm
    Windows Vista > C:\ProgramData\Autodesk\Adlm

Install option Civil 3D 2011 is greyed out

Source: Autodesk Technical Support
===========
Sometimes the option to install can be grayed out if the installer perceives that the application is already present on the machine. This is generally due to some registry information being left behind by a previous attempt to install the application or an install folder being left behind. Click here to backup your software and registry
===========
To resolve this, please verify whether there are any entries for the application, Civil 3D 2011 at the following location in the registry:

[HKEY_LOCAL_MACHINE\SOFTWARE\Microsoft\Windows\CurrentVersion\Installer\UserData\S-1-5-18\Products]

Please right click and search for ‘Civil 3D 2011’ at this location.
============
Also verify whether there are any entries for this product at:

[HKEY_LOCAL_MACHINE\SOFTWARE\Microsoft\Windows\CurrentVersion\Uninstall]

If you find any entries for Civil 3D 2011, and are sure that the application is not installed, then please remove the entries from these locations and retry the installer.
============
Also, please verify whether there are any install directories present at:

c:\Program Files\Autodesk\Civil 3D 2011

Back Up System Registry

Published date: 2010-Apr-08
ID: TS66513
Applies to:
AutoCAD® 2011
AutoCAD® 2010
AutoCAD® 2009
AutoCAD® 2008
AutoCAD® 2007

Issue

Registry edit warnings often contain text similar to the following:
Note that you should back up the registry before you edit it.
You want to know how to back up the registry for Windows XP, Windows Vista and Windows 7.

Solution

To back up the registry:

Warning!
Problems caused by improperly editing the Windows registry could render your computer operating system unusable. Microsoft provides a wealth of critical information that you need to know about the registry in the Microsoft Knowledge Base at http://support.microsoft.com/support.

Additional information about the registry is also available in the Help topics in the Microsoft Registry Editor.

1. On the Start menu (Windows), click Run.
2. In the Open box, enter regedit, and then click OK.
3. In the Registry Editor, on the Registry menu, click Export Registry File.
4. From the Save As Type drop-down list, select Registration Files (*.reg).
5. Under Export Range, click All.
6. In the File Name box, enter Backup Registry.
7. In the Save In box, select Desktop.
8. In the upper right corner of the Export Registry File dialog box, click Create New Folder, and then enter My Backup Files.
9. Click Save.

Note: You have just saved the Backup Registry file to the My Backup Files folder on the desktop. In each of the following back-up procedures, you will be instructed to save your files to the same folder.

10. On the Registry menu, click Exit.
11. Verify that the Registry Backup.reg file is located in the My Backup Files folder. To do this, double-click the My Backup Files folder on the desktop and note the contents. If the file is there, close the My Backup Files folder. If the file is not there, repeat steps 1 through 9, but in step 8, do not create a new folder; instead, select the My Backup Files folder.

Important: Do not double-click the Registry Backup.reg file on your desktop unless you intend to undo the changes that you are making to the registry.

Restoring your settings after applying the secondary installer or clean uninstall

after initiating the secondary installer instructions you will want to test the software to see if the issue has been successfully resolved, and then restore the settings you had set up prior to doing the secondary installer.

I also recommend backing up the support directory (again). This directory is called out in the secondary installer instructions. (IE..your products support directory – I call this backup the “out of the box” support directory backup).
===============
if you backed up your AutoCAD/AutoCAD vertical profiles you may want to import them.

type in options at the command line, go to the PROFILE tab and select the import button. browse to your profile and import.
===============
if you backed up your AutoCAD/AutoCAD vertical user interface you may want to restore them.

shut down AutoCAD/AutoCADvertical
copy and replace the backed up .CUI or .CUIX files from the support directory and replace them in software’s support directory.
launch AutoCAD/AutoCADvertical
================
if you have custom alias commands, iE like C = circle command, you may want to restore those.

copy and replace the backed up ACAD.PGP file from the support directory and replace them in software’s support directory.

Dell Killing Windows XP Option This September

Dell said Tuesday that it plans to stop offering Windows XP as a preloaded OS option beginning this month, as a prelude to Microsoft’s slow phase-out of the older operating system.

Read about it

Troublshooting information needed for network installation issues

From the Workstation:
=====================================

1. A copy of the licpath.lic file (c:\Program Files\<Productname>\licpath.lic)   Note: All licpath.lic files for all applications on the workstation should be the same.

2. The contents of the system variables. System Information is a good source for this. Follow these instructions to create a report of the workstations Environment Variables:
a. Press the Windows Key, plus the letter “r”, to bring up the Run dialog. (The Windows Key is on the keyboard between the Ctrl and Alt keys on the left side of the keyboard.)
b. In the Run box, enter msinfo32.exe and click OK.
c. From the File menu choose Save.
d. Save it with a name such as SystemInfo.nfo.

3. The string value for the “ADSKFLEX_LICENSE_FILE” string in the Windows Registry on the workstation.
a. In the Windows Registry Editor, browse to:
HKEY_LOCAL_MACHINE\SOFTWARE\FLEXlm License Manager
b. Right-click this Windows Registry key and choose export.
c. Save it as a text file with a name such as FLEXlm.reg.

4. The ADLM error log file. To find the ADLM error log go through the following steps:
a. Press the Windows Key, plus the letter “r”, to bring up the Run dialog. (The Windows Key is on the keyboard between the Ctrl and Alt keys on the left side of the keyboard.)
b. In the Run box, enter “%allusersprofile%\Application Data” and click OK.
c. Browse to the Autodesk folder, and then the Adlm folder.
d. Find the file REVIT2011ENUAdlm.log.

5. If you can launch the program on the Workstation, include the Program Information Properties from the Products Product Information dialog box:
a. From the Help Menu choose About Autodesk product.
b. Choose the Product Information button.
c. Choose the Save As button.
d. Browse to the location you want to store this file.
e. Give it a file name of ProductInfo.txt.
f. Choose the Save button. (If there is no save button, take a screenshot.)
g. Choose the Close button.

=====================================
From the Server:
=====================================

1. A host ID file from the System Settings tab of LMTOOLS on the license server. Please save this as a text file with a name such as SysSet.txt.

2. A copy of the license file from the license server. You will find its location in LMTOOLS on the Config Services Tab, Path to License file text box.

3. A copy of the options file from the Server (if you have one). This file will be in the same folder as the license file and will have a name of “adskflex.opt”.

4. A copy of the text from choosing the Perform Status Enquiry button on the Server Status tab of LMTOOLS. Please copy this content into a .txt file in notepad and save as a name such as SrvStat.txt.

5. A copy of the debug log file from the Server. You will find its location in LMTOOLS on the Config Services Tab, Path to the debug log file text box.

Images drop out when printing to HP plotters from Revit 2010 products

Published date: 2009-Aug-04
ID: TS13666326

Applies to:
Autodesk® Revit® Architecture 2010
Autodesk® Revit® MEP 2010
Autodesk® Revit® Structure 2010

Issue

In Revit 2010 when printing directly to HP® plotters, you notice image files are not included in the resulting print.

Solution

Disable the option for SpoolSmart® if it is present in the HP print driver preferences.  This option is typically located in Printing Preferences > Services > Troubleshooting Menu > Enable SpoolSmart.

Un-check the box to disable this feature.  Subsequent prints should properly include images from Revit 2010 products.

Autodesk Labs – Monitor AutoCAD – AutoCAD-based applications virtual memory usage

Use the Autodesk Performance Monitor to gauge the virtual memory utilized by running versions of AutoCAD and AutoCAD-based vertical products.

The Performance Monitor is a Windows desktop gadget that provides a color-coded status bar indicating the level of usage of virtual memory by AutoCAD products. When large amounts of virtual memory are in use, the running process may become unstable. The technology preview supports Windows 7 and Windows Vista at this time. Both 32-bit and 64-bit systems are supported.

http://labs.autodesk.com/utilities/acad_perf_mon/

Boot Startup in Simplified – Selective – Diagnostic mode

Source: Autodesk Technical Support

Go through the steps below to put the system into a simplified startup:

1. On the Start menu, click Run.
2. In the Open box, enter msconfig.
3. On the General tab, if the radio button is not set to Normal:
a. Go through each of the tabs and note what items are checked or unchecked.
b. On the General tab select Normal startup.
4. Select the Startup tab and click the Disable All button.
5. Click the Services tab, check the box to Hide Microsoft Services, click the Disable All button, recheck the Autodesk licensing service, and if you see it, recheck the FLEXnet licensing service.
6. Click OK and restart Windows when prompted.

======

Note:
after making the changes on the Startup and Services tab the radio button on the General tab should say Selective Startup. In order to restore the startup state of the system, after we have completed troubleshooting, select the Normal startup radio button on the General tab, and if the system was not originally on Normal Startup, go through the remaining tabs, and set them back the way they were.

Revit Visualization Troubleshooting Center

This troubleshooting center helps you to find and troubleshoot common issues related to rendering, materials, and visualization.

Click here for Revit Visualization Troubleshooting Center

Revit Graphic Card Troubleshooting Center

This troubleshooting center helps you to find and troubleshoot common issues related to Revit products and graphic cards.

Click Here For Revit Graphic Card Troubleshooting Center

AutoCAD /AutoCAD LT 2011 Update 1 has been pulled from Autodesk website and what to do if you installed it when it was available

NOTE: AutoCAD and AutoCAD LT 2011 Update 1.1 has been released :

Click for AutoCAD 2011 UPDATE 1.1 is now available
Click for AutoCAD LT 2011 UPDATE 1.1 is now available

Published date: 2010-Aug-27
ID: DL15569738

Applies to:
AutoCAD LT® 2011

On August 23, 2010, Autodesk released Update 1 for AutoCAD LT 2011. Unfortunately, Update 1 introduced an issue when conducting certain operations that may cause AutoCAD LT to shut down.  This issue affects a small number of users.

We have removed Update 1 and will reintroduce it in the near future when the issue has been resolved. For customers who have already installed Update 1, the hotfix that resolves this issue has been posted at the following location:

AutoCAD and AutoCAD LT Layer Manager Hotfix

Please be assured that Autodesk is wholly committed to the quality of AutoCAD, and regrets this error.

Error on startup or AutoCAD is not installed properly. Please reinstall immediately

Source: Autodesk Technical Source Document
Published date: 2010-Apr-06

ID: TS1056464 
Issue
When you launched the application, it immediately closes. The following error message may or may not be displayed:

This version of AutoCAD was not installed properly and some features may not run correctly. You should reinstall AutoCAD immediately to make sure all features are working properly. Do you wish to continue anyway?

Solution
We’ve discovered one source for this issue that stems from a bad registry entry in the HKEY_CLASSES_ROOT\.png key.

There have been cases where the value in the Content Type key contains a leading space.

In some cases, simply removing that leading space in the value resolves the issue. We don’t know how that value is getting set with a leading space – it is not being done by Autodesk – nor do we know if removing that space affects any other applications, however users who removed the leading space did not report any other issues.

Run REGEDIT
Navigate to HKEY_CLASSES_ROOT\.png
Modify the Content Type value to remove a leading space (if one exists)

If this did not apply to your system or it did not resolve the issue, these errors may indicate a corruption of the Microsoft® .NET Framework. This operating system component is required for several AutoCAD features, including the Properties Palette, Layer Manager, Ribbon, Menu Browser, Tooltips and other features.

To correct this issue:
On the Start menu (Windows), click Settings > Control Panel.
In Control Panel, double-click Add or Remove Programs (Windows 2000/XP) or Programs and Features (Windows Vista).
Uninstall all versions of .NET Framework, beginning with the newest version first.
Reinstall only the version of .NET Framework required for your software version. Refer to the list below for AutoCAD requirements. For vertical products, consult the product installation literature for the required .NET Framework version.

AutoCAD 2008/AutoCAD LT 2008 requires .NET Framework 2.0
AutoCAD 2009/AutoCAD LT 2009 requires .NET Framework 3.0
AutoCAD 2010/AutoCAD LT 2010 requires .NET Framework 3.5 Service Pack 1
AutoCAD 2011/AutoCAD LT 2011 requires .NET Framework 3.5 Service Pack 1

AutoCAD MEP 2009 AutoCAD Architecture 2009 : unable to eTransmit to a ZIP file

Source:
Autodesk Technical Support
issue:
Unable to eTransmit to a ZIP file

software:
AutoCAD MEP 2009
AutoCAD Architecture 2009

Resolution: (written for MEP, please adapt for Architecture)
I understand you are unable to eTransmit to a ZIP file.

I had this exact problem with another customer. They found there was a older copy of the Dzip32.dll on the system that was being used.
The correct version (5.0.0.5) and location should be at C:\Program files\AutoCAD MEP 2009\DZIP32.DLL.
They found an older one here: C:\Windows\SysWOW64\Dzip32.dll
You may want to search the hard drive for Dzip32.dll and either rename or delete any Dzip32.dll files you find that are not located in the MEP 2009 folder.

How to enable Windows Installer logging

Windows Installer can use logging to help assist in troubleshooting issues with installing software packages. This logging is enabled by adding keys and values to the registry. After the entries have been added and enabled, you can retry the problem installation and Windows Installer will track the progress and post it to the Temp folder. The new log’s file name is random, but begins with the letters “Msi” and end with a .log extension. To locate the Temp folder location, type the following line at a command prompt:
====================
NOTE:
This should be used only for troubleshooting purposes and should not be left on because it will have adverse effects on system performance and disk space. Each time you use the Add/Remove Programs tool in Control Panel, a new Msi*.log file is created.
====================
cd %temp%
To have us enable or disable Windows Installer logging for you, go to the “Fix it for me” section. If you would rather enable Windows Installer logging yourself, go to the “Let me fix it myself” section.
======
Click this and scan down the page to the fix it section to enable or disables
======
Click this for the autodesk techsource document on this topic

The current installation of AutoCAD has been modified. Please reinstall the latest version of AutoCAD to open DWG files in Design Review

Source material: excerpt from discussion board:

NOTE: currently researching to find a better solution (possibly repairing AutoCAD might resolve this)

issue:
the following message appears when trying to open a drawing in Autodesk Design Review
“The current installation of AutoCAD has been modified. Please reinstall the latest version of AutoCAD to open DWG files in Design Review”
====
resolution:
Please try the following steps:
1. Uninstall all of DWG TrueView and AutoCAD application on your machine.
2. Install DWG TrueView 2010.
3. Restart your machine.
4. Open dwg file in Design Review.

Hope this helps.

Video Card Configuration Troubleshooting Guide: AutoCAD AutoCAD Verticals

Published date: 2010-Apr-15
ID: TS1070054

You want to determine whether the stability issues your AutoCAD® vertical product is experiencing are due to your system’s video card or the drivers associated with it.

First, ensure that your Windows® operating system is up to date. For instructions on updating you operating system, refer to solution TS1069997.

Repair the installation of the product by following these steps:

Exit the product.
Click Start menu (Windows) > Settings > Control Panel.
Double-click Add or Remove Programs.
Select the product and click Change/Remove.
Select the Reinstall or Repair option.
Select Repair my and then click Next.
Update your Autodesk product with the most recent service pack and all hotfixes that have been published since the last service pack was released (or that explicitly are described as a post-service pack hotfix). Follow these steps:

Go to the Autodesk Website
Click the Services & Support link.
Under Product Support, select the product that you want to check for updates.
Click the Data & Downloads link.
Click the Updates & Service Packs link.
Locate your product version and install all the appropriate updates or service packs to update your product.
Restart your computer.
If there is no improvement in stability after applying these service packs and hotfixes, refer to the following website for a list of the recommended cards and drivers for AutoCAD® products to determine if your video graphics hardware is compatible:

Graphics Compabible

This list is updated to reflect the results of Autodesk Quality Assurance tests. You should always download the recommended drivers directly from this list, as this is the exact configuration tested by Autodesk.
If the same issues persist, disable hardware acceleration for the video card:
For 2006 AutoCAD-based products and earlier versions
Click Format menu > Options.
Click the System tab.
Under Current 3D Graphics Display, click Properties.
Under Acceleration, select Software.
Click Apply & Close.
Click OK.
Restart the application.
For 2007 AutoCAD-based products and later versions

On the command line, enter 3dconfig.
Click Manual Tune.
Clear the Enable Hardware Acceleration check box.
Click OK to close each dialog box.
Restart the application.
If the stability issues are still occurring (especially during startup), you can limit the interaction that the product has with the video card during startup to avoid these issues.

Note: The following procedure can only be performed on AutoCAD 2007-based products or later versions.

For example, to modify Architectural Desktop 2007 in this manner

Create a copy of the shortcut icon used to start Architectural Desktop 2007.
Select the icon, and then right-click it. On the shortcut menu, click Properties.
The following string will be in the Target box:

“C:\Program Files\Autodesk Architectural Desktop 2007\acad.exe” /ld “C:\Program Files\Autodesk Architectural Desktop 2007\AecBase50.dbx” /p “Architectural Desktop – Imperial”

Move to the end of this string and add the following with a space in front of the “/”:

/nohardware
The full entry will now read as follows:

“C:\Program Files\Autodesk Architectural Desktop 2007\acad.exe” /ld “C:\Program Files\Autodesk Architectural Desktop 2007\AecBase50.dbx” /p “Architectural Desktop – Imperial” /nohardware

Note: These file paths are based on the default installation path of the specified product. You will need to modify them if you chose to install to a custom location or are modifying a different product.

If the stability issues persist, start Windows in Diagnostic mode to determine whether other applications are interfering with the AutoCAD-based product. To run Windows in Diagnostic mode, follow the instructions in solution TS1054234 .

If the product ran without issue in Diagnostic mode, then the configuration of Windows (including the configuration of the personal OS system or other programs loaded onto it) may be causing conflict with the AutoCAD-based product.

If running the application in Diagnostic mode did not resolve the issue, then you may be experiencing a hardware or operating system issue, and you should consider performing a clean installation of Windows®. To ensure a clean installation of Windows, install Windows directly from the original installation media provided by Microsoft. Avoid using any OEM (Original Equipment Manufacturer) customized installations or recovery images that may have come with your computer. After you have reinstalled Windows, apply all of the current updates available from Windows Update.

Install the Autodesk product and the recommended video drivers onto the clean installation of Windows, but do not install any other software. If the Autodesk product continues to experience stability issues, then it is likely that your computer’s hardware is causing the problems.

2011: Clean Uninstall of Autodesk Revit Products

source

2010 clean uninstall of Autodesk Revit products
2012 clean uninstall of Autodesk Revit products

Issue

There may be circumstances where Autodesk Revit® 2011 products need to be removed from the workstation.  The following process will ensure all residual files are properly removed as well.

Solution

To uninstall Revit 2011 products and remove any remnants from your system, use the following procedure. The end result is a clean system on which you can reinstall.  Please ensure to backup any custom family or template files prior to following this procedure:

  1. Log on as a Local System Administrator and disable any Antivirus programs.
  2. In the Windows XP Control Panel > Add or Remove Programs > remove the specific Revit 2011 product.  For Windows Vista & Windows 7, Control Panel > Programs and Features > Uninstall.
  3. In the Windows XP Control Panel > Add or Remove Programs > remove the 3 Autodesk 2011 Material Libraries in the following order.  For Windows Vista & Windows 7, Control Panel > Programs and Features > Uninstall:•Autodesk Material Library 2011 Medium Image Library
    •Autodesk Material Library 2011 Base Image Library
    •Autodesk Material Library 2011
  4. After the product is uninstalled, use Windows Explorer to locate and delete the following folders as appropriate.  For steps 3 & 4 substitute the product name below based on which Revit 2011 product you are uninstalling; all paths listed by default are for Revit Architecture 2011:
    Autodesk Revit Architecture 2011 & RAC 2011
    Autodesk Revit Structure 2011 & RST 2011
    Autodesk Revit MEP 2011 & RME 2011

Where %username% is present below substitute the current Windows login name.

For Windows XP installations (32 and 64 bit):
•  C:\Program Files\Autodesk\Revit Architecture 2011
•  C:\Documents and Settings\%username%\Application Data\Autodesk\REVIT\2011
•  C:\Documents and Settings\%username%\Local Settings\Application Data\Autodesk\Revit\Autodesk Revit Architecture 2011
•  C:\Documents and Settings\All Users\Application Data\Autodesk\RAC 2011

For Windows Vista and Windows 7 installations (32 and 64 bit):
•  C:\Program Files\Autodesk\Revit Architecture 2011
•  C:\ProgramData\Autodesk\RAC 2011
•  C:\Users\%username%\AppData\Local\Autodesk\Revit\Autodesk Revit Architecture 2011
•  C:\Users\%username%\AppData\Roaming\Autodesk\Revit\2011

  • Open the system registry and locate then delete the following registry keys listed below as appropriate (Windows Start menu > Run > Regedit).Warning! Problems caused by improperly editing the Windows registry could render your computer operating system unusable. Microsoft provides a wealth of critical information that you need to know about the registry in the Microsoft Knowledge Base at http://support.microsoft.com.Use the Microsoft® Registry Editor only at your own risk and only after backing up the registry as well as the system.dat and user.dat files as outlined for your operating system in the Microsoft Knowledge Base and in the related solution, TS66513. Additional information about the registry is also contained in the Help topics in the Microsoft Registry Editor.For 32-bit versions of Windows XP, Vista and Windows 7
    •  HKEY_CURRENT_USER\Software\Autodesk\Revit\Autodesk Revit Architecture 2011
    •  HKEY_CURRENT_USER\Software\Autodesk\Revit\2011
    •  HKEY_LOCAL_MACHINE\SOFTWARE\Autodesk\Revit\Autodesk Revit Architecture 2011
    •  HKEY_LOCAL_MACHINE\SOFTWARE\Autodesk\
    RAC 2011
    •  HKEY_LOCAL_MACHINE\SOFTWARE\Autodesk\Revit\2011
    For 64-bit versions of Windows XP, Vista and Windows 7
    •  HKEY_CURRENT_USER\Software\Autodesk\Revit\Autodesk Revit Architecture 2011
    •  HKEY_LOCAL_MACHINE\SOFTWARE\Autodesk\RAC 2011
    •  HKEY_LOCAL_MACHINE\SOFTWARE\Autodesk\Revit\2011
    •  HKEY_LOCAL_MACHINE\SOFTWARE\Autodesk\Revit\Autodesk Revit Architecture 2011
  • Restart the workstation.

Before reinstalling Revit products

  1. In Windows Explorer, delete the contents of your Windows Temp folder, but do not delete the Windows Temp folder itself. You can locate the Temp folder by entering %TEMP% in the Address bar of Windows Explorer.
  2. Use the End Task feature to end any anti-virus programs.

Note: Disabling anti-virus programs from the system tray may not be sufficient. Virus checking programs may block certain activities that are seen as suspicious (for example, accessing the registry, adding/removing/updating DLL files, and so on), even though these activities are common when installing or removing programs.

Several anti-virus programs can be disabled by right-clicking the taskbar icon and selecting Disable from the shortcut menu. For more information about disabling your anti-virus software, refer to the vendor of that software.

Important! It is important that you not only disable the anti-virus software but also use the End Task feature to end the anti-virus software.

To verify that an anti-virus program is not still running in the background as a TSR (Terminate and Stay Resident Program):

Windows XP, Windows Vista and Windows 7

  1. Press [Ctrl] + [Alt] + [Delete].
  2. Click Task Manager.
  3. On the Processes tab of the Task Manager, select the process for the anti-virus program and then click End Process.

You are now ready to install Revit 2011 products on the clean system.

Missing Language Pack Dialogue

Autodesk has provided the following:

caused by a virus prompting this dialogue
TS13717811

The update 1 for Civil 3D 2011 readme states the following:
* Incorrect instances of missing Language Pack errors on file open have been resolved*
click for download update 1
and a civil 3d 2011 hotfix
DL15413300
================
NOTES from Autodesk Tech Support: BEFORE UPDATE1 CIVIL 3D 2011
I’m sorry about the delay in resolving the problem with the missing Language Packs.
I had a discussion with one of my co-workers about this problem, and he suggested that the only resolution to your problem is to make sure that you re-apply the “HOTFIX” to all of the drawing files and make absolutely sure that they are saved after the “HOTFIX” has been applied. I would also exit out of AutoCAD after these steps are taken. If one file is missed, the rest of the files could get reinfected all over again.

Revit MEP 2010 2011 Multiple Monitors Setup : selected object moves 4 to 5 feet by itself

source: Autodesk Technical Support: customer confirmed this resolved their issue
Software:
Revit (2010 and 2011)
external monitor connected to a 64bit/32bit laptops

Issue:
when object is selected, it takes a second to actually become selected and then physically moves the object up screen.

Notes:
If you take that same file and drag it down to the actual laptop screen Revit visibly runs smoother and objects don’t jump around.

Scope:
This same issue has been confirmed on three laptops running an external monitor. Each laptop we tried it on is connected to the second monitor in a different way, one VGA, one DVI, and one HDMI. All have the same problem. Different files as well as different objects being selected have been tried on the computers also.

Proposed Workaround:
I understand that Revit is showing odd behavior when on an external monitor.
This is an issue we have seen before when running Revit in multi-monitor set ups. The reason this happens is due to Revit being in the secondary monitor. As you have seen the issue goes away when you drag Revit to the primary monitor.

PC Multi-monitor Setup:
I suggest making the external monitor the primary when running Revit.

Laptop Multi-Monitor Setup:
I suggest making the external monitor the primary when running Revit.

=================

Additional Notes from Autodesk:

If I understand correctly, the file runs smoother in Revit Architecture than in MEP.

Depending on the configuration of your Revit User Interface (palettes, docked or undocked, etc.), the behavior you are seeing can vary. This may explain the performance difference between Revit Architecture and Revit MEP.
Also, we have seen Revit MEP use more resources for the same files than Revit Architecture and Revit Structure.

AutoCAD MEP 2010 2011 : Asks for Installation media when launching a different program

Source: Autodesk Technical Support
I understand that when you launch Carrier HAP, Titus Teams, or Cook Compute-A-Fan, you get a message saying to “Please wait while Windows configures AutoCAD MEP 2011”, and on one computer you get the message “Please wait while Windows Configures Autodesk Revit MEP 2010”, that “The feature you are trying to use is on a CD-ROM or other removable disk that is not available”, and after you put the installation disk in the drive, it gives an error “1334 The file “REVSYP201000F_EL_Adlm.asr” cannot be installed because the file cannot be found in cabinet file x86.cab.”

When this configuration behavior happens at any time other than the initial launch of AutoCAD MEP that configures the user’s account, it indicates that there is some missing file or other change on the system that Windows thinks is affecting MEP. For information about this behavior and suggestions on how to fix it, read the document on our website, located at the link below:

Windows Installer displayed unexpectedly

The 1334 error indicates some problem with reading the installation media. This could be compounded by whatever is calling up the installer in the first place, so once you get the first one fixed and it does not ask for installation media, you will not get the 1334 since you are not calling the process that requires the files. If you ever get the 1334 during a repair install or some other normal installation process outside of this issue, that would be a separate troubleshooting issue to submit for a different troubleshooting process.

Resolution Steps: from Autodesk technical support

To review the steps we took, I checked the event logs just after the install dialogs were launched (and then cancelled) and searched for any messages, either warnings or errors with MSIEXEC as the ‘Source’. When I found the error, I searched to see if there was a particular file or registry key that was being referenced in the error.
After that, when verifying that the file in the error was not present, we initiated the Repair from the Add Remove Programs. To be certain, when the prompt came up to reference the original install media, I browsed out to the mep.msi file on the install media.
Once the Repair had completed, we verified that the secondary installer no longer was triggered when launching the third party applications.

Revit 2010 : Pantone Select Severe Lag Time

System:
64 Win 7 8GB RAM
Rev Arch 2010 BUILD 20090917_1515 (x64)

Issue Scope:
multiple computers and multiple drawings.
actually half of the computers work and half don’t, they are identical machines.

After selecting PANTONE the cursor stays a circle for a while.  We cleaned out the items in the temp directory.  The first time we did this after we cleaned it out it seemed to work fine, the second time it was lagging again.  We shut down product and launched and the same thing.
customer sent the last 3 journals they are attached to this case, this didn’t provide any clues. logging in as a different person made the problem go away. Logging back in as yourself the issue returns.

Resolution:
===============
Copy and paste this directory (from a computer not having the issue using this software, to the computer having the issue)
C:\Users\ *user id*\AppData\Local\Autodesk\Revit\Autodesk Revit Architecture 2011
REBOOT AFTERWARDS

AutoCAD Map 3D 2011 : Install Error 1402

Solution provided by Autodesk Technical Support:  Confirmed to resolve issue by customer.

System:
64 Win 7 8GB RAM
Map 3D 2011

Issue:
Install Fails with Error 1402

Notes:
Error Header: AutoCAD Map 3D 2011
Error Message: Error 1402. Could not open Key:
UNKNOWN\Components\317800169C22D11A9790006794C4E25\7D2F387520099040102000060BECBAB.  Verify that you have sufficient access to that key, or contact your support personnel.

Resolution:
Please BACKUP the entire registry before modifying/changing any registry keys!
Click File > Export… > Select All for Export Range > Save
• From the START menu, execute “Run..” and then type “regedit”
• Navigate to the following parent container: HKEY_LOCAL_MACHINE\SOFTWARE\Microsoft\Windows\CurrentVersion\Installer\UserData\S-1-5-18\Components
HKEY_LOCAL_MACHINE\SOFTWARE\Microsoft\Windows\CurrentVersion\Installer\UserData\S-1-5-18\Components

• Right click on the parent container registry key Components Choose “Permissions…”

• On the “Permissions for…” dialog box which appears next, press the “Add..” button and add in the “Administrator”, “Administrators” and “SYSTEM” accounts. For ourselves, we also made sure to add in our own local account which had administrator privileges.

• Back on the first “Permissions for…” dialog box, click on each account in the top-list and make sure each has the “Full Control = Allow” and “Read = Allow” permissions.
• Click the “Advanced” button so that the “Advanced Security Settings” dialog box appears:

1. 1 – On the “Permissions tab” enable the checkmark box named “Replace all child object permissions with inheritable permissions from this object”, then press the “Apply” button.

2. 2 – On the “Owner” tab, highlight the “Administrators” name in the lower listbox, enable the checkmark box called “Replace owner on subcontainers and objects” and press the “Apply Button”.

• Repeat the previous 2 steps once more. This time around you shouldn’t get any errors about not being able to update the permissions on the child keys.
• Exit these dialog boxes by pressing the “Ok” button, so that you are back to the main registry editor.
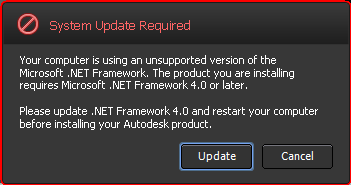
• Go and re-run your Microsoft installer or un-installer. It is recommended that you right-click on its icon and execute “Run as administrator…” if available.
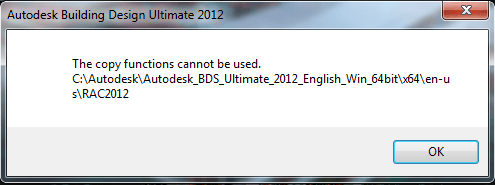
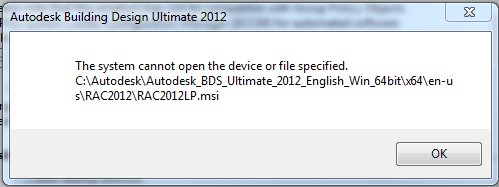
• If you continue to get this “Could not open key” message, on the exact same keys, then you didn’t do the above operations correctly.

Sometimes a repair of the registry is necessary, either CCleaner or Glary Utilities can be used
CCleaner
Glary Utilities

Microsoft Fix it Solution Center (automated fixes)

I haven’t used this personally, but it is available from Microsoft, as an attempt to automate common windows troubleshooting activities.  There is an extensive list of fix it topics.

Microsoft Fix It Solution Center

Map 3D 2010 : newer version already installed : greyed out can’t select

Source: Autodesk Technical Support

I understand that a customer has a system on which you’re unable to install Map 3D 2010, as it says that a newer version is already installed.  If you’ve already tried Revo Uninstaller, might I suggest trying it in Safe or Moderate mode?  It’s also possible that even though Map itself has been removed, there might be lingering entries for Map’s service packs in Programs and Features.  Go into that list and be sure that “show updates” is checked.  If you see Map’s service packs there, try removing them.  Failing that, try using Revo Uninstaller to remove them.

You can also try the now-Microsoft-banned Windows Installer Cleanup Utility.  You’d be looking to have it remove Map and/or any of its updates.  Microsoft claims that it’s a potentially dangerous utility now, though, so use at your own risk.  We can attach this utility to an email and send it to you – the link is not provided here.

Please let me know what you find out.

AutoCAD 2011 : Serious Lag Time before HATCH EDIT ribbon appears after selecting hatch in dwg

Source: ADSK Tech Support.

I understand that when using the HATCH command in AutoCAD 2011, the program hangs for some time before the hatch ribbon appears.

We are currently investigating this issue with AutoCAD 2011 as there does seem to be a problem with the new Hatch feature in the program. The hope is to have a fix included in the first update for 2011, but, unfortunately, there is no time frame on when this will be released.

CLICK FOR UPDATES FOR AUTOCAD NOW AVAILABLE

==================
As a workaround, please do the following:

Set HPQUICKPREVIEW = 0
Set HPDLGMODE = 1

Go to the Selection tab in Options, click the “Contextual Tab States” button at the bottom (under Ribbon Options), and then select “Do not switch to contextual tab on selection.”

Additionally, you might also consider doing what is detailed on this web page:
CadNausia

I hope this helps. Please let me know if you have further questions.

Revit Architecture 2011 : Product is greyed out and cannot be selected for installation

Issue:
customer has clean uninstalled all autodesk products on this machine, customer attempts to install Revit Architecture suite 2011 and the product is greyed out and cannot be selected for installation.  Customer has also scrubbed the registry clean of anything autodesk remaining in the registry. Revo uninstaller does show that Autodesk Design Review 2010 is installed, however, attempting to uninstall this using REVO flags an error. As stated above all products have been cleanly removed.

System:
64 bit Win 7 Pro, 6GB RAM

Software:
Revit Architecture Suite 2011

Resolutions SO FAR (STILL RESEARCHING)
There are two things that can cause this issue.
Verify the Internet Explorer 7 (IE7) or higher is installed. Revit requires IE7 or higher to install.
The other issue is that if you have DWF Viewer installed. If you do have DWF viewer installed, uninstall it before installing Revit.
I would appreciate it if you would let me know if this answers your question. If it does not, please reply with more information about what you are trying to do so that I can provide a better answer.

to use ODBC to export data from Revit to Access 2007 in a 64 Bit environment

You are trying to use ODBC to export data from Revit to Access 2007 in a 64 Bit environment
You will need to download an access database engine. These drivers are available as AccessDatabaseEngine_X64.exe on the following page

Microsoft Access Database Engine 2010 Redistributable

After down loading you will need to uninstall ALL office products!
Once they are uninstalled you need to run the AccessDatabaseEngine_X64.exe. This will install the 64 bit ODBC driver.
Now you’ll need to reinstall all our Office products.
Now you are good to go and able to export out to an Access Database.

Deployment Civil 3D 2011 on client everything is greyed out

Issue:
when installing the deployment on the client, when the “Select the Product to Install” page pops up. the following are all greyed out,
1) The language drop down listbox,
2) All of the product names and checkboxes (none of them are checked)
3) Back and Next buttons

deployment:
32 bit Civil 3D 2011, silent mode turned off

system:
32 bit XP SP3 2GB RAM

Resolution Situation 1:
uninstalling Autodesk Design Review, and relaunch the deployment. 

Resolution Situation 2:
In my case, Design Review was not installed, however Express Viewer and DWF Viewer was. I uninstalled those and setup resumed

Revit 2011 products hang at or before splash screen

I have updated the following tech source document for 2010 products to inlcude 2011, based on successful customer experience.
TS15145616

Applies to:
Autodesk® Revit® Architecture 2011
Autodesk® Revit® MEP 2011
Autodesk® Revit® Structure 2011

Issue
When you launch a Revit® 2011 product it hangs at or before the splash screen.
Solution
This can occur because of a conflict with a Communication Center file. Delete the following file, if present on the workstation at the following location:

Windows XP

• Autodesk Revit Architecture 2011
c:\Documents and Settings\%USERNAME%\Local Settings\Application Data\Autodesk\Revit\Autodesk Revit Architecture 2011\ENU\Components\WebServices\WSCommCntrData.xml
• Autodesk Revit Structure 2011
c:\Documents and Settings\%USERNAME%\Local Settings\Application Data\Autodesk\Revit\Autodesk Revit Structure 2011\ENU\Components\WebServices\WSCommCntrData.xml
• Autodesk Revit MEP 2011
c:\Documents and Settings\%USERNAME%\Local Settings\Application Data\Autodesk\Revit\Autodesk Revit MEP 2011\ENU\Components\WebServices\WSCommCntrData.xml

Windows Vista \ Windows 7

• Autodesk Revit Architecture 2011
C:\Users\%username%\AppData\Local\Autodesk\Revit\Autodesk Revit Architecture 2011\ENU\Components\WebServices\WSCommCntrData.xml
• Autodesk Revit Structure 2011
C:\Users\%username%\AppData\Local\Autodesk\Revit\Autodesk Revit Structure 2011\ENU\Components\WebServices\WSCommCntrData.xml
• Autodesk Revit MEP 2011
C:\Users\%username%\AppData\Local\Autodesk\Revit\Autodesk Revit MEP 2011\ENU\Components\WebServices\WSCommCntrData.xml

Secondary Installer AutoCAD Map 3D 2011

Issue
To reset the default AutoCAD Map 3D 2011 user settings, you want to re initiate the secondary installer.

Solution
To reset the AutoCAD Map 3D 2011 default user settings, you must first delete your application files and registry entries for the program. Follow these steps:

Note: Make sure that you back up any customized AutoCAD Map 3D 2011 files before starting this procedure. CLICK HERE FOR STEPS

1. Log on to the workstation as the user.
2. On the Start menu (Windows), click Run.
3. In the Run dialog box, enter regedit.
4. In the Registry Editor, locate the following subkey and delete it:

HKEY_CURRENT_USER\Software\Autodesk\AutoCAD\R18.1\ACAD-9002:409
5. Exit the Registry Editor.
6. In Windows Explorer, locate and delete the following application folders:
in XP:
C:\Documents and Settings\\Application Data\Autodesk\AutoCAD Map 3D 2011 (copy this directory as a backup)
C:\Documents and Settings\\Local Settings\Application Data\Autodesk\ AutoCAD Map 3D 2011

in VISTA / Windows 7
C:\Users\AppData\Roaming\Autodesk\ AutoCAD Map 3D 2011 (copy this directory as a backup first)
C:\Users\AppData\Local\Autodesk\ AutoCAD Map 3D 2011

The user should now be able to launch AutoCAD Map 3D 2011. When the product is opened, the files and folders that were deleted will be recreated by the secondary installer.

Warning! Problems caused by improperly editing the Windows registry could render your computer operating system unusable. Microsoft provides a wealth of critical information that you need to know about the registry in the Microsoft Knowledge Base at http://support.microsoft.com/support.

Use the Microsoft® Registry Editor only at your own risk and only after backing up the registry as well as the system.dat and user.dat files as outlined for your operating system in the Microsoft Knowledge Base and in the related solution, TS66513. Additional information about the registry is also contained in the Help topics in the Microsoft Registry Editor.

Secondary Installer AutoCAD Map 3D 2010

Issue
To reset the default AutoCAD Map 3D 2010 user settings, you want to re initiate the secondary installer.

Solution
To reset the AutoCAD Map 3D 2010 default user settings, you must first delete your application files and registry entries for the program. Follow these steps:

Note: Make sure that you back up any customized AutoCAD Map 3D 2010 files before starting this procedure. CLICK HERE FOR STEPS

1. Log on to the workstation as the user.
2. On the Start menu (Windows), click Run.
3. In the Run dialog box, enter regedit.
4. In the Registry Editor, locate the following subkey and delete it:

HKEY_CURRENT_USER\Software\Autodesk\AutoCAD\R18.0\ACAD-8002:409
5. Exit the Registry Editor.
6. In Windows Explorer, locate and delete the following application folders:
in XP:
C:\Documents and Settings\\Application Data\Autodesk\AutoCAD Map 3D 2010 (copy this directory as a backup)
C:\Documents and Settings\\Local Settings\Application Data\Autodesk\ AutoCAD Map 3D 2010

in VISTA / Windows 7
C:\Users\AppData\Roaming\Autodesk\ AutoCAD Map 3D 2010 (copy this directory as a backup first)
C:\Users\AppData\Local\Autodesk\ AutoCAD Map 3D 2010

The user should now be able to launch AutoCAD Map 3D 2010. When the product is opened, the files and folders that were deleted will be recreated by the secondary installer.

Warning! Problems caused by improperly editing the Windows registry could render your computer operating system unusable. Microsoft provides a wealth of critical information that you need to know about the registry in the Microsoft Knowledge Base at http://support.microsoft.com/support.

Use the Microsoft® Registry Editor only at your own risk and only after backing up the registry as well as the system.dat and user.dat files as outlined for your operating system in the Microsoft Knowledge Base and in the related solution, TS66513. Additional information about the registry is also contained in the Help topics in the Microsoft Registry Editor.

Secondary Installer AutoCAD Architecture 2011

Issue

To reset the default AutoCAD Architecture 2011 user settings, you want to re initiate the secondary installer.

Solution

To reset the AutoCAD Architecture 2011 default user settings, you must first delete your application files and registry entries for the program. Follow these steps:

Note: Make sure that you back up any customized AutoCAD Architecture 2011 files before starting this procedure. CLICK HERE FOR STEPS

1. Log on to the workstation as the user.
2. On the Start menu (Windows), click Run.
3. In the Run dialog box, enter regedit.
4. In the Registry Editor, locate the following subkey and delete it:

HKEY_CURRENT_USER\Software\Autodesk\AutoCAD\R18.1\ACAD-9004:409
5. Exit the Registry Editor.
6. In Windows Explorer, locate and delete the following application folders:

XP———————————————

C:\Documents and Settings\\Application Data\Autodesk\ ACA 2011 (copy this directory as a backup first)

C:\Documents and Settings\\Local Settings\Application Data\Autodesk\ ACA 2011

VISTA / Win 7—————————————-

C:\Users\AppData\Roaming\Autodesk\ ACA 2011 (copy this directory as a backup first)

C:\Users\AppData\Local\Autodesk\ ACA 2011

The user should now be able to launch AutoCAD Architecture 2011. When the product is opened, the files and folders that were deleted will be recreated by the secondary installer.

Warning! Problems caused by improperly editing the Windows registry could render your computer operating system unusable. Microsoft provides a wealth of critical information that you need to know about the registry in the Microsoft Knowledge Base at http://support.microsoft.com/support.

Use the Microsoft® Registry Editor only at your own risk and only after backing up the registry as well as the system.dat and user.dat files as outlined for your operating system in the Microsoft Knowledge Base and in the related solution, TS66513. Additional information about the registry is also contained in the Help topics in the Microsoft Registry Editor.

Secondary Installer AutoCAD Architecture 2010

Issue

To reset the default AutoCAD Architecture 2010 user settings, you want to re initiate the secondary installer.

Solution

To reset the AutoCAD Architecture 2010 default user settings, you must first delete your application files and registry entries for the program. Follow these steps:

Note: Make sure that you back up any customized AutoCAD Architecture 2010 files before starting this procedure. We suggest exporting out your profiles, “options” Profiles tab, export. CLICK HERE FOR STEPS

1. Log on to the workstation as the user.
2. On the Start menu (Windows), click Run.
3. In the Run dialog box, enter regedit.
4. We recommend backing up your registry (file pulldown, export) first.
4. In the Registry Editor, locate the following subkey and delete it:

HKEY_CURRENT_USER\Software\Autodesk\AutoCAD\R18.0\ACAD-8004:409
5. Exit the Registry Editor.
6. In Windows Explorer, locate and delete the following application folders:

XP———————————————

C:\Documents and Settings\\Application Data\Autodesk\ ACA 2010 (copy this directory as a backup first)

C:\Documents and Settings\\Local Settings\Application Data\Autodesk\ ACA 2010

VISTA—————————————-

C:\Users\AppData\Roaming\Autodesk\ ACA 2010 (copy this directory as a backup first)

C:\Users\AppData\Local\Autodesk\ ACA 2010

The user should now be able to launch AutoCAD Architecture 2010. When the product is opened, the files and folders that were deleted will be recreated by the secondary installer.

Warning! Problems caused by improperly editing the Windows registry could render your computer operating system unusable. Microsoft provides a wealth of critical information that you need to know about the registry in the Microsoft Knowledge Base at http://support.microsoft.com/support.

Use the Microsoft® Registry Editor only at your own risk and only after backing up the registry as well as the system.dat and user.dat files as outlined for your operating system in the Microsoft Knowledge Base and in the related solution, TS66513. Additional information about the registry is also contained in the Help topics in the Microsoft Registry Editor.

AutoCAD 2011 – from an Autodesk Discussion Board

Source Material from an Autodesk Discussion Board: a pdf.
————————————————
IDEAS FOR SPEEDING UP AUTOCAD
Last updated 11/05/09
First things first, if you start having trouble, close AutoCAD, reboot
your computer, restart AutoCAD and then see if that made a difference.
DRAWINGS:
Is the slow down in all files or just one? Start a new drawing by typing .new and see if the resulting
file is ok or not. If ok then the existing file is the problem. Run Recover on that file to see if that
helps, see other tips further down.
Once a slow drawing is up check to see what fonts are being used or called. If you don’t have one
on your system substitute in STYLE for an AutoCAD shx font. Do this for other font names you
don’t recognize to see if the helps speed up the drawing. Change all TTF fonts to SHX to see what
difference it might make.
Does the drawing contain XREF files? Close the current drawing, open
each XREF file and audit and purge each one. Then go back to your
drawing. In 2010 you can use the RECOVERALL command to also include
XREFs.
Check in layer manager to make sure you don’t have 100’s of layer
filters, if so delete them.
Check the scale list to make sure you don’t have 100’s of scale lists.
2009 does this for you automatically, 2008 use scalelistedit, reset.
Groups can cause problems, see link at bottom of page.
Don’t use true type fonts (TTF) and see if that helps, lots of those
will slow things down. If using TTF, turn hardware acceleration off.
Set Shademode to 2D, do this in each layout, each viewport, and in Model Space.
Use ‐purge, Regapps, purge all. In 2010 also use –purge, z, and –purge, e.
Large file size
http://usa.autodesk.com/adsk/servlet/ps/item?siteID=123112&id=2886521&linkID=9240617
Ideas for removing blank text, points in a drawing, anonymous groups
HARDDRIVE CLUTTER:
Clean out the temp folder (%temp%)on your computer, this can have a big impact if it is filled with
hundreds or thousands of files. Remove all the temp internet files and cookies on your computer.
I recently helped clean up a computer and it had 5,000 cookies on it.
Finally run the diskfrag program, even the one that comes with Windows works well enough.
CPU or RAM OVERLOAD:
What other programs are running? I have Inventor and Mech 2009. If I run Inventor and then
AutoCAD, AutoCAD will be very slow and “jerky”. Rebooting and only running one or the other
makes a big difference. So after a reboot only open AutoCAD and see if it runs better. Add other
programs one at a time and watch for a difference.
AUTOCAD SOFTWARE ‐ VARIOUS SETTINGS:
Do you have another version of AutoCAD installed? If so you must go through the File path
statement in that version as well. And are you using the same profile? Start AutoCAD without a
profile (copy the shortcut on the desktop, in properties remove the “ /p (profile name)” switch and
then use that shortcut to start AutoCAD.
If you don’t need draworder then set draworderctl to 0.
Turn DYNamic input off as a test, see DYN toggle at bottom center of screen.
Set SAVEFIDELITY to 0 unless you are saving down to lower version numbers.
3D – use BREP command to remove the history from selected solids. Read help to understand the
impact to doing this.
Properties causes slower operating speed and some have recommended setting qpmode to 0 (off).
Run with Properties turned off as well as QProperties off as a test.
Go to File>Open>History, are there hundreds or thousands of files listed? Delete most of those
short cuts keeping only the last 20 or so.
Make sure all the printers listed in the plot dialog actually exist.
This goes for printers as well as printer.pc3 files.
Create a file of 0 bytes in size, called acad.dll and place it in the
same location as acad.exe if one doesn’t already exist.
Options> Open and Save > Turn off display digital signature information.
Go through the file paths in Options>Files and make sure every single path listed actually exists, be
meticulous. Unplug the network cable and see if the problem goes away. If so, you may need to
get a copy of FILEMON from the net and use that to find out what AutoCAD is trying to do. See
below for a link with a great explanation on how to use FILEMON.EXE.
Change the cursorsize from 100 to 10 or 7.
http://usa.autodesk.com/adsk/servlet/ps/item?siteID=123112&id=2884947&linkID=9240617
The support file search path is stored in the Windows registry as a text string, with each path
separated by a semicolon (;). This registry entry for support paths is also shared by the Windows
operating system. The problem occurs if the combined support path is very long (over 800
characters).
To avoid this problem, restrict the support file search path to paths that are required by the
software. To check the length of the support file search path for the Autodesk software, enter the
following AutoLISP® expression on the command line:
(strlen (getenv “ACAD”))
To resolve the problem, shorten either path, and then close and reopen the program.
The above will also be related to commands not being recognized.
Dock the command line in the lower or upper portion of the autocad screen, do not have it
floating. If the command line is not showing it can still have an impact if it was floating prior to
being made invisible. Hit Ctrl+9 to bring it back, if it is floating then dock it at the bottom of the
AutoCAD screen, then hit Ctrl+9 again.
“In AutoCAD 2009, 2010, enable the AutoCAD Classic workspace.
Dock any desktop element and make sure that none of the palettes are floating.
Turn off any unused palettes.
Update the graphics driver.”
Turn transparency off on tool palettes. Hover over a palette and right click, pick transparency,…
Use Cleanscreen (CTRL+0 toggles it off and on) to remove all palettes,
etc. and see if it makes a difference.
Close the new layer manager in 2009 and higher. Use LAYERDLGMODE set to 0.
TREEDEPTH at ‐2520 and SORTENTS at 20, or turn SORTENTS to 0 if a
large file and using draworder.
Manual Tune video driver ‐ Options, System, Performance Settings, Manual Tune, Driver Name
pulldown. Which one is showing? For vista Direct3D might be better. For XP pick the driver for
your card, mine is from nVidia so I have nvd3d9.hdi picked. Pick the Enable hardware acceleration
to see if that helps. Further down move the sliders over to the left.
Video Driver updates ‐ check for newer drivers for your card.
Viewres still affects the speed of the computer, contrary to what you may have been told.
Autodesk has confirmed this to me personally, especially so with MEP. Set it to 500 instead of the
maximum setting. Set cursor size to 10 or less.
Set ltscale to the proper value, a large drawing with linetypes will slow down when in MS with
ltscale set to 1 or a small value.
Too many fonts ‐ remove fonts that you don’t actually use, this will
speed up AutoCAD and the OS.
OS SETTINGS:
Does your computer have Blue tooth? A user reported a blue tooth phone placed near the
computer slowed the computer to a crawl, they moved the phone away and it sped back up.
Set the virtual memory paging file to a larger size with a min and max rather than letting windose
handle it for you. XP ‐ Control Panel, System Properties, Advanced, Performance Settings,
Advanced, Virtual Memory Change, Custom Size, Initial size = 3X ram (3GB ram = 9GB paging file
size), maximum size = 4X ram. Go larger if you have the hard drive space.
In the same area as immediately listed above, instead of Advanced tab pick Visual Effects tab, pick
adjust for best performance, then if you must go to custom and pick the few settings you can’t do
without.
Lower hardware acceleration setting, in Control panel, Display, settings, advanced, troubleshoot,
move the hardware acceleration slider to the left one click and try it out, keep moving it right and
watching for a change in performance and also fewer crashes. Find a setting you can live with.
ANTIVIRUS SOFTWARE:
Antivirus software ‐ disable and see if there is a difference in performance.
If the antivirus software allows you to, set AutoCAD to be ignored.
NETWORK:
What network software is being used?, there have been problems reported with some Novell
server systems, as well as others. If posting in the new groups be sure to mention the server
software.
Check the network card speed, is it 10/100 or a 1000? If your network is 1GB then a 1GB card will
speed things up.
OTHER IDEAS:
Go to autodesk.com web site, pick Services and Support, use the Knowledge Base and search on
“slow”, “delay”, etc.
filemon.exe how to use it to find where autocad is freezing http://cadpanacea.com/node/71
Disable digital signatures
1‐On your desktop, right‐click on any Autodesk Icon (i.e.: AutoCAD) and pick “Enable/Disable Digital
Signature Icon”.
2‐In the “Signature Validation Options” dialogue box, uncheck “Display digital signatures and
display special icons”.
3‐Restart your computer.
Full details at this link.
http://themadcadder.blogs.com/my_weblog/2005/01/diable_the_digi.html
Get rid of blank text
http://lynn.blogs.com/lynn_allens_blog/2007/09/an‐almost‐autum.html
In 2010 use –purge, e
Clean empty groups and unnamed groups out of drawing.
http://forums.augi.com/showthread.php?t=50895
Various tips from an AutoCAD expert.
http://blog.jtbworld.com/2008/09/autocad‐2009‐slow‐performance‐tips.html
Disable the communication center. From Tony Tanzillo
In AutoCAD 2010, you can disable the InfoCenter toolbar by opening the
registry, and going to the following key:
HKEY_CURRENT_USER\Software\Autodesk\AutoCAD\R18.0\ACAD-8001:409\InfoCenter
In that key there’s a value with the name “InfoCenterOn”.
Changing that value from 1 to 0 will disable the InfoCenter toolbar.
Use regedit to open this key:
HKEY_CURRENT_USER\Software\Autodesk\AutoCAD\R18.0\ACAD‐8001:409\Recent FileList
Make note of how many files in the list are at remote locations that are offline.
If you find a lot of them, that’s probably the issue.
from Tony Tanzillo, Autodesk.com NG’s

Unhandled e0434f4dh exception at 76beb727h

system:
win 7, 64 bit

software:
Civil 3D 2010
no updates applied

issue:
applied update 3, afterward opening a drawing caused the error:
Unhandled e0434f4dh exception at 76beb727h, and crashed the software.

resolution:
Click for Instructions Backing Up and Restoring My Software Settings
before doing this you may want to export your AutoCAD Civil 3D 2010 profile(s) (options dialogue box)
backup the following directory first if you are using:
XP
C:\Documents and Settings\\Application Data\Autodesk\C3D 2010
Vista / Win 7
C:\Users\\AppData\Roaming\Autodesk\C3D 2010

1 Log on to the workstation as the user.
2 On the Start menu (Windows), click Run.
3 In the Run dialog box, enter regedit.
a Back up your registry , file >> export
4 In the Registry Editor, locate the following subkey and delete it:
HKEY_CURRENT_USER\Software\Autodesk\AutoCAD\R18.0\ACAD-8000:409
5 Exit the Registry Editor.

now, double click on the desktop icon and launch the software, this will reset all the registry based options in the options dialogue box.

Secondary Installer AutoCAD LT 2010

Issue

To reset the default AutoCAD LT® 2010 user settings, you want to initiate the secondary installer.

Solution

To reset the AutoCAD LT 2010 default user settings, you must first delete your application files and registry entries for the program. Follow these steps:

Note: Make sure that you back up any customized AutoCAD LT 2010 files before starting this procedure. CLICK HERE FOR STEPS

1. Log on to the workstation as the user.
2. On the Start menu (Windows), click Run.
3. In the Run dialog box, enter regedit.
4. In the Registry Editor, locate the following subkey and delete it:

HKEY_CURRENT_USER\Software\Autodesk\AutoCAD LT\R15\ACADLT-8001:409

5. Exit the Registry Editor.
6. In XP using Windows Explorer, locate and delete the following application folders:

C:\Documents and Settings\\Application Data\Autodesk\AutoCAD LT 2010 (backup this directory first)
C:\Documents and Settings\\Local Settings\Application Data\Autodesk\AutoCAD LT 2010

7. In Vista / Windows 7

C:\Users\\AppData\Roaming\Autodesk\ AutoCAD LT 2010 (backup this directory first)
C:\Users\\AppData\Local\Autodesk\ AutoCAD LT 2010

The user should now be able to launch AutoCAD LT 2010. When the product is opened, the files and folders that were deleted will be recreated by the secondary installer.

Warning! Problems caused by improperly editing the Windows registry could render your computer operating system unusable. Microsoft provides a wealth of critical information that you need to know about the registry in the Microsoft Knowledge Base at http://support.microsoft.com/support.

Use the Microsoft® Registry Editor only at your own risk and only after backing up the registry as well as the system.dat and user.dat files as outlined for your operating system in the Microsoft Knowledge Base and in the related solution, TS66513. Additional information about the registry is also contained in the Help topics in the Microsoft Registry Editor.

Wblock – the file that is output is always in the 2011 DWG or DXF format

Issue:
I understand that when you use the WBLOCK command in AutoCAD Map 3D 2011, the file that is output is always in the 2011 DWG or DXF format — even if you select another format, such as 2004 or 2007.
I am sorry that you have had this trouble.

Known BUG:
This issue actually occurs because of a known code defect. The defect is present in the 2011 versions of AutoCAD and AutoCAD-based “vertical” applications.
We do not have any information about exactly when a fix for this defect will be released. Tentatively, this defect is planned to be fixed in the first major product update for each of the 2011 applications.

Workaround:
In the meantime, the recommended workaround is to use the command-line version of the command; that is, type -WBLOCK (with a hyphen in front) on the command line. The issue of the output file always being in the 2010 format occurs only when you use the dialog-based version of the command.
I have linked this Support Request to the entry for this defect in our database of product “change requests.” You might receive some automatically generated “change request” follow-up e-mail messages as a result.

The AutoCAD Map 3D 2010 installer launches when you start another application

Autodesk has provided the following Solution for this issue.  A customer has confirmed that it worked on multiple machines using multiple operating systems and RAM configurations in his office.

TS14174241

——-
Issue

When you launch an application that is not AutoCAD Map 3D 2010 you receive a message from the Windows Installer stating the following:

“Please wait while Windows configures AutoCAD Map 3D 2010.”

is displayed while the non Autodesk application is launched.

The Windows Application Log will also have this entry:

“Detection of product ‘{5783F2D7-8002-0409-0002-0060B0CE6BBA}’, feature ‘P’, component ‘{43DB808E-EDB6-4FBC-A37D-41E59D400FCA}’ failed. The resource ‘C:\Documents and Settings\All Users\Application Data\Autodesk\Geospatial Coordinate Systems Temp\Australia\Agd66\A66National(13.09.01).gsb’ does not exist.”

Solution

This attempt to heal Map 3D 2010 is benign and can be suppressed by following these instructions:

1. In Windows Explorer browse to:
XP: “C:\Documents and Settings\All Users\Application Data\Autodesk\”
Vista: “C:\ProgramData\Autodesk”
2. Right-click “Geospatial Coordinate Systems” and choose copy.
3. Right-click a blank space in the right pane and choose paste.
4. Wait until the copy process is complete.
5. Rename “Copy of Geospatial Coordinate Systems” to “Geospatial Coordinate Systems Temp”.

Note: that Vista protects this folder with extra security. An administrator will need to perform these steps.

AutoCAD MTEXT object causes excessive sluggishness / Crashing

issue:
singular large MTEXT object causing extreme performance degradation. The Text originates from a Word Doc, or from Notepad.

system: (varies)
XP, VISTA, WIN 7
32 bit and 64 bit
4 GB to 12GB RAM

Resolution:
The paste special to text worked so much better than pasting it into MText.

Research:
—part 1—

For a complex page composition sample like this, the video driver has to be optimized, the font has to be supported and Word’s export converter, mswrd632.wpc needs to be functioning correctly in order to paste the contents into a single Mtext block in AutoCAD and maintain expected performance.
On a 32-bit version of Win XP, I was able to reproduce the appearance of all the text as shown in Word by pasting special as AutoCAD entities in AutoCAD 2010. There was no delay as the cursor moved over the text or selected individual text lines. There were a few lines of text that were overlapping that needed adjustment. All text was single line or Dtext that is searchable and editable in AutoCAD
When I attempted to paste directly into AutoCAD as an OLE object from the clipboard, I received an alert message that ‘Word cannot start the converter mswrd632.wpc’. This message is caused by a security update from December 8, 2009. The OLE paste completed and I still didn’t have any delays in AutoCAD.
I then tested copying all three columns from Word that caused a slight delay in the Mtext editor. When I pasted one column into an Mtext block, there was no appreciable delay in the editor or after existing the Mtext editor.
Also, I noticed that the driver version 7.15.11.8246 is not listed in our Graphics Hardware List. That specific Quadro NVS 295 graphics card model is not listed among those tested by NVIDIA for use with AutoCAD. The nearest model in the list is an NVIDIA Quadro NVS 290 that recommends a non-certified driver version 8.16.0011.9166.
So, in summary, if you need the exact text appearance and fastest response, use the Paste Special as AutoCAD entities method. With the minor adjustments in text position, that will give the best performance.

—Research part 2—

The lengthy delay when editing the text that has been pasted into an MText block is caused by processing the complex formatting of the text from the Word document.
You’ll notice the message in the bottom left “Please wait, formatting text” as you resize columns or make any other significant changes like that.
AutoCAD is not optimized to perform full page text composition like Word can. The tests I described were based on the recognition of this, having attempted editing multi-column formatted text from external sources before. To be clear, I avoided this in the suggestions I last sent.
If you really need to maintain all the text in an Mtext multi-column text block then either create all the text in AutoCAD, or if you paste from Word or other external source, then select all the text, press Ctrl+Space to remove all character formatting, then the lengthy formatting process would be reduced and there would be far less delay.
Note: Ctrl+Space is a shortcut to remove character formatting. You can also select the text, right-click to ‘Remove Formatting’ and choose three options for removing formatting.
You can further increase response for this amount of formatted text once you have the appearance you need by exploding the Mtext block into Dtext.
I have attached a sample of this text block in a drawing ‘Sample pasted exploded.dwg’ that has been exploded after adjusting the columns as needed. To make adjusting the Mtext columns to match their appearance in Word easier, I changed the color of the text for columns one and three to reduce the need to zoom in and out as much.

AutoCAD MEP 2010 Pipe is being hidden by solid object on floor when in plan view

issue
The boxes are at floor level and the piping is approximately 8’6” above the floor. looking at plan view the boxes are hiding the pipe not the pipe hiding the boxes

software
AutoCAD MEP 2010,
Standalone,
No service packs applied

system
Win 7, 6GB, 64 bit

solution:
We have been working on your case about the solid object hiding the pipe at a higher elevation on AutoCAD MEP 2010 and have an answer.
Two things are accomplices working together to bring about this effect. Our MEP objects work with the displays like MEP Design. In plan view, our objects are not 3D, in fact they are 2D linework at 0 elevation. Ever try to orbit directly from plan view? Notice that everything looks flat up until you cancel the orbit command. Then suddenly it’s no longer plan view, and the objects spring up to be 3D? They are flat in plan for speed and efficiency. Second thing is the view is set to 3D Hidden. Our flat 2D 0 elevation linework is being hidden by the solid above.
To get around this, you have two choices. Don’t be in plan view, which agreeably is not much of a choice. Or open the Display Manager from the Manage tab of the Ribbon. In the tree on the left pane, expand on Configurations, then select on MEP Design but do not expand it. on the right pane, make sure you are on the Configuration tab. You should see Top, Bottom, left Right…Model. Top will currently be set to the MEP Design – Plan. Change that value to be MEP Design – Model. Ok out. The pipe will now be masking the solid below. The pipe will now be 3D in plan view.

Secondary Installer AutoCAD MEP 2010

Issue

To reset the default AutoCAD® MEP 2010 user settings, you want to reinitiate the secondary installer.

Solution

To reset the AutoCAD MEP 2010 default user settings, you must first delete your application files and registry entries for the program. Follow these steps:

Note: Make sure that you back up any customized AutoCAD MEP 2010 files before starting this procedure. CLICK HERE FOR STEPS

  1. Log on to the workstation as the user.
  2. On the Start menu (Windows), click Run.
  3. In the Run dialog box, enter regedit.
  4. In the Registry Editor, locate the following subkey and delete it:HKEY_CURRENT_USER\Software\Autodesk\AutoCAD\R18.0\ACAD-8006:409
  5. Exit the Registry Editor.

In Windows Explorer, locate and delete the following application folders:
XP:
C:\Documents and Settings\<user name>\Application Data\Autodesk\MEP 2010 (Copy and Paste this as a backup)

C:\Documents and Settings\<user name>\Local Settings\Application Data\Autodesk\MEP 2010

VISTA:

C:\Users\<user name>\AppData\Roaming\Autodesk\MEP 2010 ((Copy and Paste this as a backup)

C:\Users\<user name>\AppData\Local\Autodesk\MEP 2010

The user should now be able to launch AutoCAD MEP 2010. When the product is opened, the files and folders that were deleted will be recreated by the secondary installer.

Warning! Problems caused by improperly editing the Windows registry could render your computer operating system unusable. Microsoft provides a wealth of critical information that you need to know about the registry in the Microsoft Knowledge Base at http://support.microsoft.com/support.

Use the Microsoft® Registry Editor only at your own risk and only after backing up the registry as well as the system.dat and user.dat files as outlined for your operating system in the Microsoft Knowledge Base and in the related solution, TS66513. Additional information about the registry is also contained in the Help topics in the Microsoft Registry Editor.

Revit 2010 products hang at or before splash screen

TS15145616

Issue

When you launch a Revit® 2010 product it hangs at or before the splash screen.

Solution

This can occur because of a conflict with a Communication Center file. Delete the following file, if present on the workstation at the following location:

Windows XP

Autodesk Revit Architecture 2010
c:\Documents and Settings\%USERNAME%\Local Settings\Application Data\Autodesk\Revit\Autodesk Revit Architecture 2010\ENU\Components\WebServices\WSCommCntrData.xml

Autodesk Revit Structure 2010
c:\Documents and Settings\%USERNAME%\Local Settings\Application Data\Autodesk\Revit\Autodesk Revit Structure 2010\ENU\Components\WebServices\WSCommCntrData.xml

Autodesk Revit MEP 2010
c:\Documents and Settings\%USERNAME%\Local Settings\Application Data\Autodesk\Revit\Autodesk Revit MEP 2010\ENU\Components\WebServices\WSCommCntrData.xml

Windows Vista \ Windows 7

Autodesk Revit Architecture 2010
C:\Users\%username%\AppData\Local\Autodesk\Revit\Autodesk Revit Architecture 2010\ENU\Components\WebServices\WSCommCntrData.xml

Autodesk Revit Structure 2010
C:\Users\%username%\AppData\Local\Autodesk\Revit\Autodesk Revit Structure 2010\ENU\Components\WebServices\WSCommCntrData.xml

Autodesk Revit MEP 2010
C:\Users\%username%\AppData\Local\Autodesk\Revit\Autodesk Revit MEP 2010\ENU\Components\WebServices\WSCommCntrData.xml

Top 20 Technical Support Questions

Can you describe your problem?
What is the Software and Version you are using?
Are you using any 3rd party add ons?
Have you applied all the software updates, do you know how to check?
Let me verify your contact information EMAIL ADDRESS?
Could you provide me with some system information?
OS
RAM
Is this a networked or a standalone version?
Is your software crashing?
Do you have any error messages?
Could you send me a snapshot of this error message?
Is this issue predictable, can you trigger it on purpose?
Does this issue happen on other computers?
Does this issue happen in other drawings?
Could you send me the drawing(s) and see if I can reproduce your issue?
When did you first notice this happen? How long? Did it used to work?
Could you log in as someone else and see if it still happens?
If you go to another computer and log in as yourself does the error occur?

======== CUI Related================
Are you employing an enterprise CUI?
Have you been able to ever get user interface back, and if so, how?

Plotting Issues : Top 10 Questions To Ask

I understand that plotting a drawing from AutoCAD 2010 can take multiple hours before it starts plotting.
=================
I’d be happy to help you with this issue, but I’ll need some more information about it in order to start troubleshooting. Please answer the following questions:

1. What plotting device are you using?
2. What driver version are you using for it?
3. Is the plotter connected directly to the computer or over a network?
4. What OS are you working in? (XP SP3 32-bit, Vista Ultimate 64-bit, etc.)
5. What is the orthophoto file size?
6. How was the orthophoto inserted into the DWG (insert raster image, OLE, etc.)
7. Does the drawing show correctly in print preview?
8. Is the issue limited to just this drawing? If you insert this same orthophoto into a new drawing do you get the same issue when attempting to plot?
9. Do other raster images of comparable size work?
10. What are the spool settings on the Advanced tab in the Windows Properties of the plotter?

Applying Service Packs / Updates

Installation of Service Pack(s)

video: determining which service pack is installed on your Autodesk product.
http://screencast.com/t/vFgoXIEm

video: determining which service pack or update that made available from Autodesk.
http://screencast.com/t/Wn56G19QPp
I am working on this issue.  In the mean time please check to see if your Software is up to date:
Go to <Help> <About> <Product Info> <Service Packs> to determine.
Or…
You can go to <Start> <Control Panel> <Add/Remove Programs> <check the Updates checkbox> <look at your product  in the listing>

If you determine your software isn’t up to date, the instructions for making it so are provided below.

===========================
1) Download SP to your hard drive
2) Disable Anti-Virus
3) Close all open programs
4) Insert Product Install Disk into Disk Drive
a) When install page loads go ahead and close it down
b) We only need the presence of the disk in the disk drive
5) Double click on SP ( it self installs)

Secondary Installer AutoCAD 2010

Issue

To reset the default AutoCAD® 2010 user settings, you want to reinitiate the secondary installer.

Solution

To reset the AutoCAD 2010 default user settings, you must first delete your application files and registry entries for the program. Follow these steps:

Note: Make sure that you back up any customized AutoCAD 2010 files before starting this procedure, like your AutoCAD profiles (Options, Profile TAB). CLICK HERE FOR STEPS

  1. Log on to the workstation as the user.
  2. On the Start menu (Windows), click Run.
  3. In the Run dialog box, enter regedit.
  4. Backup your registry, FILE and then EXPORT
  5. In the Registry Editor, locate the following subkey and delete it: HKEY_CURRENT_USER\Software\Autodesk\AutoCAD\R18.0\ACAD-8001:409
  6. Exit the Registry Editor.
  7. In XP using Windows Explorer, locate and delete the following application folders:C:\Documents and Settings\<user name>\Application Data\Autodesk\AutoCAD 2010 (backup this directory first)
    C:\Documents and Settings\<user name>\Local Settings\Application Data\Autodesk\AutoCAD 2010
  8. In Vista / Windows 7

C:\Users\<username>\AppData\Roaming\Autodesk\ AutoCAD 2010 (backup this directory first)
C:\Users\<username>\AppData\Local\Autodesk\ AutoCAD 2010

The user should now be able to launch AutoCAD 2010. When the product is opened, the files and folders that were deleted will be recreated by the secondary installer.

Warning! Problems caused by improperly editing the Windows registry could render your computer operating system unusable. Microsoft provides a wealth of critical information that you need to know about the registry in the Microsoft Knowledge Base at http://support.microsoft.com/support.

Use the Microsoft® Registry Editor only at your own risk and only after backing up the registry as well as the system.dat and user.dat files as outlined for your operating system in the Microsoft Knowledge Base and in the related solution, TS66513. Additional information about the registry is also contained in the Help topics in the Microsoft Registry Editor.

Microsoft End of Support

We would like to make you aware of important news regarding certain versions of Windows that could affect your computers and servers. On July 13, Microsoft support—including the release of new security updates—will end for Windows XP Service Pack 2 (SP2), Windows 2000 Server and Windows 2000 Professional. It is also important to note that support for Windows Vista Release to Manufacturing (or RTM, as it is commonly referred to, which indicates the original version without any service packs installed) ended on April 13.
KEY DATES
Product End of Support (EOS) Date
Windows Vista RTM April 13, 2010
Windows XP SP2
Windows 2000 Professional
Windows 2000 Server
July 13, 2010
WHAT DOES THIS MEAN FOR YOU?
Microsoft will stop providing incident support and will not release new updates, including security updates.
Running an unsupported version of Windows could be harder to manage, expensive to maintain, and could expose your business and your customers to business and regulatory risks.
Running an unsupported version of Windows could represent a security threat—Microsoft will no longer release new security updates for vulnerabilities discovered after EOS.
WHAT SHOULD YOU DO?
1) Upgrade to the latest version of the operating system
Windows 7 and Windows Server 2008 R2 provide you with platforms designed to address the current business and security environment.
2) Install the most current service pack
If you have computers that are not ready to move to Windows 7, then apply the most current service pack to continue to receive updates and support.
For Windows Vista support and updates, apply Service Pack 2.
For Windows XP support and updates, apply Service Pack 3 (SP3).
If you have Premier Support, these benefits can be used toward Windows XP SP3 migration and patch management.
There are no service pack upgrade options for Windows 2000 Server or Windows 2000 Professional.
To learn more about your end-of-support options, contact your Microsoft Certified Partner, or visit windows.microsoft.com/eos.

Secondary Installer AutoCAD MEP 2008

Issue
To reset the default AutoCAD® MEP 2008 user settings, you want to reinitiate the secondary installer.

Solution
To reset the AutoCAD MEP 2008 default user settings, you must first delete your application files and registry entries for the program. Follow these steps:
Note: Make sure that you back up any customized AutoCAD MEP 2008 files before starting this procedure. CLICK HERE FOR STEPS

1. Log on to the workstation as the user.
2. On the Start menu (Windows), click Run.
3. In the Run dialog box, enter regedit.
4. In the Registry Editor, locate the following subkey and delete it:
HKEY_CURRENT_USER\Software\Autodesk\AutoCAD\R17.1\ACAD-6006:409
5. Exit the Registry Editor.

In Windows Explorer, locate and delete the following application folders:

XP:
C:\Documents and Settings\\Application Data\Autodesk\ ACD-MEP 2008 (Copy and Paste this as a backup)
C:\Documents and Settings\\Local Settings\Application Data\Autodesk\ ACD-MEP 2008

VISTA:
C:\Users\\AppData\Roaming\Autodesk\ ACD-MEP 2008 (Copy and Paste this as a backup)
C:\Users\\AppData\Local\Autodesk\ ACD-MEP 2008

The user should now be able to launch AutoCAD MEP 2008. When the product is opened, the files and folders that were deleted will be recreated by the secondary installer.

Warning! Problems caused by improperly editing the Windows registry could render your computer operating system unusable. Microsoft provides a wealth of critical information that you need to know about the registry in the Microsoft Knowledge Base at http://support.microsoft.com/support.

Use the Microsoft® Registry Editor only at your own risk and only after backing up the registry as well as the system.dat and user.dat files as outlined for your operating system in the Microsoft Knowledge Base and in the related solution, TS66513. Additional information about the registry is also contained in the Help topics in the Microsoft Registry Editor.

Please Stand By: Current Issues Being Researched

this represents a small subset of the issues that are under investigation currently. When they are resolved I plan on posting the issue with full description of both the problem and its resolution.

1===============
Grip/select/hover over PLINES or Alignments causes object to appear to shift
Resolution: Disable Hardware Acceleration in AutoCAD or AutoCAD vertical.
2===============
Unable to Install Object Enabler Raster Design 2011 PERIOD
Resolution:
I had turned off the “welcome Screen” in my deployment packages. Apparently, that was preventing RD OE from installing. When I turned the welcome screen on, it worked fine.
3===============
One MTEXT object causes excessive sluggishness in AutoCAD
Resolution:
see post in “Support Cases” category for current status of research on this issue

Create a “Truly” ADMIN Account on XP

here is the steps one needs to follow to create “truly” Admin account on XP.  Please note that often times even though a new user can be a member of admin group, the account might have restricted permissions.

To Create a new admin account:
1.go to > Start > Setting > Control Panel
2.Swithch to Classic View
3.double click on User Accounts applet
4.click on Advanced tab, and then again Advanced
5.Local Users and Groups management console will open
6.right click on Users and then select New User in pop up window
7.fill out the required filed: user name, password, etc and then click Create, and then Close
8.now right click on the newly create user account (you should see it in right window in Users and Groups management)
9.select Properties form the pop up windows
10.click on Member Of tab
11.click on Add
12.in the Select Groups window, under ‘Enter the object names to select’, type Administrators and click on ‘Check Names’ tab.
13.the_computer_name\Administrators should show up in the ‘Enter the object names to select’ box
14.click OK, OK several times
15.close Local Users and Groups management console
16.click OK to close User Accounts window
17.open User Accounts window
18.under Users, select the newly created admin user account
19.click Properties > Group Membership
20.under What level of access do you want to grant this user?
21.here you need to make sure that ‘Restricted user’ radio button is not selected.
22.select Other and then choose Administrators in drop down lost.
23.click Ok a couple of times to close the window
24.restart the computer (XP) and login is as the new admin

Windows User Profile Naming Conventions

A user name cannot be identical to any other user or group name on the computer being administered. It can contain up to 20 uppercase or lowercase characters, except for the following:

” / \ [ ] : ; | = , + * ? < >

A user name cannot consist solely of periods (.) or spaces.

Reboot into Diagnostic Startup and Create a new, local admin account to test from

Since the standard solutions for this issue didn’t work, there are a few tests that I’d like to run. Please try the following:

1.     Reboot into Diagnostic Startup. This will ensure that programs running in the background aren’t conflicting with the installer. This document can walk you through the process:

boot up in diagnostic mode

2.     Create a new, local admin account to test from. This will have a new set of permissions and make sure that the domain setup isn’t causing the problem. The steps are in these links:

create a new admin account on XP

3.     Use the original media – DVD or download – to install the program. This will tell us if the system is having trouble reading the customized deployment.

Land Desktop Companion 2009 w/ Raster Design 2009 Deployment on 64 bit OS

Solution from Autodesk Technical Support:

Separate 64-bit and 32-bit deployments need to be made so that the installer can detect the operating system type and complete an install.

For AutoCAD Civil 3D Land Desktop Companion 2009, which is only available as a 32-bit application, this means they need to choose the 64-bit radio button and create a 64-bit deployment. If they have a mixture of 32-bit and 64-bit operating systems they will need both a 32-bit and a 64-bit deployment. It is common for example to name the Deployment LDC2009-32 for 32-bit and LDC2009-64 for 64-bit or some similar naming convention designating the bit type. Both deployments are required even though the end result is a 32-bit version of AutoCAD on both 32-bit and 64-bit operating systems.

The same is true for AutoCAD Raster Design yet a little more complicated as three deployments should be made for a mixed environment that includes AutoCAD Map 3D 2009, AutoCAD Civil 3D 2009, AutoCAD Civil 3D Land Desktop Companion 2009:

  • For 32-bit AutoCAD Raster Design on 32-bit versions of AutoCAD on 32-bit operating systems make a 32-bit deployment.
  • For 64-bit AutoCAD Raster Design on 64-bit versions of AutoCAD on 64-bit operating systems make a 64-bit deployment.
  • For 32-bit AutoCAD Raster Design on 32-bit versions of AutoCAD (AutoCAD Map 3D 2009, AutoCAD Civil 3D 2009, AutoCAD Civil 3D Land Desktop Companion 2009) on 64-bit operating systems make a special 32-bit deployment. When I do this I name this deployment something like “ARD2009for32bitACADon64bitOS” to distinguish it from ARD2009-32 and ARD2009-64, for example. There is a technical solution which requires the modification of the Setup.ini to create this special deployment. The URL is http://support.autodesk.com/getdoc.asp?id=TS1083246.

It is important to note that with 64-bit operating systems AutoCAD Raster Design 2009 cannot be installed as both 32-bit and 64-bit. Therefore the customer will need to choose which version of AutoCAD they install it on if they are installing mixed versions of AutoCAD. For example on a with AutoCAD 2009 (64-bit) and AutoCAD Civil 3D 2009 (32-bit) both installed on the same computer customers usually install the 32-bit version of AutoCAD Raster Design 2009 so that they have raster imagery functionality with AutoCAD Civil 3D 2009.

That all said when Installing AutoCAD Civil 3D Land Desktop Companion 2009 and AutoCAD Raster Design 2009 on a 64-bit operating system they would install the deployment named LDC2009-64 for AutoCAD Civil 3D Land Desktop Companion 2009, then install the deployment named ARD2009for32bitACADon64bitOS for AutoCAD Raster Design 2009.

Registry Keys for Autodesk Navisworks 2010 Uninstalls

Autodesk TS Doc

Issue

When you try to install Navisworks®, the installer lists Navisworks as already being installed, even though it is not. As a result, you are unable to install Navisworks.

Solution

An incomplete uninstall can sometimes leave residual registry keys that may cause the Navisworks installer to detect incorrectly that Navisworks has already been installed.

To resolve this issue, remove the following key from the Windows Registry:

HKEY_LOCAL_MACHINE\SOFTWARE\Classes\Installer\Products\39497741D131AAB48BF792993B746F9A

Once you have done so, you can proceed with the installation.

Warning! Problems caused by improperly editing the Windows Registry could render your computer operating system unusable. Microsoft provides a wealth of critical information that you need to know about the registry in the Microsoft Knowledge Base.

Use the Microsoft Registry Editor only at your own risk and only after backing up the registry as well as the system.dat and user.dat files as outlined for your operating system in the Microsoft Knowledge Base and in the related Autodesk solution, TS66513. Additional information about the registry is also contained in the Help topics in the Microsoft Registry Editor.

Registry Entries for Autodesk® NavisWorks® Manage 2009 Uninstalls

Autodesk TS Doc

Your installation has become corrupted and you were unable to uninstall or reinstall the program.

To resolve this issue, you need to remove specific Windows registry entries that are causing the installer to detect that NavisWorks is already installed. Follow these steps:

  1. Click Start menu (Windows) > Run.
  2. In the Run dialog box, enter regedit and click OK.
  3. Locate and delete the following registry keys: 

    HKEY_LOCAL_MACHINE\SOFTWARE\Classes\Installer\Products\DAB390B81B325E140B6745A393D0C030

    HKEY_LOCAL_MACHINE\SOFTWARE\Microsoft\Windows\CurrentVersion\Installer\UserData\S-1-5-18\Products\DAB390B81B325E140B6745A393D0C030

    HKEY_LOCAL_MACHINE\SOFTWARE\Microsoft\Windows\CurrentVersion\Uninstall\{8B093BAD-23B1-41E5-B076-543A390D0C03

    HKEY_LOCAL_MACHINE\SOFTWARE\Microsoft\Windows\CurrentVersion\Uninstall\InstallShield_{8B093BAD-23B1-41E5-B076-543A390D0C03}

Once you have removed these keys, you should be able to reinstall NavisWorks.

Warning! Problems caused by improperly editing the Windows Registry could render your computer operating system unusable. Microsoft provides a wealth of critical information that you need to know about the registry in the Microsoft Knowledge Base.

Use the Microsoft Registry Editor only at your own risk and only after backing up the registry as well as the system.dat and user.dat files as outlined for your operating system in the Microsoft Knowledge Base and in the related Autodesk solution, TS66513. Additional information about the registry is also contained in the Help topics in the Microsoft Registry Editor.

Dymanic Zoom in Outlook, Word, IE

Is your text in windows applications too large.  Try holding down your CNTRL key and scroll your wheel on your mouse.  This has the effect of changing your Viewing scale of what your looking at.

Secondary Installer AutoCAD Architecture 2007 : Autodesk Architectural Desktop 2007

Issue

To reset the default Autodesk Architectural Desktop  2007 user settings, you want to reinitiate the secondary installer.

Solution

To reset the Autodesk Architectural Desktop 2007 default user settings, you must first delete your application files and registry entries for the program. Follow these steps:

Note: Make sure that you back up any customized AutoCAD 2007 files before starting this procedure. CLICK HERE FOR STEPS

  1. Log on to the workstation as the user.
  2. On the Start menu (Windows), click Run.
  3. In the Run dialog box, enter regedit.
  4. In the Registry Editor, locate the following subkey and delete it:HKEY_CURRENT_USER\Software\Autodesk\AutoCAD\R17.0\ACAD-5004:409
  5. Exit the Registry Editor.
  6. In Windows Explorer, locate and delete the following application folders:C:\Documents and Settings\<user name>\Application Data\Autodesk\ADT 2007 (backup this directory first)
    C:\Documents and Settings\<user name>\Local Settings\Application Data\Autodesk\ADT 2007

The user should now be able to launch Autodesk Architectureal Desktop 2007. When the product is opened, the files and folders that were deleted will be recreated by the secondary installer.

Warning! Problems caused by improperly editing the Windows registry could render your computer operating system unusable. Microsoft provides a wealth of critical information that you need to know about the registry in the Microsoft Knowledge Base at http://support.microsoft.com/support.

Use the Microsoft® Registry Editor only at your own risk and only after backing up the registry as well as the system.dat and user.dat files as outlined for your operating system in the Microsoft Knowledge Base and in the related solution, TS66513. Additional information about the registry is also contained in the Help topics in the Microsoft Registry Editor.

Secondary Installer AutoCAD 2007

Issue

To reset the default AutoCAD® 2007 user settings, you want to reinitiate the secondary installer.

Solution

To reset the AutoCAD 2007 default user settings, you must first delete your application files and registry entries for the program. Follow these steps:

Note: Make sure that you back up any customized AutoCAD 2007 files before starting this procedure. CLICK HERE FOR STEPS

  1. Log on to the workstation as the user.
  2. On the Start menu (Windows), click Run.
  3. In the Run dialog box, enter regedit.
  4. In the Registry Editor, locate the following subkey and delete it:
  5. HKEY_CURRENT_USER\Software\Autodesk\AutoCAD\R17.0\ACAD-5001:409
  6. Exit the Registry Editor.
  7. In Windows Explorer, locate and delete the following application folders:
  8. C:\Documents and Settings\<user name>\Application Data\Autodesk\AutoCAD 2007 (backup this directory first)
    C:\Documents and Settings\<user name>\Local Settings\Application Data\Autodesk\AutoCAD 2007

The user should now be able to launch AutoCAD 2007. When the product is opened, the files and folders that were deleted will be recreated by the secondary installer.

Warning! Problems caused by improperly editing the Windows registry could render your computer operating system unusable. Microsoft provides a wealth of critical information that you need to know about the registry in the Microsoft Knowledge Base at http://support.microsoft.com/support.

Use the Microsoft® Registry Editor only at your own risk and only after backing up the registry as well as the system.dat and user.dat files as outlined for your operating system in the Microsoft Knowledge Base and in the related solution, TS66513. Additional information about the registry is also contained in the Help topics in the Microsoft Registry Editor.

Perform Status Enquiry – Will Not Read License File Properly

If you are experiencing problems with the Server Status tab > Perform Status Enquiry, make sure that the “LMTOOLS Ignores License File Path Environment Variables” option is selected on the Service/License File tab and run the Status Enquiry again. In many cases this will correct erroneous Status Enquiries.

Subscription Center Information SN# and Product Keys

Subscription Customers may have questions about accessing their 2011 software downloads. Here’s how the process works:

Subscription customers who are in the role of Software Coordinator will receive an email as soon as their serial number hasbeen upgraded after the release of the 2011 product. The email, which is sent from Download@autodesksubscription.com, contains the customer’s serial number and the product key, which is needed for installation. Please remind your customers to check their junk/spam folders for mail coming from Download@autodesksubscription.com because the emails sometimes end up there.

Customers can also access their serial number and product key directly from the Subscription Center > Contract
Administration > Coverage Report tab.

Customers who are experiencing problems with their Subscription upgrade can contact the Business Center at subscription-team@autodesk.com.

Action: For questions or problems signing in to Subscription Center, get immediate information by accessing the “Get HelpSigning in to Subscription Center” button located on the Sign in to Subscription Center page.

Contact: subscription-team@autodesk.com

The system cannot find the path specified error when Creating Administrative Images for Custom Network Deployments with Map 3D 2011

Autodesk has provided a tech source (TS##)  resolution document for this issue:  I have posted the description of the issue.  Click the following link to view it.

TS15173935

Issue Description:

When creating a Deployment, with the Deployment Wizard, you receive an error message saying:

The system cannot find the path specified

Failed to copy the following files:

\\HostComputer\ShareName\…\DeploymentName\AdminImage\x**\en-US\acad\Acad\Program Files\Root\HelpHTML\*.*

To

<<Custom Support Files network share location>>

Where x** is x86 for 32-bit Deployments and x64 is for 64-bit Deployments.

Network deployment fails when installing AutoCAD Map 3D 2011 Language Pack

TS15079870

Issue:

When creating a custom or modified administrative image for a network deployment you must copy the HelpHTML folder and files to the administrative image from the media DVD. Otherwise you cannot install a network deployment; the install process will unexpectedly fail when it starts installing the AutoCAD Map 3D Language Pack.

Solution:

After you create the administrative image copy the <media>:\X86\EN-US\ACAD\ACAD\PROGRAM FILES\ROOT\HELPHTML folder to the \\HostComputer\ShareName\…\DeploymentName\AdminImage\X86\EN-US\ACAD\ACAD\PROGRAM FILES\ROOT\ folder. You can now begin to install a network deployment.

Customer Choice Blogs -You can Help Add To this List

AutoCAD Civil 3D

Civil Engineering Resource CenterAutodesk
Being Civil – Almas Suljevic, Jason Hickey, Justin Ziemba, Seth Hall
BIM on the Rocks – Dana Probert
Civil—Made in France – Willy Luce
From the Ground Up – Ove Cervin, Jack Strongitharm
The Dirt – Pete Kelsey

AutoCAD Map 3D
Between the Poles – Geoff Zeiss
CADnGIS – Neal Niemiec
GeoExpressions – Mike Schlosser
Geospatial—Made in France – Gwenaël Bachelot
GIS Exchange – Katie Jacques
The Geospatial Navigator – Matthias Liechti, Marcus Briglmeir

AutoCAD Revit (Architecture, MEP, Structure)
Revit Arch
Revit Structure
Revit MEP
Revit General

Setting the 3GB Switch for Vista and Win 7

Click the following link for an Autodesk Tech source document for instructions.
=======================================

You want to enable the 3GB switch on the Windows Vista™ or Windows 7 operating systems.

To enable the 3GB switch on Windows Vista™ or Windows 7:

  1. Right-click Command Prompt in the Accessories program group of the Start menu. Click Run as Administrator.
  2. At the command prompt, enter “bcdedit /set IncreaseUserVa 3072”
  3. Restart the computer.

To disable the 3GB switch:

  1. Right-click on Command Prompt in the Accessories program group of the Start menu. Click Run as Administrator.
  2. At the command prompt, enter “bcdedit /deletevalue IncreaseUserVa”
  3. Restart the computer.

For more information on the 3GB switch, refer to the following Microsoft MSDN article:

http://msdn.microsoft.com/en-us/library/ff556232.aspx

3ds Max does not launch no messaging no splashscreen

Issue:

3DS Max would not launch on a 32 bit operating system.
Double click on the desktop icon and nothing happened.
No hour glass, no hard drive activity, no error message,
No splash screens, absolutely nothing.

Solution:

created an exclusion group in their Symantec Antivirus and then it loads.

Interesting Point:

Anti-virus cannot be overlooked for causing havoc with Autodesk software.

Enable 3GB Switch on XP

Enabling the 3GB Switch (ON XP)
1.    Right-click My Computer. Click Properties.
2.    In the System Properties dialog box, click the Advanced tab.
3.    On the Advanced tab, under Startup and Recovery, click Settings.
4.    In the Startup and Recovery dialog box, under System startup, click Edit. The Windows boot.ini file will be opened in Notepad.
5.    Save a renamed copy of your boot.ini file somewhere on your computer in case you need to revert back to your original version of the file. Note: Boot.ini files may be different from computer to computer.
6.    Highlight the following line in the boot.ini file:
multi(0)disk(0)rdisk(0)partition(2)\WINDOWS=”Microsoft Windows XP Professional” /fastdetect
7.    Copy (Ctrl-C) and paste (Ctrl-V) the line just below the original. Note: Your exact text string may be different from the text string in this document. So be sure to copy the text string from your boot.ini file, not the text string shown here.
8.    Modify the copied line to include “ /3GB”, as shown in the example below. Note: Do not overwrite any existing lines.
multi(0)disk(0)rdisk(0)partition(2)\WINDOWS=”Microsoft Windows XP Professional 3GB” /3GB /fastdetect
9.    Save the boot.ini file and close Notepad.
10.    Click OK to close each dialog box.
11.    Reboot your computer.
12.    During startup, select the 3GB option. If you do not select the 3GB option, the system will default to the 2GB total memory setting.
NOTE: If there are problems at startup, you may need to update some of your drivers.

Civil 3D 2011 : survey tab does not layer things correctly

The Link for the File is not provided here because of the impending release of the hotfix.  see below note from Autodesk Technical Support:

====================================

The issue you have described in a known issue for which the development is about to provide the permanent fix in the next few days. Here is a fixed version of the AeccSurvey.dbx (x64).  If you need this fixed for your presentation any time this week we can provide you an official fix but you would need to know that this needs to be removed before you apply an official hotfix (which will include other fixes, too) because if this is not removed installer will be unable to apply the hotfix since the file has changed. So, make certain you backup your original AeccSurvey.dbx before you drop this new .dbx in. Here are the steps:

1.     Go to C:\Program Files\Autodesk\AutoCAD Civil 3D 2011
2.     Right-click on AeccSurvey.dbx file and rename it to AeccSurvey.dwb.old
3.     Copy the attached AecSurvey.dbx into C:\Program Files\Autodesk\AutoCAD Civil 3D 2011
4.     Restart Civil 3D 2011

Secondary Installer AutoCAD 2011

Issue

To reset the default AutoCAD® 2011 user settings, you want to reinitiate the secondary installer.

Solution

To reset the AutoCAD 2011 default user settings, you must first delete your application files and registry entries for the program. Follow these steps:

Note: Make sure that you back up any customized AutoCAD 2011 files before starting this procedure. CLICK HERE FOR STEPS
========================
1. Log on to the workstation as the user.
2. On the Start menu (Windows), click Run.
3. In the Run dialog box, enter regedit.
4. In the Registry Editor, locate the following subkey and delete it:
HKEY_CURRENT_USER\Software\Autodesk\AutoCAD\R18.1\ACAD-9001:409
5. Exit the Registry Editor.
====================
In Windows Explorer, locate and delete the following application folders:
XP:
C:\Documents and Settings\user id\Application Data\Autodesk\AutoCAD 2011 (Copy and Paste this as a backup)
C:\Documents and Settings\user id\Local Settings\Application Data\Autodesk\AutoCAD 2011
VISTA / WIN 7:
C:\Users\user id\AppData\Roaming\Autodesk\AutoCAD 2011((Copy and Paste this as a backup)
C:\Users\user id\AppData\Local\Autodesk\AutoCAD 2011

The user should now be able to launch AutoCAD 2011. When the product is opened, the files and folders that were deleted will be recreated by the secondary installer.

Warning! Problems caused by improperly editing the Windows registry could render your computer operating system unusable. Microsoft provides a wealth of critical information that you need to know about the registry in the Microsoft Knowledge Base at http://support.microsoft.com/support.

Use the Microsoft® Registry Editor only at your own risk and only after backing up the registry as well as the system.dat and user.dat files as outlined for your operating system in the Microsoft Knowledge Base and in the related solution, TS66513. Additional information about the registry is also contained in the Help topics in the Microsoft Registry Editor.

Secondary Installer AutoCAD Architecture 2009

Issue

To reset the default AutoCAD Architecture 2009 user settings, you want to reinitiate the secondary installer.

Solution

To reset the AutoCAD Architecture 2009 default user settings, you must first delete your application files and registry entries for the program. Follow these steps:

Note: Make sure that you back up any customized AutoCAD Architecture 2009 files before starting this procedure. CLICK HERE FOR STEPS

  1. Log on to the workstation as the user.
  2. On the Start menu (Windows), click Run.
  3. In the Run dialog box, enter regedit.
  4. In the Registry Editor, locate the following subkey and delete it:

    HKEY_CURRENT_USER\Software\Autodesk\AutoCAD\R17.2\ACAD-7004:409

  5. Exit the Registry Editor.
  6. In Windows Explorer, locate and delete the following application folders:

XP———————————————

C:\Documents and Settings\<user name>\Application Data\Autodesk\ ACD-A 2009 (copy this directory as a backup first)

C:\Documents and Settings\<user name>\Local Settings\Application Data\Autodesk\ ACD-A 2009

VISTA—————————————-

C:\Users\\<user name>\\AppData\Roaming\Autodesk\ ACD-A 2009 (copy this directory as a backup first)

C:\Users\\<user name>\\AppData\Local\Autodesk\ ACD-A 2009

The user should now be able to launch AutoCAD Architecture 2009. When the product is opened, the files and folders that were deleted will be recreated by the secondary installer.

Warning! Problems caused by improperly editing the Windows registry could render your computer operating system unusable. Microsoft provides a wealth of critical information that you need to know about the registry in the Microsoft Knowledge Base at http://support.microsoft.com/support.

Use the Microsoft® Registry Editor only at your own risk and only after backing up the registry as well as the system.dat and user.dat files as outlined for your operating system in the Microsoft Knowledge Base and in the related solution, TS66513. Additional information about the registry is also contained in the Help topics in the Microsoft Registry Editor.

2011 Materials Library Uninstall Order

The Materials Libraries that get installed with 2011 products need to be uninstalled in a specific order, the largest to the smallest.  It should be noted that these are shared libraries for 2011 suite of products.  Uninstalling them without uninstalling the products using them would cause issues with those installations.

there are 3 libraries that may be present in Add/Remove Programs or Programs and Features
========================================
Autodesk Material Library 2011 Medium Image library – this is the largest it should be uninstalled first.
Autodesk Material Library 2011 Base Image library – this is the next largest it should be uninstalled second
Autodesk Material Library 2011 – this should be the smallest library and should be uninstalled last
=========================================

Converting Existing Revit Products Standalone Installations to Network

How to convert an existing revit standalone installation into a networked version.

Video NOTE:This video will work better with Internet Explorer. An add in may be required if another browser is used
http://www.screencast.com/t/ZDU0MDhiOD

Secondary Installer AutoCAD Map 3D 2011

Issue

To reset the default AutoCAD® Map 3D 2011 user settings, you want to reinitiate the secondary installer.

Solution

To reset the AutoCAD Map 3D 2011 default user settings, you must first delete your application files and registry entries for the program. Follow these steps:

Note: Make sure that you back up any customized AutoCAD Map 3D 2011 files before starting this procedure. CLICK HERE FOR STEPS
========================
1. Log on to the workstation as the user.
2. On the Start menu (Windows), click Run.
3. In the Run dialog box, enter regedit.
4. In the Registry Editor, locate the following subkey and delete it:
HKEY_CURRENT_USER\Software\Autodesk\AutoCAD\R18.1\ACAD-9002:409
5. Exit the Registry Editor.
====================
In Windows Explorer, locate and delete the following application folders:
XP:
C:\Documents and Settings\\Application Data\Autodesk\AutoCAD Map 3D 2011 (Copy and Paste this as a backup)
C:\Documents and Settings\\Local Settings\Application Data\Autodesk\AutoCAD Map 3D 2011
VISTA / WIN 7:
C:\Users\\AppData\Roaming\Autodesk\AutoCAD Map 3D 2011((Copy and Paste this as a backup)
C:\Users\\AppData\Local\Autodesk\AutoCAD Map 3D 2011

Warning! Problems caused by improperly editing the Windows registry could render your computer operating system unusable. Microsoft provides a wealth of critical information that you need to know about the registry in the Microsoft Knowledge Base at http://support.microsoft.com/support.

Use the Microsoft® Registry Editor only at your own risk and only after backing up the registry as well as the system.dat and user.dat files as outlined for your operating system in the Microsoft Knowledge Base and in the related solution, TS66513. Additional information about the registry is also contained in the Help topics in the Microsoft Registry Editor.

HOTFIX AutoCAD Architecture 2011 – Trim Crash : Fixed in Product Update 1

Trim Hotfix

Click for AutoCAD Architecture Updates

=============================
Published date: 2010-May-13
ID: DL15140123Applies to:
AutoCAD® Architecture 2011
AutoCAD® MEP 2011
trim_aca_mep_hotfix_32bit.zip (zip – 549Kb)
trim_aca_mep_hotfix_64bit.zip (zip – 570Kb)
Readme (html – 4Kb)

This hotfix repairs a problem that causes AutoCAD Architecture 2011 and AutoCAD MEP 2011 to crash while trimming entities. The problem is sometimes triggered by other modifications such as Fillet, Chamfer, and Extend.


Secondary Installer AutoCAD Civil 3D 2010

Issue

To reset the default AutoCAD Civil 3D 2010 user settings, you want to reinitiate the secondary installer.

Solution

To reset the AutoCAD Civil 3D 2010 default user settings, you must first delete your application files and registry entries for the program. Follow these steps:
Note: Make sure that you back up any customized AutoCAD Civil 3D 2010 files before starting this procedure.  It is recommended that you export out your profiles (options, profile tab, export). CLICK HERE FOR STEPS

  1. Log on to the workstation as the user.
  2. On the Start menu (Windows), click Run.
  3. In the Run dialog box, enter regedit.
  4. back up your registry by choosing file pulldown and then export.
  5. In the Registry Editor, locate the following subkey and delete it:
    HKEY_CURRENT_USER\Software\Autodesk\AutoCAD\R18.0\ACAD-8000:409
  6. Exit the Registry Editor.
  7. In XP Windows Explorer, locate and delete the following application folders:
    C:\Documents and Settings\<user name>\Application Data\Autodesk\C3D 2010 (backup this directory first)
    C:\Documents and Settings\<user name>\Local Settings\Application Data\Autodesk\C3D 2010
  8. In Vista / Windows 7
  9. C:\Users\<username>\AppData\Roaming\Autodesk\C3D 2010 (backup this directory first)
    C:\Users\<username>\AppData\Local\Autodesk\C3D 2010

The user should now be able to launch AutoCAD Civil 3D 2010. When the product is opened, the files and folders that were deleted will be recreated by the secondary installer.

Warning! Problems caused by improperly editing the Windows registry could render your computer operating system unusable. Microsoft provides a wealth of critical information that you need to know about the registry in the Microsoft Knowledge Base at http://support.microsoft.com/support.
Use the Microsoft® Registry Editor only at your own risk and only after backing up the registry as well as the system.dat and user.dat files as outlined for your operating system in the Microsoft Knowledge Base and in the related solution, TS66513. Additional information about the registry is also contained in the Help topics in the Microsoft Registry Editor.

Secondary Installer AutoCAD Architecture 2011

Issue

To reset the default AutoCAD® Architecture 2011 user settings, you want to reinitiate the secondary installer.

Solution

To reset the AutoCAD Architecture 2011 default user settings, you must first delete your application files and registry entries for the program. Follow these steps:

Note: Make sure that you back up any customized AutoCAD Architecture 2011 files before starting this procedure. CLICK HERE FOR STEPS
========================
1. Log on to the workstation as the user.
2. On the Start menu (Windows), click Run.
3. In the Run dialog box, enter regedit.
4. In the Registry Editor, locate the following subkey and delete it:
HKEY_CURRENT_USER\Software\Autodesk\AutoCAD\R18.1\ACAD-9004:409
5. Exit the Registry Editor.
====================
In Windows Explorer, locate and delete the following application folders:
XP:
C:\Documents and Settings\\Application Data\Autodesk\ACA 2011 (Copy and Paste this as a backup)
C:\Documents and Settings\\Local Settings\Application Data\Autodesk\ACA 2011
VISTA / WIN 7:
C:\Users\\AppData\Roaming\Autodesk\ACA 2011 ((Copy and Paste this as a backup)
C:\Users\\AppData\Local\Autodesk\ACA 2011

The user should now be able to launch AutoCAD Architecture 2011 . When the product is opened, the files and folders that were deleted will be recreated by the secondary installer.

Warning! Problems caused by improperly editing the Windows registry could render your computer operating system unusable. Microsoft provides a wealth of critical information that you need to know about the registry in the Microsoft Knowledge Base at http://support.microsoft.com/support.

Use the Microsoft® Registry Editor only at your own risk and only after backing up the registry as well as the system.dat and user.dat files as outlined for your operating system in the Microsoft Knowledge Base and in the related solution, TS66513. Additional information about the registry is also contained in the Help topics in the Microsoft Registry Editor.

Autodesk Network License Manager IPv6 Support for Windows (2010 & 2011)

This Tech Source Document that is documented to work with 2010 products also works with 2011 products. Autodesk has not updated the “Applies To” listing to include the 2011 suite of products.

http://usa.autodesk.com/adsk/servlet/ps/dl/item?siteID=123112&id=10976858&linkID=9240978

Secondary Installer AutoCAD Civil 3D 2011

Issue
To reset the default AutoCAD Civil 3D 2011 user settings, you want to reinitiate the secondary installer.

Solution
To reset the AutoCAD Civil 3D 2011 default user settings, you must first delete your application files and registry entries for the program. Follow these steps:

Note: Make sure that you back up any customized AutoCAD Civil 3D 2011 files before starting this procedure. (indicated below as backup) CLICK HERE FOR STEPS
====================================

1. Log on to the workstation as the user.
2. On the Start menu (Windows), click Run.
3. In the Run dialog box, enter regedit.
4. In the Registry Editor, locate the following subkey and delete it:

HKEY_CURRENT_USER\Software\Autodesk\AutoCAD\R18.1\ACAD-9000:409

5. Exit the Registry Editor.

===================
In XP Windows Explorer, locate and delete the following application folders:

C:\Documents and Settings\<user name>\Application Data\Autodesk\C3D 2011 (backkup this directory first)
C:\Documents and Settings\<user name>\Local Settings\Application Data\Autodesk\C3D 2011

In Vista / Windows 7, locate and delete the following application folders:

C:\Users\<<userid>>\AppData\Roaming\Autodesk\C3D 2011 (backkup this directory first)
C:\Users\<<userid>>\AppData\Local\Autodesk\C3D 2011

The user should now be able to launch AutoCAD Civil 3D 2011. When the product is opened, the files and folders that were deleted will be recreated by the secondary installer.

Warning! Problems caused by improperly editing the Windows registry could render your computer operating system unusable. Microsoft provides a wealth of critical information that you need to know about the registry in the Microsoft Knowledge Base at http://support.microsoft.com/support.

Use the Microsoft® Registry Editor only at your own risk and only after backing up the registry as well as the system.dat and user.dat files as outlined for your operating system in the Microsoft Knowledge Base and in the related solution, TS66513. Additional information about the registry is also contained in the Help topics in the Microsoft Registry Editor.

64 Bit – Additional Clean Uninstallation Instructions: Microsoft Visual C++ Redistributables

Here are additional instructions for a clean un-installation for 64 bit machines. It instructs the customer to remove and add back in the Microsoft Visual C++ Redistributable which is an Autodesk prerequisite for installation. The previous email had the links for the 32 bit Redistributables.

NOTES:

• When dealing with 64 bit OS we must keep in mind that there may be 32 bit software installations on them. These 32 bit programs will use the 32 bit Microsoft Visual C++ Redistributables. So a 64 bit OS can have both the 32 bit and 64 bit Redistributables on them.

• Uninstalling the Redistributables should be done in reverse order.

• Redistributables are no longer available for download from the Windows Update site. The download links to these are listed here in this email

• This can be done by itself as a step in resolving an issue. If it doesn’t work then you can say this has been attempted. This is a standard step that Autodesk asks customers to do.

=========================
We will use add/remove programs to remove the Microsoft Visual C++ Redistributables, in reverse order…2008 first then 2005….
Then put reinstall them, they are located at the download sites indicated below:
=========================
Microsoft Visual C++ 2005 Redistributable Package (x64)
=========================
Microsoft Visual C++ 2005 SP1 Redistributable Package (x64)
=========================
Microsoft Visual C++ 2008 Redistributable Package (x64)
=========================
Microsoft Visual C++ 2008 SP1 Redistributable Package (x64)
===========================

Secondary Installer AutoCAD MEP 2011

Issue

To reset the default AutoCAD® MEP 2011 user settings, you want to reinitiate the secondary installer.

Solution

To reset the AutoCAD MEP 2011 default user settings, you must first delete your application files and registry entries for the program. Follow these steps:

Note: Make sure that you back up any customized AutoCAD MEP 2011 files before starting this procedure. CLICK HERE FOR STEPS
========================
1. Log on to the workstation as the user.
2. On the Start menu (Windows), click Run.
3. In the Run dialog box, enter regedit.
4. In the Registry Editor, locate the following subkey and delete it:
HKEY_CURRENT_USER\Software\Autodesk\AutoCAD\R18.1\ACAD-9006:409
5. Exit the Registry Editor.
====================
In Windows Explorer, locate and delete the following application folders:
XP:
C:\Documents and Settings\\Application Data\Autodesk\MEP 2011 (Copy and Paste this as a backup)
C:\Documents and Settings\\Local Settings\Application Data\Autodesk\MEP 2011
VISTA:
C:\Users\\AppData\Roaming\Autodesk\MEP 2011 ((Copy and Paste this as a backup)
C:\Users\\AppData\Local\Autodesk\MEP 2011

The user should now be able to launch AutoCAD MEP 2011. When the product is opened, the files and folders that were deleted will be recreated by the secondary installer.

Warning! Problems caused by improperly editing the Windows registry could render your computer operating system unusable. Microsoft provides a wealth of critical information that you need to know about the registry in the Microsoft Knowledge Base at http://support.microsoft.com/support.

Use the Microsoft® Registry Editor only at your own risk and only after backing up the registry as well as the system.dat and user.dat files as outlined for your operating system in the Microsoft Knowledge Base and in the related solution, TS66513. Additional information about the registry is also contained in the Help topics in the Microsoft Registry Editor.

Install Product Checkbox is Greyed Out

A previous installation of this product was attempted and failed.
When attempting to install it again the checkbox for your product is greyed out.
to resolve this first look at add remove programs and remove anything that is showing up from the attempted install.
then download the Microsoft Installer Cleanup Utility, you can refer to another post in the CATEGORY called UTILITIES.
After installing this utility select your product and hit remove.

Hacking 2010 Raster Design Object Enabler onto Map 3D / Civil 3D 2011 ***NOW OBSOLETE SEE NOTE***

*************************
CLICK FOR THE 2011 OBJECT ENABLER NOW AVAILABLE HERE:

*************************
32 bit OS
1) install A 2010 autocad or autocad vertical (If you don’t already have one installed)
2) install 2010 object enabler
3) perform a registry hack
================================
64 bit OS
1) install 2010 object enabler
2) perform registry hack
================================
Object Enabler:
=================
object enabler on

AutoCAD® 2010
AutoCAD® Architecture 2010
AutoCAD® Civil 3D® 2010
AutoCAD® Electrical 2010
AutoCAD® Map 3D 2010
AutoCAD® Mechanical 2010
AutoCAD® MEP 2010

32 bit OE
64 bit OE
Readme

Registry Hack:

find the following key highlight it right click
export the following key
“HKEY_LOCAL_MACHINE\SOFTWARE\Autodesk\AutoCAD\R18.0\AdImaging“

give it a name and save it to your hard drive.
open this file up in notepad and change the R18.0 To R18.1 and save it.
exit out of notepad.
double click on the file
open 2011 product

32 Bit – Additional Clean Uninstallation Instructions: Microsoft Visual C++ Redistributables

Here are additional instructions for a clean un-installation for 32 bit machines. It instructs the customer to remove and add back in the Microsoft Visual C++ Redistributable which is an Autodesk prerequisite for installation. I will follow this email up with a 64 bit version of the same thing.

NOTES:
· When dealing with 64 bit OS we must keep in mind that there may be 32 bit software installations on them. These 32 bit programs will use the 32 bit Microsoft Visual C++ Redistributables. So a 64 bit OS can have both the 32 bit and 64 bit Redistributables on them.

· Uninstalling the Redistributables should be done in reverse order.
· Redistributables are no longer available for download from the Windows Update site. The download links to these are listed here in this email
· This can be done by itself as a step in resolving an issue. If it doesn’t work then you can say this has been attempted. This is a standard step that Autodesk asks customers to do.
=========================
We will use add/remove programs to remove the Microsoft Visual C++ Redistributables, in reverse order…2008 first then 2005….
Then put reinstall them, they are located at the download sites indicated below:
=========================
Microsoft Visual C++ 2005 Redistributable Package (x86)
http://www.microsoft.com/Downloads/details.aspx?displaylang=en&FamilyID=32bc1bee-a3f9-4c13-9c99-220b62a191ee
=========================
Microsoft Visual C++ 2005 SP1 Redistributable Package (x86)
http://www.microsoft.com/Downloads/details.aspx?familyid=200B2FD9-AE1A-4A14-984D-389C36F85647&displaylang=en
=========================
Microsoft Visual C++ 2008 Redistributable Package (x86)
http://www.microsoft.com/Downloads/details.aspx?familyid=9B2DA534-3E03-4391-8A4D-074B9F2BC1BF&displaylang=en
=========================
Microsoft Visual C++ 2008 SP1 Redistributable Package (x86)
http://www.microsoft.com/Downloads/details.aspx?familyid=A5C84275-3B97-4AB7-A40D-3802B2AF5FC2&displaylang=en
=========================

Support for Windows 7 – 2010 Known limitations

The following products are supported on Microsoft Windows 7:

* AutoCAD 2010
* AutoCAD LT 2010
* AutoCAD Architecture 2010
* Autodesk Inventor 2010
* Autodesk Inventor LT 2010
* AutoCAD Electrical 2010
* AutoCAD Mechanical 2010
* AutoCAD MEP 2010
* Autodesk Algor Simulation 2010

Graphics Card Support for Windows 7:

Windows 7 is supported but not certified. This means that Autodesk has not certified every card but we expect they should work with Windows 7 without issue. The certified driver versions for Vista 32 and Vista 64 should install and work with AutoCAD 2010. The exception to this are the ATI FireGL and FirePro graphics cards and drivers for those cards should be downloaded from http://www.amd.com/us/Pages/AMDHomePage.aspx. If your NVIDIA drivers on Windows 7 are newer than 191.00, and your ATI drivers are newer than 8.634, hardware acceleration should be on by default.

AutoCAD® and all AutoCAD-based vertical products:

• Infocenter balloons sometimes display blank
• Dragging Ribbon tabs sometimes crashes the product
• Encrypted files fail to open and save on Windows 7
• Open files do not appear on Windows 7 Jumplist
• Export to Impression functionality will not work because Autodesk Impression is not supported on Windows 7

AutoCAD Architectural 2010 and AutoCAD Mechanical 2010:

• Text in the Drafting Settings dialog overlaps radio buttons

Windows 7 – Online Resources – Microsoft Answers & @MicrosoftHelps

Microsoft has found that support calls for Windows 7 are half of what the company originally expected. It speculates the change may be because users have turned to two of its new online resources: Microsoft Answers and Twitter.

This site has discussions groups, answers provided here by users are monitored, researched and confirmed by Microsoft.

Microsoft Answers  (launched in 2009 exclusively for Windows Vista Issues now includes 7) (So far, Microsoft has validated some 60,000 solutions)

http://answers.microsoft.com/en-us/default.aspx

 @MicrosoftHelps (Microsoft Twitter Site) (real-time Windows 7 information only 600 tweets so far…)
http://twitter.com/MicrosoftHelps

Text Will Not Plot

Issue:
Old font in old drawings will not plot even though it shows up in plot preview.
It plots fine with XP machines but not with Vista
Newest Vista Driver installed for the plotter.

Resolution:
Updated the firmware on the plotter.
Now the Vista machines are plotting this old font as well as the XP machines.

Upload Revit Files for Autodesk to Duplicate Issue

In order to duplicate the issues you are having with Revit, The following files are neccessary, the Revit Journal files, and system information of the computer having the issue. Click on the links below for instructions where to find these requested files.
——-
Journal File Location

still can’t find your journal files? Click here
——-
Obtaining a System Information file (NFO) for diagnostics and troubleshooting

Program Fails to Launch–Data Execution Prevention Exception

1. On the Start menu (Windows), click Settings > Control Panel.
2. In Control Panel, double-click System.
3. In the System Properties dialog box, click the Advanced tab.
4. On the Advanced tab, under Performance, click Settings.
5. In the Performance Options dialog box, click the Data Execution Prevention tab.
6. Select the Turn on DEP for all programs and services except those I select option.
7. Click the Add button.
8. In the Open dialog box, locate your products execution file, MyProduct.exe. (the default location is C:\Program Files\MyProduct).
9. Select the file and click Open. Note: You will see a Not Applicable option. Ignore this option. If you see this, it means you are following the procedure correctly.
10. Click OK to close each dialog box.
11. Reboot your computer.
You should now be able to start MyProduct.

Network License Parser WebTool

This is a On-Line Network License Parser created and provided by autodesk.

It allows the customer to upload a network license and it reports what is in it.
Product, Version, Seats, Serial Numbers.

It helps us determine if their license is updated or not.

http://www.licenseparser.com/

Network Deployment Environment Variables

Issue
You want to use an environment variable to specify one or more network (FlexLM®) license servers for your Autodesk products.

Solution
To use an environment variable to specify one or more license servers for your Autodesk products
1. On the Start menu (Windows), click Settings > Control Panel.
2. Double-click System.
3. In the System Properties dialog box, click the Advanced tab.
4. Click Environment Variables.
5. Under System Variables, click New.
6. In the Variable Name box, enter ADSKFLEX_LICENSE_FILE
7. In the Variable Value box, enter the license server(s) in the following format:
@server1;@server2;@server3 (where server is the hostname or IP address of your license server)
8. Click OK to close each dialog box.

======================================
Consider the following when using the ADSKFLEX_LICENSE_FILE environment variable to specify license servers:
• This variable is automatically set during a client installation from a deployment that is configured for distributed servers.
• Licenses are located based on the order that the servers are listed in the environment variable. It is strongly recommended that you have client computers look to their closest geographic server first.
• There is no maximum number of servers that you can specify, but an environment variable does have certain character limitations, which depend on the version of Windows® operating system that you use.
• You do not need to restart your system for this change to take effect. The setting becomes valid once you close the System Properties dialog box.
• This variable automatically overwrites the current license server settings, such as the licpath.lic file and registry cache.
• Only products that use the ADSKFLEX.EXE vendor daemon are affected. Other FlexLM®-enabled products (including Alias software) are not affected by this variable. Contact the appropriate product vendor directly for similar variables for vendor daemons.
======================================

Microsoft Installer Cleanup Utility: Is No Longer Available: Alternative to Making sure it is really uninstalled

Take a look this is the Microsoft cleanup utility
**********************
NOTE:
While the Windows Installer Cleanup utility resolved some installation problems, it sometimes damaged other components installed on the computer. Because of this, the tool has been removed from the Microsoft Download Center.
**********************
Autodesk Technical Support is recommending using REVO UNINSTALLER.

Revo Uninstaller Download

Links to Common Installation Errors

Errors during AutoCAD® software installation
Issue
When you tried to install your AutoCAD®-based software program, an error message was displayed.
Solution
Common installation errors for AutoCAD-based software are listed below. You should try these solutions first, and then review further instructions if the problem persists.
———————
• Error 1603 during software installation
http://usa.autodesk.com/getdoc/id=TS1076287
http://support.microsoft.com/kb/834484
———————
• Error 1904 … Flash9.ocx failed to register
http://usa.autodesk.com/getdoc/id=TS1069786
———————
• Error 1402 or 1406 during installation
http://usa.autodesk.com/getdoc/id=TS1069886
http://usa.autodesk.com/adsk/servlet/ps/dl/item?siteID=123112&id=16508079&linkID=9240617
———————
• Error 1308 or 1311 during software installation
http://usa.autodesk.com/getdoc/id=TS1076310
———————
• Error 1606: Could not access network location
o Installing on Windows Vista
http://usa.autodesk.com/getdoc/id=TS1070134
———————
o Using Group Policies, SMS or other unattended installation methods, all versions
http://usa.autodesk.com/getdoc/id=TS1059669
———————
o Using Group Policies, SMS or other unattended installation methods, AutoCAD 2004 only
LINK REMOVED BY AUTODESK
———————
o Using Group Policies, SMS or other unattended installation methods, Windows Vista only
http://usa.autodesk.com/getdoc/id=DL9727345
———————
o Using a “Run as” installation method
http://usa.autodesk.com/getdoc/id=TS82627
———————
• Error during installation: acad.msi: AdskExecuteSequence
http://usa.autodesk.com/getdoc/id=TS1076308
———————
• Error: This installation is forbidden by system policy. Java 2 Runtime Environment, SE v1.4.2_04.msi
http://usa.autodesk.com/getdoc/id=TS1070167
———————
• Windows – No Disk. Exception Processing Message c0000013 Parameters 75b6bf9c 75b6bf9c 75b6bf9c
http://usa.autodesk.com/getdoc/id=TS1070310
———————
• Error when installing from a deployment to a 64-bit computer
http://usa.autodesk.com/getdoc/id=TS1069920
———————

If these known solutions do not resolve the installation error, the additional tests listed below will help determine the cause of the problem.
• Try running the installation from the installation media in Windows Diagnostic Mode. Diagnostic mode prevents other software applications and processes from interfering with the installation. Refer to the following solution for more information:
———————
Clean installation on Windows® XP
http://usa.autodesk.com/getdoc/id=TS75218
———————
• If you are not seeing an error message when the installation fails, try clearing the Client Installations Will Be Run In Silent mode option when you create or modify your deployment. Refer to the following solution for more information:
———————
Using log to troubleshoot installation errors.
http://usa.autodesk.com/getdoc/id=TS1059799
———————
Once you receive an error message, you can refer to this list or search for the error message on
———————
Autodesk.com/Support.
http://www.autodesk.com/support
———————
• If the installer is reporting that the program is already installed, the installation will not complete. Refer to the following solution for more information:
———————
Removing all Autodesk® software products from system to ensure a clean installation.
http://usa.autodesk.com/getdoc/id=TS45252
———————
If you are still receiving an error message that states the product is already installed, you may need to use the Windows Installer Cleanup utility to remove it. This utility can be downloaded from Microsoft.
• If you are experiencing an error during uninstall that is not on this list, you can use the Windows Installer Cleanup Utility from Microsoft to uninstall the application.
• Some installation problems can be resolved by re-registering or re-installing the Microsoft Windows Installer service. For more information refer to the following solution:
———————
Re-registering or re-installing the Microsoft Windows Installer.
http://usa.autodesk.com/getdoc/id=TS1076311
———————
If you have worked through the standard troubleshooting steps without resolving the issue, follow this link to receive additional technical assistance.
Please collect the following information from your system before requesting technical assistance:
• Screenshot or full text of any error messages
• Description of the steps leading to the problem
• Client installation log files from %TEMP%
See also
———————
• AutoCAD® 2010 Installation and Configuration Troubleshooting Guide
http://usa.autodesk.com/adsk/servlet/ps/item?siteID=123112&id=9480492&linkID=9240617
———————
• Contacting a technical support provider
http://usa.autodesk.com/adsk/servlet/ps/item?siteID=123112&id=10246102&linkID=9240617
———————

Flattening all Z values to zero

The following is how to flatten all z values in your drawing:
You can make a macro of this if you wish. Make a backup of your drawing before doing this.
— — — — — — —
Move
<>
0,0,1e99
Move
P(revious)
0,0,-1e99
— — — — — — —

Educational plot stamp removal request

This is the current questionnaire that must be filled out if the educational stamp (watermark) on drawings created with the Educational version need to be removed.

===============================

Hello XXXXXXX,FFFFF LLLLL of Applied Technology Group called us (Autodesk Product Support) on your behalf today.

I understand that you have some AutoCAD Architecture 2010 drawings that have acquired the educational plot stamp.

I am sorry that you have had this inconvenience.

Drawings that have been created or modified in an educational version — as well as drawings that re-use layers, blocks, layouts, or other components of drawings that have been created or modified in an educational version — will have this plot stamp. (The purpose of this plot stamp is to discourage the commercial use of educational versions of AutoCAD and AutoCAD-based applications, since educational versions are sold on the premise that they will be used for educational purposes only.)

Before we can assist with removing the plot stamp from your drawings, we need to get some information. Please reply to this message with these details:

1. What is your company’s name and address?

2. Please list all product serial numbers, registered to your company, of Autodesk software products that have come into contact with the drawings that have the educational plot stamp.

3. How did the educational plot stamp get into your drawings?

4. How many drawings do you estimate have the educational plot stamp?

5. Please provide the following contact information:

Contact name:
Phone number:
E-mail address:

Once we receive these details, we will escalate this Support Request to a technician who will assist you further, once the request for removal of the plot stamp is approved.

I am sending a courtesy copy of this e-mail message to FFFFF LLLLL, and I am looking forward to your reply.

Kind regards,

xxxxx.
Autodesk Support Team

Drawing Recovery Methodologies

===========================

Recover damaged drawing files

===========================

=====

Issue
=====

Drawing files can become corrupted for many reasons. The most common cause for corruption is when a drawing file is copied onto a floppy drive or a hard drive that contains damaged sectors. In this situation, some or all of the file(s) copied onto the damaged sectors become unreadable. Other sources of file corruption include defective computer RAM, power surges, usage errors, and network file transmission problems. Another cause for file corruption, although infrequent, is when AutoCAD® shuts down unexpectedly while the drawing is opened. Also, drawings originating from other software packages that have been translated into DXF™ or DWG format can suffer through the file translation.

The most effective way to guard against this type of data loss is to make frequent backup files of your drawings. Although this document explains different ways of recovering corrupted drawings, file recovery is not always completely successful.

Even when a drawing can be recovered, some part of the file is often corrupted beyond recovery, therefore you must identify the part(s) of the file that were not recovered and consequently recreate the data. Instead, it is obviously better to use a “good” backup of a drawing so that you know exactly what data is contained in the drawing based on when the last backup was made.

=========

Solution
=========

Note that most of the recovery methods explained in this document can be used in all releases of AutoCAD® and AutoCAD LT® software.

====================================

Before Recovering a Drawing

Autodesk Product Support strongly recommends that you perform the following steps before recovering a corrupted drawing:

  • Make a copy or copies of  your drawing on reliable storage media. For example, if you suspect that your hard disk contains bad sectors, copy your files to another hard disk, a network drive, a floppy disk, or a tape. It is best to perform recovery operations on a copy of the file, since there are several different methods of recovery, and each method alters the file in a different way. For each recovery method, it is best to use a copy of the original file since recovery processes may alter a damaged drawing yet still not recover it enough that AutoCAD can open it. If you retain a copy of the original damaged file, you can then use another recovery process on the original file.
  • Identify and make backup copies of BAK files associated with the damaged drawing. If you open and save a damaged file without fully recovering it, you may overwrite a good BAK file with a corrupted BAK file.
  • Note that there is a mechanism in AutoCAD that prevents a good BAK file from being over-written by a corrupted BAK file. When AutoCAD saves a drawing, it also checks the file for corruption. If the file is corrupted, AutoCAD does not overwrite the existing BAK file. Instead, it creates backup files that have the file extension(s) .bk1, .bk2, .bk3, etc. Be aware that this process is not always successful; therefore, it is a good idea to make archive copies of good BAK files if you suspect that you have a corrupted file.
  • Try to identify the source of the corruption. For example, if you suspect that drawings are becoming corrupted by copying files onto a hard disk with bad sectors, you should identify and correct the problem with the hard disk before you begin to recover your files. By doing some investigation, you may find that there is more than one source that is causing the corruption or that your original assumption about what is causing the problem is incorrect.
  • Record any error messages generated by AutoCAD or the operating system. Note when the messages occur in order to find a connection between the messages and when the drawing becomes corrupted. Continue to record any errors or messages that are generated during the recovery process.

====================================

AutoCAD RECOVER Command

To use the RECOVER command on a damaged drawing, launch AutoCAD and open a new drawing with no prototype. Use the OPEN command to open the drawing. If AutoCAD detects that it is corrupted, a message is displayed indicating the file is damaged. AutoCAD then prompts you to use the RECOVER command to open the drawing, and a message is displayed asking you to enter YES to proceed. If you proceed, AutoCAD then scans through the drawing database to detect and fix errors. If the RECOVER process repairs the file so that it can be opened, AutoCAD then opens the drawing and a message similar to the following message is displayed on the command line:

Command: RECOVER
Drawing recovery.
Drawing recovery log.
Scanning completed.
Validating objects in the handle table.
Valid objects 10033 Invalid objects 0
Validating objects completed.
Used contingency data.
Salvaged database from drawing.
0 Blocks audited
Pass 1 10000 objects audited
Pass 2 10000 objects audited
Pass 3 10000 objects audited
Total errors found 720 fixed 720
Regenerating drawing.

If the the drawing cannot be repaired, one of several messages is displayed to indicate that the file cannot be recovered. If the drawing is severely corrupted, the recovery process may lock up or AutoCAD may shut down. If this happens, you need to reboot the computer and try a different recovery method.

If the drawing can be opened with the RECOVER command, you should next use the AUDIT command. It is possible to have a drawing that contains “nested” damage that cannot be fixed by the RECOVER process on the first pass. In this situation, use the AUDIT process once or several times to fix this type of damage.

To begin, enter audit on the command line. You will be asked if you want the AUDIT process to attempt to fix any errors it encounters. Press the Y key to accept this choice and begin the AUDIT process. AutoCAD will now scan through the existing open drawing and attempt to find and fix errors. A report similar to the following report will be displayed on the command line (press F2 when the audit is complete to view the entire report):

Fix any errors detected? <N>
0 Blocks audited
Pass 1 10000 objects audited
Pass 2 10000 objects audited
Pass 3 10000 objects audited
Total errors found 16 fixed 16

If AUDIT finds and fixes errors, you should run the process again until no more errors are found.

Be aware that AUDIT may find errors that it cannot fix. Also, the audit process will sometimes report that it has found and fixed errors in the drawing, but subsequent audits will report finding and fixing the same number of errors. If this occurs, try to run the RECOVER process again or try one of the other recovery methods described in this solution.

====================================

Using the INSERT Command to Recover Drawings

It is sometimes possible to use the INSERT command to recover a damaged drawing. If the RECOVER command cannot successfully open a drawing, you may be able to insert the drawing into another drawing as if it is an external block.

To use the INSERT command:

  1. Start AutoCAD and open a new drawing. Be sure that you do not open a prototype drawing.
  2. Enter ddinsert on the command line. (You can also click Draw > Insert > Block.)
  3. In the Insert dialog box, click File, and then select the damaged drawing in the Select Drawing File dialog box.
  4. Clear the Specify Parameters Onscreen check box, and select the Explode check box.
  5. Click OK in the Insert dialog box.

AutoCAD attempts to insert and explode the damaged drawing. If the process succeeds, run the AUDIT command as described in the preceding section.

====================================

WBLOCK Command for Saving Parts of a Drawing

If you have a drawing that can be opened but AUDIT cannot fix, use the WBLOCK command to extract entities from the damaged file. This method is also good to use on drawings that become corrupted again even though the RECOVER feature was successful.

To use the WBLOCK command:

  1. Start AutoCAD and open the drawing.
  2. Set all of the layers in the drawing to ON, THAWED, and UNLOCKED.
  3. Enter wblock on the command line to create a new external block.
  4. In the Create Drawing File dialog box, enter a name for the block.
  5. Enter a name for the internal block (or press ENTER), and then select an insertion point.
  6. Select all the objects in the drawing by entering all on the command line or by manually selecting all of the objects using a crossing window.
  7. Close the current drawing after the external block is created without saving the changes and open the external block file.
  8. Run the AUDIT command on this drawing to test the file for corruption.

If running AUDIT on this drawing reports it finds errors, discard this file and reopen the original damaged file. The following discusses two methods for how to proceed. The first method should be used for a drawing that contains less than 30 layers; the second method should be used for a drawing that contains more than 30 layers.

====================================

Method #1 – For drawings with less than 30 layers

  1. Freeze all the layers in the drawing except for the first layer in the layer list and create an external block from the data on this layer.
  2. Open the external block file as described in the preceding section and perform an AUDIT.
  3. If AUDIT reports errors, discard this drawing, reopen the damaged file, and create an external block that contains only the data on the second layer in the layer list.
  4. Repeat this process until you have determined which layers in the damaged file contain corrupted data.
  5. Use WBLOCK to create an external block that contains all the objects on layers that do not contain corrupted data.

====================================

Method #2 – For drawings with more than 30 layers

  1. Set all of the layers in the drawing file to ON, THAWED, and UNLOCKED.
  2. Zoom to the drawing extents.
  3. Use the WBLOCK command to create an external block from all the objects in the upper right quarter of the screen area.
  4. Repeat this process for the other three quarters of the drawing.
  5. Open each quadrant drawing separately and run the AUDIT process on each.One or more of the quadrants will fail the AUDIT process.
  6. Divide these quadrants into quarters and repeat this process until you have identified all or many of the quadrants that do not report errors when audited.These quadrants can then be reassembled into a single drawing.

====================================

Drawing Recovery using DXFOUT and DXFIN

AutoCAD contains a translator for creating drawing interchange format (DXF™) files from DWG files. It is possible to use the DXF conversion process to fix damaged drawings. However, the DXF translator was not designed for recovering drawings, therefore this process will not work on drawings that contain a lot of damaged data. Also, the error and warning messages that are displayed during the DXF translation are not meant to provide detailed information about the status of drawing damage or recovery.

To use the DXF translator to recover a file, you need to open the drawing in AutoCAD and then immediately cancel the first automatic regeneration process that occurs when the drawing is opened. If you can perform this step, you can use the DXF translator to create a DXF file. You can then either re-translate the DXF file into a DWG file or repair the DXF file manually by editing it in an ASCII text editor, such as Microsoft® Notepad.

  1. Start AutoCAD.
  2. On the File menu, click Open.You can also enter open on the command line.
  3. Select the damaged drawing from the File dialog box to open it.
  4. In the Select File dialog box, click OK to open the drawing and immediately press the ESC key to cancel the current command. (If you are using MS-DOS® AutoCAD or if you have configured Windows AutoCAD as “Classic AutoCAD,” you must press CTRL+C).

This process should cancel the first regeneration of the drawing. If the drawing can be opened, the AutoCAD command prompt will appear. (You may want to practice this process with an undamaged file to get a sense of how to do this.)

Next, enter dxfout on the command line. You are then prompted to enter a name for the DXF file and to specify the level of accuracy for the file translation. The translation process begins when the level of accuracy is entered. Refer to the AutoCAD User’s Guide for more information about DXF files and translation choices.

After the DXF file is created, re-import the file into AutoCAD using the DXFIN command. To import the file into AutoCAD, open a new drawing (no prototype) and enter the dxfin on the command line and select the DXF file you created. The file is then translated again into an AutoCAD DWG file.

If the DXFIN process fails, you can view and edit the DXF file in an ASCII text editor. A DXF file is a complete translation of the drawing into ASCII text. Refer to the AutoCAD Customization Guide for a description of the contents and structure of a DXF file. If you prefer not to learn the structure of DXF files, you can scan the file for obvious anomalies or corruption, or possibly truncate or remove sections of the file in order to salvage some data.

====================================

Sources of Drawing File Corruption

As previously noted, file corruption can occur for a number of reasons. If you discover that you have a damaged drawing, it is important to track down and eliminate the source of corruption to prevent the problem from recurring. This section describes some of the most common reasons and recommends possible solutions.

====================================

Cause #1

A drawing can become corrupted because it is copied to a floppy disk or hard disk that contains defective sectors. Also, a drawing on a floppy disk or hard disk can become corrupted because the disk is damaged due to a power surge or other type of physical damage.

Solutions/Suggestions

Use the tools provided with the operating system, such as Scandisk (provided with Windows® and MS-DOS), to detect flaws in the physical media. Also, third-party diagnostic applications, such as Norton Utilities, can detect, and in some cases, prevent future access to damaged sectors on physical media.

Suggested drawing recovery procedures include the steps listed above. Also, files can sometimes be recovered from damaged physical media by computer hardware service providers.

====================================

Cause #2

A drawing can become corrupted because the system RAM is defective. When the drawing is edited in AutoCAD, the file is copied into and out of RAM and is not correctly written back to the hard disk.

Solutions/Suggestions

This problem usually manifests itself in other areas, such as corrupted operating system files or failure to run AutoCAD and other programs, before you experience corrupted AutoCAD drawings. If you encounter any of the following problems, you should check the integrity of the system RAM:

  • Drawings become corrupted
  • System terminates unexpectedly
  • Error messages occur in AutoCAD and other programs

Several third-party diagnostic applications, such as Norton Utilities, can detect flaws in system RAM.

====================================

Cause #3

A drawing can sometimes become corrupted if an AutoCAD session is terminated while the drawing is open in AutoCAD.

Solutions/Suggestions

Drawings are not easily corrupted while they are open in an AutoCAD. When a drawing is open and changes are made, the new or edited data is stored in temporary files. When a SAVE is performed, the information in the temporary files is written to the drawing database. If an AutoCAD session is terminated between saves, the data in the temporary files is lost, therefore, the drawing will not contain any of the changes from the current editing session. However, if an AutoCAD session shuts down unexpectedly during a SAVE operation, it is sometimes possible for the open file to become corrupted.

If AutoCAD shuts down unexpectedly, it is usually because of memory conflicts with other applications on a system, or a lack of system resources. If your installation of AutoCAD shuts down unexpectedly (even if drawings do not become corrupted), you should diagnose the problem by eliminating the possibility of a memory conflict or a shortage of system resources.

====================================

Cause #4

Drawings or DXF files from other CAD applications will not open in AutoCAD because of file translation problems.

Solutions/Suggestions

Files from other CAD applications will sometimes generate error messages when you open them in AutoCAD. In most cases, the application that created the file has not created the DWG or DXF file correctly. You should confirm the file is not actually corrupted by opening it in the original application and running the equivalent of the RECOVER command in that application.

In some cases a DWG or a DXF file created by another CAD package is meant to be used only with a specific release of AutoCAD. For example, a CAD application might only produce DXF files that can be opened in AutoCAD Release 12 and not Release 13. The documentation for the application that produced the file will generally provide information about compatibility with the various releases of AutoCAD.

====================================

Un-install / Re-install .Net Framework

Uninstalling the Dot Net Framework using the removal utility and then

Installing .net framework 3.5 and then the .net framework 3.1 sp1 using the links below (if they are not on Windows Update)

NOTES:

  • The Dot Net Framework is bit adverse — it works in both 32 and 64 bit OS’s.
  • Because the Windows Update for XP and Vista may not always show the Dot Net Frameworks in the download listing the links to them are shown below.

====================================================

We will NOT use the Add/Remove programs (XP), or Programs and Features (Vista) for un-installing the Dot Net Framework.
There is a utility we will use to do this.  The download link for this utility is shown below.

  • Uninstalling of all dot net frameworks using the tool below.
  • Reinstallation of the frameworks by windows update is preferred
  • however If they do not show up in windows update the links are provided below for download from Microsoft

=========================================================

dotnet framework removal tool
http://cid-27e6a35d1a492af7.skydrive.live.com/self.aspx/Blog_Tools/dotnetfx_cleanup_tool.zip

Microsoft .NET Framework 3.5
http://www.microsoft.com/downloads/details.aspx?familyid=333325FD-AE52-4E35-B531-508D977D32A6&displaylang=en

Microsoft .NET Framework 3.5 Service Pack 1 (install .NET Framework 3.5 first)
http://www.microsoft.com/downloads/details.aspx?familyid=AB99342F-5D1A-413D-8319-81DA479AB0D7&displaylang=en

Determining ProductID for Autodesk software in Registry Keys

http://usa.autodesk.com/adsk/servlet/ps/item?siteID=123112&id=9120436&linkID=9240617

Determining ProductID for Autodesk software

Issue:

You need to determine which ProductID (ACAD-####:###) corresponds to which software in order to edit registry entries related to AutoCAD or an AutoCAD-based product.

Solution

To determine the applicable ProductID for an Autodesk product, use the tables below:

ProductID Structure

ProductIDs have the following structure:

Rxx.x\ACAD-<ProductID>:<LocaleID>

For example,
R16.0\ACAD-201:409 = AutoCAD 2004 English
R16.1\ACAD-301:409 = AutoCAD 2005 English
R16.2\ACAD-4001:409 = AutoCAD 2006 English
R17.0\ACAD-5001:409 = AutoCAD 2007 English
R17.1\ACAD-6001:409 = AutoCAD 2008 English
R17.2\ACAD-7001:409 = AutoCAD 2009 English
R18.0\ACAD-8001:409 = AutoCAD 2010 English
R18.1\ACAD-9001:409 = AutoCAD 2011 English
=====
R9\  ACADLT-201:409 = AutoCAD LT 2004 English
R10\ACADLT-301:409 = AutoCAD LT 2005 English
R11\ACADLT-4001:409 = AutoCAD LT 2006 English
R12\ACADLT-5001:409 = AutoCAD LT 2007 English
R13\ACADLT-6001:409 = AutoCAD LT 2008 English
R14\ACADLT-7001:409 = AutoCAD LT 2009 English
R15\ACADLT-8001:409 = AutoCAD LT 2010 English
R16\ACADLT-9001:409 = AutoCAD LT 2011 English

Note 1: This structure applies only to the products listed below and may or may not reflect the structure of ProductIDs in the future.

Note 2: for the Rxx.x look at this table

AutoCAD / AutoCAD Verticals        AutoCAD LT

2004 = R16.0                                2004 = R9
2005 = R16.1                                2005 = R10
2006 = R16.2                                2006 = R11
2007 = R17.0                                2007 = R12
2008 = R17.1                                2008 = R13
2009 = R17.2                                2009 = R14
2010 = R18.0                                2010 = R15
2011 = R18.1                                2011 = R16

Note 3: if you do not see your version here ie (2010, 2011), refer to the secondary installer instructions for your product and version.  They are located in the “secondary installers” category.  You will see a registry entry that will correspond to the one specified in this post.

ProductID Assignments

2009 Product IDs
7000 Autodesk Civil 3D
7001 AutoCAD (Registry Cookies: ACAD-7001; ARD-7001)
700A AutoCAD OEM (Registry Cookie: AOEM-7001)
7002 Map
7003 Inventor Series
7004 AutoCAD Architecture (previously Architectural Desktop)
7005 AutoCAD Mechanical
7006 AutoCAD MEP (previously Building Systems)
7007 AutoCAD Electrical
7008 Land Desktop
7009 AutoCAD LT (Registry Cookie: ACLT-7001)
7012 ADT for Raster Design
7013 Inventor Professional
7014 Inventor Professional for Routed Systems
7015 Inventor Professional for Simulation
7016 AutoCAD P & ID
7022 Autodesk Utility Design
7023 Autodesk Topobase Client
2008 Product IDs
6000 Autodesk Civil 3D
6001 AutoCAD (Registry Cookies: ACAD-6001; ARD-6001)
600A AutoCAD OEM (Registry Cookie: AOEM-6001)
6002 Map
6003 Inventor Series
6004 AutoCAD Architecture (previously Architectural Desktop)
6005 AutoCAD Mechanical
6006 AutoCAD MEP (previously Building Systems)
6007 AutoCAD Electrical
6008 Land Desktop
6009 AutoCAD LT (Registry Cookie: ACLT-6001)
6012 ADT for Raster Design
6013 Inventor Professional
6014 Inventor Professional for Routed Systems
6015 Inventor Professional for Simulation
6016 AutoCAD P & ID
6022 Autodesk Utility Design
6023 Autodesk Topobase Client
2007 Product IDs
5000 Autodesk Civil 3D
5001 AutoCAD (Registry Cookies: ACAD-5001; ARD-5001)
500A AutoCAD OEM (Registry Cookie: AOEM-5001)
5002 Map
5003 Inventor Series
5004 Architectural Desktop
5005 AutoCAD Mechanical
5006 Building Systems
5016 Building Systems 2007.1
5007 AutoCAD Electrical
5008 Land Desktop
5009 AutoCAD LT (Registry Cookie: ACLT-5001)
5012 ADT for Raster Design
5013 Inventor Professional
5014 Inventor Professional for Routed Systems
5015 Inventor Professional for Simulation
5016 AutoCAD P & ID
5022 Autodesk Utility Design
5023 Autodesk Topobase Client
2006 Product IDs
4000 Autodesk Civil 3D
4001 AutoCAD (Registry Cookies: ACAD-4001; ARD-4001)
400A AutoCAD OEM (Registry Cookie: AOEM-4001)
4002 Map
4003 Mechanical Desktop for AIS
4013 Mechanical Desktop for AIP
4004 Architectural Desktop
4005 AutoCAD Mechanical
4006 Building Systems
4007 AutoCAD Electrical
4008 Land Desktop
4009 AutoCAD LT (Registry Cookie: ACLT-4001)
4012 ADT for Raster Design
4022 Autodesk Utility Design
2005 Product IDs
300 Autodesk Civil 3D
301 AutoCAD (Registry Cookies: ACAD-301; ARD-301)
30A AutoCAD OEM (Registry Cookie: AOEM-301)
302 Map
303 Mechanical Desktop for AIS
313 Mechanical Desktop for AIP
304 Architectural Desktop
305 AutoCAD Mechanical
306 Building Systems
307 AutoCAD Electrical
308 Land Desktop
309 AutoCAD LT (Registry Cookie: ACLT-301)
3012 Architectural Desktop w/Raster Design
3012 Autodesk Utility Design
2004 Service Pack Product IDs
200 Autodesk Civil 3D
223 Mechanical Desktop 2004 DX for AIP
233 Mechanical Desktop 2004 DX for AIS
215 AutoCAD Mechanical 2004 DX
207 AutoCAD Electrical
2004 Product IDs
201 AutoCAD (Registry Cookie: ACAD-201; ACLT-201; AOEM-201; ARD-201)
20A AutoCAD OEM
202 Map
203 Mechanical Desktop for AIS
213 Mechanical Desktop for AIP
204 Architectural Desktop
205 AutoCAD Mechanical
206 Building Systems
208 Land Desktop
209 AutoCAD LT
211 AutoCAD 2004 Extension 1 – Express Tools
221 AutoCAD 2004 Extension 2 – Migration Tools: BDC
231 AutoCAD 2004 Extension 3 – Migration Tools: Customization Conversion
241 AutoCAD 2004 Extension 4 – Tool Palettes Extension
111 AutoCAD 2004 CAD Manager Tools
2002 Product IDs
101 AutoCAD
10A AutoCAD OEM
102 Map
103 Mechanical Desktop
104 Architectural Desktop
105 AutoCAD Mechanical
108 Land Desktop
109 AutoCAD LT
111 AutoCAD Extension 1 – CAD Manager Tools
121 AutoCAD Extension 2
131 AutoCAD Extension 3
141 AutoCAD Extension 4
2000i Product IDs
001 AutoCAD
065 AutoCAD LT
002 Map
003 Mechanical Desktop
004 Architectural Desktop
005 AutoCAD Mechanical
008 Land Desktop
051 AutoCAD Extension 1 – Standards Extension
052 AutoCAD Extension 2 – XML Extension
053 AutoCAD Extension 3
054 AutoCAD Extension 4

LocaleID Structure

The structure used for LocaleIDs is a 4-character hexadecimal representation of the locale / language for the product.

LocaleID Language Abbreviation Language
409 ENU English
407 DEU German
040C FRA French
410 ITA Italian
040A ESP Spanish
415 PLK Polish
040E HUN Hungarian
405 CSY Czech
419 RUS Russian
416 PTB Brazilian Portuguese
804 CHS Simplified Chinese
404 CHT Traditional Chinese
412 KOR Korean
411 JPN Japanese

Registry Keys of AutoCAD® Architecture or AutoCAD® MEP

Clean reinstallation of AutoCAD® Architecture or AutoCAD® MEP

Published date: 2007-Jun-19
TS1070370
Applies to:
AutoCAD® Architecture 2008
Autodesk® Architectural Desktop 2007
Autodesk® Architectural Desktop 2006
Autodesk® Architectural Desktop 2005
AutoCAD® MEP 2008
Autodesk® Building Systems 2007.1
Autodesk® Building Systems 2007
Autodesk® Building Systems 2006
Autodesk® Building Systems 2005
Issue
You may experience issues with AutoCAD® Architecture (formerly known as Architectural Desktop) or AutoCAD® MEP (formerly known as Building Systems) after failed installs or uninstalls of other Autodesk products.
In these cases, it is strongly recommended that you completely remove the product from the system, and then try to reinstall the product.
Solution
This solution only applies to the following products.

========================
On Windows XP:
• Architectural Desktop 2005
• Architectural Desktop 2006
• Architectural Desktop 2007
• Autodesk Building Systems 2005
• Autodesk Building Systems 2006
• Autodesk Building Systems 2007
• Autodesk Building Systems 2007.1

========================
On Windows Vista:
• AutoCAD Architecture 2008
• AutoCAD MEP 2008
Important! You should back up any customized Autodesk files before you implement the following procedures.
To completely remove the product from your system
1. Log on as a member of the “Local Administrator” group and disable any antivirus or anti-spyware programs.
2. In the Control Panel, double-click Add or Remove Programs in Windows XP, or select Programs and Features in Windows Vista.
3. Select the product and click Remove.
4. Using Windows Explorer, browse to and delete the following folders:

For Products on Windows XP:

C:\Program Files\
C:\Documents and Settings\\Application Data\Autodesk\
C:\Documents and Settings\\Local Settings\Application Data\Autodesk\
C:\Documents and Settings\All Users\Application Data\Autodesk\

For Products on Windows Vista:

C:\Program Files\
C:\ProgramData\Autodesk\
C:\Users\\AppData\Roaming\Autodesk\

========================

You should replace with the name of each user that runs the product on this computer and replace and
with the corresponding product information from the following list:

<FULL_PROGRAM_NAME> Autodesk Architectural Desktop 2005
<PROFILE_FOLDER_NAME> ADT 2005

<FULL_PROGRAM_NAME> Autodesk Architectural Desktop 2006
<PROFILE_FOLDER_NAME> ADT 2006

<FULL_PROGRAM_NAME> Autodesk Architectural Desktop 2007
<PROFILE_FOLDER_NAME> ADT 2007

<FULL_PROGRAM_NAME> AutoCAD Architecture 2008
<PROFILE_FOLDER_NAME> ACD-A 2008

<FULL_PROGRAM_NAME> Autodesk Building Systems 2005
<PROFILE_FOLDER_NAME> ABS 2005

<FULL_PROGRAM_NAME> Autodesk Building Systems 2006
<PROFILE_FOLDER_NAME> ABS 2006

<FULL_PROGRAM_NAME> Autodesk Building Systems 2007
<PROFILE_FOLDER_NAME> ABS 2007

Note: This listing also includes Autodesk Building Systems 2007.1 because the directory names are identical to the directory names for Autodesk Building Systems 2007. The two products cannot be installed side by side.

<FULL_PROGRAM_NAME> AutoCAD MEP 2008

<PROFILE_FOLDER_NAME> ACD-MEP 2008

========================

After removing the applicable directories, you should also delete the corresponding registry keys for the products.
To delete the registry keys and reinstall the product
1. Log on as member of the “Local Administrator” group and disable any antivirus or anti-spyware programs.
2. On the Start menu in Windows XP, click Run. On the Start menu in Windows Vista, use the Search box.
3. Enter regedit in the text box and click OK in Windows XP or press in Windows Vista to start the Registry Editor.
4. In the Registry Editor, locate the following keys and delete them:
o “HKEY_LOCAL_MACHINE\SOFTWARE\Autodesk\AutoCAD\”
o “HKEY_CURRENT_USER\Software\Autodesk\AutoCAD\”

========================

You should replace with the corresponding product key name from the following list. For a full list of all Autodesk Product IDs, refer to the following Technical Solution: http://usa.autodesk.com/getdoc/id=TS1061475.

Autodesk Architectural Desktop 2005 is R16.1\ACAD-304:409
Autodesk Architectural Desktop 2006 is R16.2\ACAD-4004:409
Autodesk Architectural Desktop 2007 is R17.0\ACAD-5004:409
AutoCAD Architecture 2008 is R17.1\ACAD-6004:409
Autodesk Building Systems 2005 is R16.1\ACAD-306:409
Autodesk Building Systems 2006 is R16.2\ACAD-4006:409
Autodesk Building Systems 2007 is R17.0\ACAD-5106:409

Note: This listing also includes Autodesk Building Systems 2007.1 because the key name is identical to the key name for Autodesk Building Systems 2007. The two products cannot be installed side by side.

AutoCAD MEP 2008 is R17.1\ACAD-6006:409
5. Delete the files in the Local Administrator’s C:\Documents and Settings\\Local Settings\Temp directory to make sure that cached files are not used during the reinstallation.
6. Visit http://windowsupdate.microsoft.com to make sure that your Windows computer has all of the current updates and patches. Install any updates and patches as needed.
7. Restart your computer.
8. Log on as a member of the Local Administrator group and disable any antivirus or anti-spyware programs.
9. Reinstall the product.
=========================
Warning! Problems caused by improperly editing the Windows registry could render your computer operating system unusable. Microsoft provides critical information that you need to know about the registry in the Microsoft Knowledge Base at: http://support.microsoft.com/support.
Use the Microsoft Registry Editor only at your own risk and only after backing up the registry as well as the system.dat and user.dat files as outlined for your operating system in following Microsoft Knowledge Base related solution at: http://usa.autodesk.com/getdoc/id=TS66513. Additional information about the registry is also contained in the Help topics in the Microsoft Registry Editor.

Clean Uninstall AutoCAD and AutoCAD Verticals

VIDEO: using these instructions
====================================
there are two variations of the same theme depending on the number of Autodesk products installed on the machine, the instructions are listed below.
===============================
one good way to find out your <<USER ID>> is to open up windows explorer and type in %temp% for the address and hit return – this will take you to the directory listed in step 2.

IMPORTANT: it is highly recommended that you back up your computers registry before making changes to it. Also backing up your software also restoring your settings after you reinstall Also update your software after reinstallation if needed. CLICK HERE FOR STEPS
====================================================
If you only have MORE THAN ONE Autodesk Product on Machine and want to UNINSTALL SINGLE PRODUCT
====================================================
1)      Backup the following Directories
a.       C:\Documents and Settings\<<USERID>>\Application Data\Autodesk\<<product name>>
b.      C:\Documents and Settings\<<USERID>>\Local Settings\Application Data\Autodesk\<<product name>>
c.       Any Customization Files you have edited
2) Delete the CONTENTS of the following Directory the NOT THE DIRECTORY ITSELF
a.       C:\Documents and Settings\\<<USERID>>\Local Settings\Temp
3)      Window Add/Remove Programs à remove Autodesk program
4)      Delete the following directories
a.       C:\Documents and Settings\<<USERID>>\Application Data\Autodesk\<<product name>>
b.      C:\Documents and Settings\<<USERID>>\Local Settings\Application Data\Autodesk\<<product name>>
c.       C:\Program Files\<<product name>>
5)      Edit the Computers Registry
a.       On the Start menu (Windows), click Run
b.      In the Run dialog box, enter regedit in the Open box and click OK to start the Registry Editor.
c.       In the Registry Editor, locate the following subkeys and delete them
i.      PLEASE CLICK BELOW IF UNSURE WHICH KEY TO DELETE FOR REGISTRY INFORMATION
ii.      HKEY_CURRENT_USER\Software\Autodesk\AutoCAD\…ACAD-………<click here for reg info
iii.      HKEY_LOCAL_MACHINE\Software\Autodesk\AutoCAD\…ACAD-…….<click here for reg info
6)      Empty the Recycle Bin
7)      Start > All Programs > Accessories > System Tools > Disk Cleanup
8)      Start > All Programs > Accessories > System Tools > Disk Defragmenter  (3 Times)
9)      Reboot
====================================================
If you only have ONLY ONE Autodesk Product on Machine or you want to UNINSTALL ALL Autodesk products
====================================================
1)      Backup the following Directories
a.       C:\Documents and Settings\<<USERID>>\Application Data\Autodesk
b.      C:\Documents and Settings\<<USERID>>\Local Settings\Application Data\Autodesk
c.       Any Customization Files you have edited
2)      Delete the CONTENTS of the following Directory the NOT THE DIRECTORY ITSELF
a.       C:\Documents and Settings\\<<USERID>>\Local Settings\Temp
3)      Window Add/Remove Programs à remove Autodesk program
4)      Delete the following directories
a.       C:\Documents and Settings\<<USERID>>\Application Data\Autodesk
b.      C:\Documents and Settings\<<USERID>>\Local Settings\Application Data\Autodesk
c.       C:\Program Files\Common Files\Autodesk Shared
d.      C:\Program Files\\<<product name>>
5)      Edit the Computers Registry
a.       On the Start menu (Windows), click Run
b.      In the Run dialog box, enter regedit in the Open box and click OK to start the Registry Editor.
c.       In the Registry Editor, locate the following subkeys and delete them
i.      PLEASE CALL ME IF UNSURE WHICH KEY TO DELETE
ii.      HKEY_CURRENT_USER\Software\Autodesk
iii.      HKEY_LOCAL_MACHINE\Software\Autodesk
6)      Empty the Recycle Bin
7)      Start > All Programs > Accessories > System Tools > Disk Cleanup
8)      Start > All Programs > Accessories > System Tools > Disk Defragmenter  (3 Times)
9)      Reboot
====================================================
NOTES:
if you have 2011 product there are shared materials libraries located in Add/Remove Programs or Programs and Features. These libraries are shared by all the 2011 products, so only uninstall them if all other 2011 products have already been uninstalled first. When you uninstall these material libraries uninstall them Largest one first, smallest one last.
========================================
Autodesk Material Library 2011 Medium Image library – this is the largest it should be uninstalled first.
Autodesk Material Library 2011 Base Image library – this is the next largest it should be uninstalled second
Autodesk Material Library 2011 – this should be the smallest library and should be uninstalled last
=========================================

If the preceding clean uninstallation instructions did not resolve the issue or you believe that a clean uninstall is not necessary to resolve your issue, you can do any of the following.  These instructions can be performed independently of any instructions in this post.  Uninstalling and reinstalling the .NET framework or Uninstalling and reinstalling the C++ redistributables can be done at anytime to resolve an issue without doing a clean uninstall.  Both of these uninstalls/reinstalls are very common troubleshooting activities Autodesk Technical Support asks customers to do, before resorting to other methods.

(there is a version 4 of the .NET framework available now, the following link is not updated to show this yet, rely on windows update to determine which one you need to install)

Click for finding out which .NET framework AutoCAD and AutoCAD verticals use
Click for Uninstall Reinstall the .NET framework

Uninstall Reinstall C++ Redistributables (32 or 64 bit)
Click for 32 bit
Click for 64 bit
===========================================

Warning! Problems caused by improperly editing the Windows registry could render your computer operating system unusable. Microsoft provides a wealth of critical information that you need to know about the registry in the Microsoft Knowledge Base at http://support.microsoft.com/support.

Use the Microsoft® Registry Editor only at your own risk and only after backing up the registry as well as the system.dat and user.dat files as outlined for your operating system in the Microsoft Knowledge Base and in the related solution, TS66513. Additional information about the registry is also contained in the Help topics in the Microsoft Registry Editor.

Borrowing a Network License from LMTOOLS (FLEXnet) Option File Info

The attachments to this email contain 2 documents and the link below contain information regarding controlling the borrowing of a network incense from the Autodesk Network License Manager.

****************************************************
Note:
Users can borrow a license in an Autodesk product by clicking the Tools menu License Borrowing, or by entering borrowlicense on the Autodesk product command line.
*********************
Note:
Additional control of how license are managed is possible creating an options file. In this text file you can specify individuals, groups, projects, computers, software, software version, maximum and minimum number of licenses available, and maximum and minimum length of borrow time allowed, etc.
****************************************************

2006-2009 FLEXnet Feature Codes
2010 FLEXnet Feature Codes
2011 FLEXnet Feature Codes
2012 FLEXnet Feature Codes

Controlling network license access using an options file
source

Published date: 2006-Jun-21
ID: TS1055247
Applies to:
AutoCAD® 2009
AutoCAD® 2008
AutoCAD® 2007
AutoCAD® 2006

Issue
You would like to know how to control network license access using an options file with the FLEXlm or FLEXnet network license managers.

Solution
Access to licenses is controlled with a FLEXlm® options file that is configured with the settings you want to use. The options file is an optional component of the Flex license management system and is not required for normal license operation.

Creating the options file
1. Create a new text file named ADSKFLEX.OPT. It is strongly recommended that you only use a plain text editor, such as Notepad, for editing options files.
2. Place this file in the same directory as your Autodesk license file.
3. Perform a ReRead License File operation from the Start/Stop/ReRead tab in LMTOOLS.
4. Examine the debug log file to confirm that your options file changes have been implemented by the license manager.

Note: The examples in this document are intended to serve as samples only. Many options file commands, such as INCLUDE/EXCLUDE, are mutually exclusive. When you use these types of commands you should make sure that the syntax is correct.

================================
Entering comments in the options file
All syntax following a number sign (#) will be ignored by the license manager.
An example of an options file comment is shown below.
#This is a comment

===============================
Defining groups
You can define groups using the Windows login name or the computer name. Note: Computer names and user names are case sensitive.
GROUP [groupname] [user1] [user2] [user3]
HOST_GROUP [groupname] [computername1] [computername2] [computername3]
The following example defines a group called EngineeringGroup for three users:
GROUP EngineeringGroup smithj jonesb whitef
The following example defines a group called DraftingDept with three computers:
HOST_GROUP DraftingDept computer1 computer2 computer3

======================================
Disabling case sensitivity for user and computer names
You can enable/disable case sensitivity for user names and computer names when using the GROUP or HOST_GROUP commands.
The following example disables case sensitivity for user and computer names:
GROUPCASEINSENSITIVE ON
The following example does not disable case sensitivity for user and computer names:
GROUPCASEINSENSITIVE OFF

======================================
Defining project association
Specific computers can be defined as part of a project by configuring an environment variable on those client machines. This project designation can then be used to control license access in the options file. Note: The project environment variable is an optional component and is not required when you define groups directly in the options file.
To designate a computer as a member of a project
1. On the Start menu (Windows), click Settings > Control Panel.
2. In Control Panel, double-click System.
3. In the System properties dialog box, click the Advanced tab.
4. On the Advanced tab, click Environment Variables.
5. Under System Variables, click New.
6. In the New System Variable dialog box, enter LM_PROJECT for the Variable name and the project name for the Variable value.
7. Click OK to close each dialog box.
Your project is now defined and you do not have to reboot the computer for these settings to take effect.

======================================
Reserving licenses
You can reserve a specific count of licenses for a user, computer, group of users or computers, IP address, IP address range or by LM_PROJECT variable association (computer names and user names are case sensitive).
RESERVE [count] [productfeature] [type] [name]
The following examples reserve either 1 or 5 AutoCAD® 2006 licenses for a variety of types:
RESERVE 1 48800ACD_2006_0F USER smithj
RESERVE 1 48800ACD_2006_0F HOST computer1
RESERVE 5 48800ACD_2006_0F GROUP EngineeringGroup
RESERVE 5 48800ACD_2006_0F HOST_GROUP DraftingDept
RESERVE 1 48800ACD_2006_0F INTERNET 192.168.0.100
RESERVE 5 48800ACD_2006_0F INTERNET 192.168.0.*
RESERVE 5 48800ACD_2006_0F PROJECT CivilProject

======================================
Restricting maximum license usage
You can limit usage of specific licenses for a user, computer, group of users or computers, IP address, IP address range or by LM_PROJECT variable association (computer names and user names are case sensitive).
MAX [count] [productfeature] [type] [name]
The following examples set a limit of either 1 or 5 AutoCAD 2006 licenses for a variety of types:
MAX 1 48800ACD_2006_0F USER smithj
MAX 1 48800ACD_2006_0F HOST computer1
MAX 5 48800ACD_2006_0F GROUP EngineeringGroup
MAX 5 48800ACD_2006_0F HOST_GROUP DraftingDept
MAX 1 48800ACD_2006_0F INTERNET 192.168.0.100
MAX 5 48800ACD_2006_0F INTERNET 192.168.0.*
MAX 5 48800ACD_2006_0F PROJECT CivilProject

======================================
Excluding license usage
You can block access to specific licenses for a user, computer, group of users or computers, IP address, IP address range or by LM_PROJECT variable association (computer names and user names are case sensitive). Note: Any users, hosts or IP addresses not explicitly excluded will continue to have access to these licenses.
EXCLUDE [productfeature] [type] [name]
The following examples block access to AutoCAD 2006 licenses for a variety of types:
EXCLUDE 48800ACD_2006_0F USER smithj
EXCLUDE 48800ACD_2006_0F HOST computer1
EXCLUDE 48800ACD_2006_0F GROUP EngineeringGroup
EXCLUDE 48800ACD_2006_0F HOST_GROUP DraftingDept
EXCLUDE 48800ACD_2006_0F INTERNET 192.168.0.100
EXCLUDE 48800ACD_2006_0F INTERNET 192.168.0.*
EXCLUDE 48800ACD_2006_0F PROJECT CivilProject

======================================
Including license usage
You can provide access to specific licenses for a user, computer, group of users or computers, IP address, IP address range or by LM_PROJECT variable association (computer names and user names are case sensitive). Note: Any users, hosts or IP addresses not explicitly included will not have access to the specified licenses. If you want to block license usage for only a few users you should consider using the EXCLUDE syntax.
INCLUDE [productfeature] [type] [name]
The following examples provide access to AutoCAD 2006 licenses for the specified type only:
INCLUDE 48800ACD_2006_0F USER smithj
INCLUDE 48800ACD_2006_0F HOST computer1
INCLUDE 48800ACD_2006_0F GROUP EngineeringGroup
INCLUDE 48800ACD_2006_0F HOST_GROUP DraftingDept
INCLUDE 48800ACD_2006_0F INTERNET 192.168.0.100
INCLUDE 48800ACD_2006_0F INTERNET 192.168.0.*
INCLUDE 48800ACD_2006_0F PROJECT CivilProject

======================================
Setting license inactivity timeout
You can configure the license manager to automatically reclaim inactive licenses after a specified time. Inactivity is defined as an idle product with no commands issued in the specified time. Users will be given the option to save their current drawing if a license is revoked by the license manager for inactivity. Note: Time is specified in seconds and the lowest acceptable value for these options is 900 seconds (15 minutes).
TIMEOUT [productfeature] [seconds]
TIMEOUTALL [seconds]
The following examples set inactivity timeouts of 30 minutes for AutoCAD 2006 and all respective products:
TIMEOUT 48800ACD_2006_0F 1800
TIMEOUTALL 1800

======================================
Report log creation
You can configure the creation of a report log (RL) file for use with the SAMreport™ or SAMreport™-lite usage reporting tools. For more information about configuring SAMReport-Lite, you should refer to the related documentation.

======================================
Note: The plus sign (+) preceding the report log file path indicates that the license manager should append to the report log instead of overwriting it. Also, the path for the report log should not contain spaces and must already exist (the license manager will not create this location for you). The license manager will create the report log file.
REPORTLOG +
The following example defines a report log file to be created in a specific location:
REPORTLOG +C:\Reports\MyServer.rl

======================================
Controlling license borrowing
Several options file commands control license borrowing for specified licenses.

======================================
Maintaining licenses
You can specify a number of specific licenses that cannot be borrowed.
BORROW_LOWWATER [productfeature] [count]
The following example blocks license borrowing for 5 AutoCAD 2006 licenses:
BORROW_LOWWATER 48800ACD_2006_0F 5

======================================
Setting the borrow period
You can specify the maximum duration of time that a specific license can be borrowed for in hours. Note: This value cannot be above the maximum borrow period specified by Autodesk in the product license file.
MAX_BORROW_HOURS [productfeature] [hours]
The following example limits license borrowing of AutoCAD 2006 licenses to 3 days:
MAX_BORROW_HOURS 48800ACD_2006_0F 72

======================================
Excluding license borrowing
You can block the ability to borrow specific licenses for a user, computer, group of users or computers, IP address, IP address range or by LM_PROJECT variable association (computer names and user names are case sensitive). Note: Any users, hosts or IP addresses not explicitly excluded will continue to have the ability to borrow licenses.
EXCLUDE_BORROW [productfeature] [type] [name]
The following examples block borrowing of AutoCAD 2006 licenses for a variety of types:
EXCLUDE_BORROW 48800ACD_2006_0F USER smithj
EXCLUDE_BORROW 48800ACD_2006_0F HOST computer1
EXCLUDE_BORROW 48800ACD_2006_0F GROUP EngineeringGroup
EXCLUDE_BORROW 48800ACD_2006_0F HOST_GROUP DraftingDept
EXCLUDE_BORROW 48800ACD_2006_0F INTERNET 192.168.0.100
EXCLUDE_BORROW 48800ACD_2006_0F INTERNET 192.168.0.*
EXCLUDE_BORROW 48800ACD_2006_0F PROJECT CivilProject

======================================
Including license borrowing
You can provide the ability to borrow specific licenses for a user, computer, group of users or computers, IP address, IP address range or by LM_PROJECT variable association (computer names and user names are case sensitive).
Note: Any users, hosts or IP addresses not explicitly included will not have the ability to borrow the specified licenses. If you want to block license borrowing for only a few users, you should consider using the EXCLUDE_BORROW syntax above.
INCLUDE_BORROW [productfeature] [type] [name]
The following examples allow borrowing of AutoCAD 2006 licenses for the specified type only:
INCLUDE_BORROW 48800ACD_2006_0F USER smithj
INCLUDE_BORROW 48800ACD_2006_0F HOST computer1
INCLUDE_BORROW 48800ACD_2006_0F GROUP EngineeringGroup
INCLUDE_BORROW 48800ACD_2006_0F HOST_GROUP DraftingDept
INCLUDE_BORROW 48800ACD_2006_0F INTERNET 192.168.0.100
INCLUDE_BORROW 48800ACD_2006_0F INTERNET 192.168.0.*
INCLUDE_BORROW 48800ACD_2006_0F PROJECT CivilProject

Autodesk at the movies Academy Awards

In case you didn’t know….Autodesk products are used in the movie industry, a lot of academy award winners….here is an incomplete listing.
Everyone:

Here are some movies that were made with Autodesk products.

• A History of Violence: Mr. X used the Discreet Flame system and Autodesk Combustion desktop visual effects software
• Aeon Flux: The Orphanage used Autodesk 3ds Max software and Pacific Title & Art Studio used Discreet Inferno, Discreet Smoke and Discreet Lustre systems
• Brokeback Mountain: Buzz Image Group used the Discreet Inferno system
• Les Chevaliers du Ciel: La Maison used the Discreet Inferno and Flame systems and Autodesk Combustion software
• Flight Plan: Pacific Title & Art Studio used Discreet Inferno, Discreet Smoke and Discreet Lustre systems
• Ice Harvest: Mr. X used the Discreet Flame system
• Jarhead: ILM used the Discreet Inferno and Discreet Flame systems as part of its proprietary SABRE visual effects system
• Just Friends: Pacific Title & Art Studio used Discreet Inferno, Discreet Smoke and Discreet Lustre systems
• King Kong: Weta Digital used the Discreet Lustre system
• Munich: ILM used the Discreet Inferno and Discreet Flame systems as part of its proprietary SABRE visual effects system
• Prize Winner of Defiance Ohio: Sony Pictures Imageworks used the Discreet Flame system
• Rent: ILM used the Discreet Inferno and Discreet Flame systems as part of its proprietary SABRE visual effects system
• Serenity: Zoic Studios used the Discreet Flame system and Autodesk Combustion software
• Stay: Buzz Image Group and R!OT used Discreet Inferno systems, and Frantic Films used Autodesk 3ds Max software
• The Brothers Grimm: Peerless used the Discreet Inferno system and Autodesk Burn background processing solution
• The Legend of Zorro: Peerless used the Discreet Inferno system and Autodesk Burn background processing solution
• Where the Truth Lies: Mr. X used the Discreet Flame system
• Yours, Mine and Ours: Pacific Title & Art Studio used Discreet Inferno, Discreet Smoke and Discreet Lustre systems
• Zathura: Sony Pictures Imageworks used the Discreet Flame system and Digital Dimension used Autodesk 3ds Max software

Unable to run AutoCAD as a restricted user

source: TS1055299

When you tried to launch AutoCAD® as a restricted user, you either received error messages or the program failed to start.

Important Notes, read this information carefully before proceeding:

*

AutoCAD® and AutoCAD® LT are only tested against out-of-box Microsoft restricted users and roaming users. Any customization or restriction you place on users could have unexpected results in AutoCAD and are considered unsupported operating environments.
*

The information below is for system and network administrators only. Advanced troubleshooting knowledge and access rights will be required for both testing and resolving these issues. You should always back up essential data files, export a copy of the current registry settings and set a system restore point before making changes to the Windows Registry or user profile folders.
*

Other Autodesk products, including verticals built on AutoCAD technology, may have different requirements and recommendations. Many Autodesk products do not support restricted or roaming users even in the default, out-of-box configuration. You should always refer to specific product documentation for details and requirements.

Testing strategy for failures when running AutoCAD as a restricted user

To determine the specific customization that is causing the problem, you should start by testing a new local or domain user without any policies or restrictions applied. Then you can begin adding customizations one at a time or in small groups. You should test AutoCAD with each change. For more information about troubleshooting Windows user profiles, refer to Microsoft support and documentation.

If users are configured in an Organizational Unit (OU) on a Microsoft Active Directory server, you should create a new OU that does not have a Group Policy applied. Make sure that you block the inheritance of policies from other OUs.

Expected AutoCAD startup behavior

To help troubleshoot user profile problems, refer to the following description of the expected AutoCAD startup procedure:

1. When AutoCAD is launched by any user, the existence of the following folders and registry keys is validated:

* C:\Documents and Settings\%username%\Application Data\Autodesk\AutoCAD 2006
* C:\Documents and Settings\%username%\Local Settings\Application Data\Autodesk\AutoCAD 2006
* HKEY_CURRENT_USER\Software\Autodesk\AutoCAD\R16.2\ACAD-4001:409

2. If these folders or registry keys do not exist, a secondary installer process (Msiexec) is launched to configure the default content and settings in these locations. The default content is stored in the hidden folder \UserDataCache (the default location is C:\Program Files\AutoCAD 2006\UserDataCache). If these folders and registry keys exist (even if they contain limited or incorrect data), AutoCAD will still launch.
3. The normal launch sequence continues and the required components (files, menus, toolbars, and so on) are loaded.

There are several customizations that are known to cause problems with the AutoCAD launch process. The following list, including related solutions where applicable, covers only some of the common settings that have been reported to Autodesk Product Support. This list is not inclusive and specific details will vary based on other network and machine customizations. You should refer to the testing strategy in this solution to determine the exact cause of failure.

Corrupt or duplicate user profiles

During the secondary installer process, a hard-coded link is established between your registry settings and your profile folders. If the name of the user or the name of the profile folder changes, required content cannot be accessed. In this situation, errors indicating that content cannot be found will usually be displayed.

To work around this issue

* Check to make sure that the registry values in the HKEY_CURRENT_USER\Software\Autodesk\AutoCAD\R16.2\ACAD-4001:409 subkey are pointing to the current user profile. If they are pointing to the correct location, it may be necessary to back up any data in the profile and recreate it on the machine and/or the network.
* Check for duplicate profile folders in the format %username%.domainname or %username%.computername. This condition indicates that there are problems or changes with user profiles that may need to be addressed on the machine or the network.
* The errors in AutoCAD can often be resolved by backing up and deleting the following registry subkey: HKEY_CURRENT_USER\Software\Autodesk\AutoCAD\R16.2\ACAD-4001:409, and then launching AutoCAD to trigger the secondary installer process. Note: During the secondary installer process, many user specific settings will be reset to the default settings. You should back up any customizations before you proceed. Also, this workaround will not address the problem that is causing the user profile to be duplicated or corrupted.

Default user customization and/or mandatory profiles

Microsoft user profiles contain registry information specific to that user in a file called NTUSER.DAT which is located in the user profile folder. Copying this registry information into the Default User profile or assigning this registry information as part of a mandatory profile can cause several types of failures in the secondary installer functionality. For example, AutoCAD failing to run with no error message or splash screen. In many cases, AutoCAD will fail with an error message implicating a different user’s profile folders. These configurations are not tested or supported for any Autodesk products and no workaround is supplied.

Folder redirection

There are several ways to redirect certain folders from within the user profile, including (but not limited to) the Start Menu, My Documents or Temp folders. This customization can be done directly on the computer or with network management software, such as Microsoft Active Directory and Group Policies. These types of customizations can cause failures in the AutoCAD secondary installer which might result in error messages, such as Error 1606: Unable to access network location. To correct this issue, you should remove folder redirection from the user, reboot the machine, and then try to run AutoCAD again.

Permissions restrictions

In Windows 2000 and XP, restricted users are prevented from modifying files, folders and registry entries outside their user profile. To support restricted user accounts, all customizable AutoCAD files and registry settings are stored within the user profile. Users must have Full Control permissions to all files and folders in the C:\Documents and Settings\%username% (Windows XP) or C:\WINNT\Users\%username% (Windows 2000) directory. Additionally, users must have Full Control permissions to all registry keys and values in the HKEY_CURRENT_USER key in the registry. Restrictions that limit a user’s permissions to these locations could cause failures in the AutoCAD secondary installer or within the program. Typical errors include Microsoft Windows Installer errors such as Error 1321: Insufficient permissions to modify file. Errors in the 14##, 13##, 17## range could also indicate permissions restrictions.

To correct this issue, you should remove permission restrictions from the user, reboot the machine, and then try to run AutoCAD again.

Restrictions on the Windows Installer Service

There are several ways of preventing users from accessing the Windows Installer Service (Msiexec), including placing restrictions in the Group Policy Object in Active Directory. The first time a user of a machine runs AutoCAD, the Windows Installer Service is required for the secondary installer to function. To correct this issue, you should remove this restriction from the user, reboot the machine, and then try to run AutoCAD again.

Preventing applications from running in the user profile

Policies that prevent users from launching applications from within the user profile can cause AutoCAD to fail to launch with no error message or splash screen. One place this restriction can be specified is in the Group Policy Object in Active Directory under User Configuration > Windows Settings > Security Settings > Software Restriction Policies > Additional Rules > %userprofile% = Disallowed. These types of restrictions are not tested or supported for use with AutoCAD. To correct this issue, you shoud remove this restriction from the user, reboot the machine, and then try to run AutoCAD again.

Data Execution Prevention

Data execution prevention (DEP) can prevent AutoCAD from launching. See the related solutions for information about exempting AutoCAD from Windows DEP settings.

Intro Applied Technology Group Hotline –FTP Site –Service Packs

===============================================
Introducing Technical Support
Helpdesk Hotline: 501-372-2373
Technical Support: FTP site
===============================================
video: logging onto our FTP site:
http://screencast.com/t/L3Ntx5LUp4B
_____________________________
Applied Technology Groups FTP site:
Using Windows Explorer  (NOT internet explorer)
Path  FTP://www.appliedtg.com
User:               ATGFTP (capitals)
Password:     appli3d123 (lower case)
_______________________________
Copy and paste your content into the appropriate directory or
If the directory doesn’t exist then create one.  If you do create
The directory then please let us know.
===============================================
Installation of Service Pack(s)
===============================================

video: determining which service pack is installed on your Autodesk product.
http://screencast.com/t/vFgoXIEm
video: determining which service pack or update that made available from Autodesk.
http://screencast.com/t/Wn56G19QPp
I am working on this issue.  In the mean time please check to see if your Software is up to date:
Go to <Help> <About> <Product Info> <Service Packs> to determine.
Or…
You can go to <Start> <Control Panel> <Add/Remove Programs> <check the Updates checkbox> <look at your product  in the listing>

If you determine your software isn’t up to date, the instructions for making it so are provided below with the links you need.

Feel free to contact me at the email or numbers below.

Thank you.
===========================
1) Download SP to your hard drive
2) Disable Anti-Virus
3) Close all open programs
4) Insert Product Install Disk into Disk Drive
a) When install page loads go ahead and close it down
b) We only need the presence of the disk in the disk drive
5) Double click on SP ( it self installs)

Force Return Network License

Erase the knowledge of the borrowed license from the client machine, borrow it again, and then try to return it using the procedure below. Note: This procedure resets all borrowed licenses for this user/computer.

  1. On the client computer, log in as the user who borrowed the license.
  2. On the Start menu (Windows), click Run (Windows 2000/XP) or StartSearch (Windows Vista).
  3. Enter regedit, and then click OK.
  4. In the Registry Editor, navigate to the following registry key:
    • HKEY_CURRENT_USER\Software\FLEXlm License Manager\Borrow
  5. In the Registry Editor, on the File menu, click Export to create a back up of this key.
  6. Delete this registry key.
  7. Close the Registry Editor.
  8. Borrow the license again for the product(s) and version(s) that you could not return.
    • Launch the product
    • Close the product

Adding Firewall Port Exceptions for Autodesk Products

Any program that filters or uses one of the following specific ports:
TCP/IP or UDP ports 27000 – 27009
TCP/IP or UDP port 2080

http://screencast.com/t/kpOj2jiSpO

NOTE:
The example below illustrates the general idea of how to open a port exception for windows firewall.
You may not have this exact user interface….
Adding the port exception
1. Click Start, click Run, type wscui.cpl, and then click OK.
2. In Windows Security Center, click Windows Firewall.
3. Click the Exceptions tab, and then click Add Port to display the Add a Port dialog box.
4. Type a descriptive name for the port exception and the port number that your program uses, and then select either the TCP or UDP protocol.
a. CHOOSE TCP
5. Click OK to close the Add a Port dialog box.

2011 Product Keys

Here is an incomplete listing of 2011 Product Keys

Click here for the 2010 Product Key Listing
Click here for the 2012 Product Key Listing

Happy installations….

AutoCAD 2011   001C1
AutoCAD LT 2011  057C1
AutoCAD Architecture 2011 185C1
AutoCAD Civil 3D 2011 237C1
AutoCAD Map 3D 2011 129C1
AutoCAD MEP 2011  235C1
AutoCAD P&ID 2011 448C1
AutoCAD Raster Design 2011 340C1
Autodesk Navisworks Manage 2011 507C1
Autodesk Navisworks Review 2011 504C1
Autodesk Navisworks Simulate 2011 506C1
Autodesk MapGuide Enterprise 2011  276C1
Autodesk 3DS Studio Max Design 2011 495C1
Autodesk Productstream Prof. Pro 2011 261C1
Autodesk Revit Architecture 2011  240C1
Revit Architecture Suite 2011   241C1
Autodesk Revit Structure 2011  255C1
Autodesk Revit Structure Suite 2011 256C1
Autodesk Revit Architecture Visualization Suite 2011 595C1
Autodesk Revit MEP 2011  297C1
Autodesk Revit MEP Suite 2011 257C1

Launch Errors with Civil 3D 2010

Errors on Launch:

base.dcl can’t find file
Error loading dialog control file
Semantic error(s) in DCL file acadmap.dcl. see file acad.dce for details
Semantic error(s) in DCL file ade.dcl. see file acad.dce for details
—————
These are Erroneous ACMAP06 Launch Errors (do not know why these would be showing up)
—————
Solution: Registry Key Removal
HKEY_CURRENT_USER\Software\Autodesk\AutoCAD\R16.2\ACAD-8000:409
Launch the product using the Desktop icon for civil 3d 2010.

Warning! Problems caused by improperly editing the Windows registry could render your computer operating system unusable. Microsoft provides a wealth of critical information that you need to know about the registry in the Microsoft Knowledge Base at http://support.microsoft.com/support.

Use the Microsoft® Registry Editor only at your own risk and only after backing up the registry as well as the system.dat and user.dat files as outlined for your operating system in the Microsoft Knowledge Base and in the related solution, TS66513. Additional information about the registry is also contained in the Help topics in the Microsoft Registry Editor.

network license timeout issue with Revit 2010

=====================================

Revit 2010 License Timeout Workaround – Update 2 and Subscription Advantage Pack Build

http://usa.autodesk.com/adsk/servlet/ps/dl/item?siteID=123112&id=14309812&linkID=9243099

=====================================

Published date: 2010-Jan-22
ID: TS14309812

Applies to:
Autodesk® Revit® Architecture 2010
Autodesk® Revit® MEP 2010
Autodesk® Revit® Structure 2010

network_license_workaround_-_update_2.zip (zip – 18123Kb)
network_license_workaround_-_sub_advantage_update_3.zip (zip – 18145Kb)

Issue

Revit 2010 is not able to recover a lost network license when Revit is running. The program switches to Demo mode and any open data files will not be saved.

Solution

The files attached will allow Revit 2010 to recover a network license while running. If, after a 2 hour grace period, a network license is not found, Revit 2010 will display a dialog with the options to Save As & Exit or Exit. The user will not encounter Demo mode at anytime during this process.

Requirements:

For Revit 2010 Build # 20090917_1515 use the Network License Workaround – Update 2.zip

For Revit 2010 Build # 20090925_1815 use the Network License Workaround – Sub Advantage Update 3.zip. This version of the workaround also includes the wall crash hotfix.

Network License Workaround – Update 2 Known Issues:

  1. TIMEOUT – The Server TIMEOUT (idle license recovery) settings for Revit 2010 will be ignored.
  2. STARTUP – If no network license is found, an ADLM dialog will display and Revit will exit. The user will not have any other options.
  3. SHUTDOWN – If closing the software when in the 2 hr grace period, the user will be prompted to save any unsaved work. The save will complete successfully if the user chooses to save, but CER dialog will display. This can be ignored.
  4. 64-BIT – You cannot successfully switch to standalone on a 64-bit OS. With a valid network license, you can switch from network to demo and back, but not to standalone from either.
  5. BORROW LICENSE – You cannot borrow a license with the workaround in place.  If you need to borrow a license the workaround will need to be removed from the workstation.

Network License Workaround – Sub Advantage Update 3 Known Issues:

  1. BORROW LICENSE – You cannot borrow a license with the workaround in place.  If you need to borrow a license the workaround will need to be removed from the workstation.

Directions:

To implement this workaround:

  1. On the client system, shut down Revit.
  2. Rename the following files located in the …\<Revit Installation Location>\Program\… folder:• GemDriverN.dll -> GemDriverN.dll.old
    • RevitDB.dll -> RevitDB.dll.old
    • RevitResENU.dll -> RevitResENU.dll.old
  3. Replace these files with the revised files from the ‘Network License Workaround – Update 2.zip’ file. Choose either the 32-bit or 64-bit version of the files.

To revert this workaround so that a update can be applied:

  1. On the client system, shut down Revit.
  2. Delete these files located in the …\<Revit Installation Location>\Program\… folder:• GemDriverN.dll
    • RevitDB.dll
    • RevitResENU.dll
  3. Rename the following files located in the …\<Revit Installation Location>\Program\… folder:• GemDriverN.dll.old -> GemDriverN.dll
    • RevitDB.dll.old -> RevitDB.dll
    • RevitResENU.dll.old -> RevitResENU.dll

This is will return your Revit 2010 install back to the base Revit 2010 Update 2 or 3 configuration. You can now apply a future Revit 2010 Update.

2010: Clean Uninstall of Revit Products

source

2011 clean uninstall of Autodesk Revit products
2012 clean uninstall of Autodesk Revit products

Issue

There may be circumstances where Revit 2010 products need to be removed from the workstation.  The following process will ensure all residual files are properly removed as well.

Solution

To uninstall Revit 2010 products and remove any remnants from your system, use the following procedure. The end result is a clean system on which you can reinstall.  Please ensure to backup any custom family or template files prior to following this procedure:

  1. Log on as a Local System Administrator and disable any Antivirus programs.
  2. In the Windows XP Control Panel > Add or Remove Programs > remove the specific Revit 2010 product.  For Windows Vista, Control Panel > Programs and Features > Uninstall.
  3. After the product is uninstalled, use Windows Explorer to locate and delete the following folders as appropriate.  For steps 3 & 4 substitute the product name below based on which Revit 2010 product you are uninstalling; all paths listed by default are for Revit Architecture 2010:


Autodesk Revit Architecture 2010 & RAC 2010
Autodesk Revit Structure 2010 & RST 2010
Autodesk Revit MEP 2010 & RME 2010

Where %username% is present below substitute the current Windows login name.

For Microsoft XP installations (32 and 64 bit):
•  C:\Program Files\Autodesk Revit Architecture 2010
•  C:\Documents and Settings\%username%\Application Data\Autodesk\REVIT\2010
•  C:\Documents and Settings\%username%\Local Settings\Application Data\Autodesk\Revit\Autodesk Revit Architecture 2010
•  C:\Documents and Settings\All Users\Application Data\Autodesk\RAC 2010

For Microsoft Vista installations (32 and 64 bit):
•  C:\Program Files\Autodesk Revit Architecture 2010
•  C:\ProgramData\Autodesk\RAC 2010
•  C:\Users\%username%\AppData\Local\Autodesk\Revit\Autodesk Revit Architecture 2010
•  C:\Users\%username%\AppData\Roaming\Autodesk\Revit\2010

  1. Open the system registry and locate then delete the following registry keys listed below as appropriate (Windows Start menu > Run > Regedit).

Warning! Problems caused by improperly editing the Windows registry could render your computer operating system unusable. Microsoft provides a wealth of critical information that you need to know about the registry in the Microsoft Knowledge Base at http://support.microsoft.com.

Use the Microsoft® Registry Editor only at your own risk and only after backing up the registry as well as the system.dat and user.dat files as outlined for your operating system in the Microsoft Knowledge Base and in the related solution, TS66513. Additional information about the registry is also contained in the Help topics in the Microsoft Registry Editor.

For 32-bit versions of Vista and XP
•  HKEY_CURRENT_USER\Software\Autodesk\Revit\Autodesk Revit Architecture 2010
•  HKEY_CURRENT_USER\Software\Autodesk\Revit\2010
•  HKEY_LOCAL_MACHINE\SOFTWARE\Autodesk\Revit\Autodesk Revit Architecture 2010
•  HKEY_LOCAL_MACHINE\SOFTWARE\Autodesk\RAC 2010
•  HKEY_LOCAL_MACHINE\SOFTWARE\Autodesk\Revit\2010

For 64-bit versions of Vista and XP
•  HKEY_CURRENT_USER\Software\Autodesk\Revit\Autodesk Revit Architecture 2010
•  HKEY_LOCAL_MACHINE\SOFTWARE\Autodesk\RAC 2010
•  HKEY_LOCAL_MACHINE\SOFTWARE\Autodesk\Revit\2010
•  HKEY_LOCAL_MACHINE\SOFTWARE\Autodesk\Revit\Autodesk Revit Architecture 2010

  1. Restart the workstation.

Before reinstalling Revit products

  1. In Windows Explorer, delete the contents of your Windows Temp folder, but do not delete the Windows Temp folder itself. You can locate the Temp folder by entering %TEMP% in the Address bar of Windows Explorer.
  2. Use the End Task feature to end any anti-virus programs.

Note: Disabling anti-virus programs from the system tray may not be sufficient. Virus checking programs may block certain activities that are seen as suspicious (for example, accessing the registry, adding/removing/updating DLL files, and so on), even though these activities are common when installing or removing programs.

Several anti-virus programs can be disabled by right-clicking the taskbar icon and selecting Disable from the shortcut menu. For more information about disabling your anti-virus software, refer to the vendor of that software.

Important! It is important that you not only disable the anti-virus software but also use the End Task feature to end the anti-virus software.

To verify that an anti-virus program is not still running in the background as a TSR (Terminate and Stay Resident Program):

Windows XP and Windows Vista

  1. Press [Ctrl] + [Alt] + [Delete].
  2. Click Task Manager.
  3. On the Processes tab of the Task Manager, select the process for the anti-virus program and then click End Process.

You are now ready to install Revit 2010 products on the clean system.

Network Installation Videos

Video: Install LM Tools.
http://screencast.com/t/J9k9X37az7n

Video: LMTOOLS Version
http://screencast.com/t/twuW1GVH

Information required for license

Video: Configuring LMTOOLS Part 1:
http://screencast.com/t/LgsigJLR

Video: Configuring LMTOOLS Part 2:
http://screencast.com/t/qM1M5fXQRWY

Video: Creating a network deployment of AutoCAD 2010:
http://screencast.com/t/rgmKbDVfTF

NOTES:
Information to generate network license:
• Server Name:
• Ethernet Address:
• Serial Numbers for your product
• Autodesk Product Activation & Registration Number: 800-551-1490
The Network Deployment can be done before the LMTOOLS is configured
The Process of creating a network deployment is the same for other products – AutoCAD 2010 is used as an example
Make sure you enter the Product Key that came with your product (only 2010 or higher version has them)

2010 Product Keys

Here is an incomplete listing of 2010 Product Keys
Happy installations….

2012 Product Keys
2011 Product Keys

AutoCAD 2010 001B1
AutoCAD LT 2010 057B1
AutoCAD Architecture 2010 185B1
AutoCAD Civil 3D 2010 237B1
AutoCAD Civil 2010 544B1
AutoCAD Map 3D 2010 129B1
AutoCAD MEP 2010 235B1
AutoCAD P&ID 2010 448B1
AutoCAD Raster Design 2010 340B1
Autodesk Navisworks Manage 2010 507B1
Autodesk Navisworks Review 2010 504B1
Autodesk Navisworks Simulate 2010 506B1
Autodesk MapGuide Enterprise 2010 276B1
Autodesk 3DS Studio Max Design 2010 495B1
Autodesk Productstream Prof. Pro 2010 261B1
Autodesk Revit Architecture 2010 240B1
Revit Architecture Suite 2010 241B1
Autodesk Revit Structure 2010 255B1
Autodesk Revit Structure Suite 2010 256B1
Autodesk Revit MEP 2010 297B1
Autodesk Revit MEP Suite 2010 257B1
Autodesk Quantity Takeoff 2010 242B1
=========================================

Click here for the 2011 Product Keys Listing

Improving Plotter Performance

Upon researching your issue further, I found this information. Since you are having problems (AutoCAD hangs, incomplete plots, or errors) when plotting a drawing that contains a raster image, solid fill hatches, or using a Visual Style.

In addition to attached images, plotting both solid fill hatches and Visual Styles are affected by three different settings that control raster output.

Beginning in AutoCAD 2007, two new variables were added to help manage how much of the available system resources AutoCAD uses when plotting raster objects: RASTERPERCENT and RASTERTHRESHOLD. (Note: Neither of these variables are noted in the AutoCAD 2007 nor 2008 help files, but were included in the product read me files.)

• The RASTERPERCENT variable controls what percentage of available system resources (i.e. virtual memory) can be used to calculate raster output. Since this setting was unavailable before AutoCAD 2007, AutoCAD would use all available virtual memory and could affect the performance of other applications running. The default setting is 20, which means that AutoCAD can only use 20% of available virtual memory. While this setting is fine for most drawings, this may not be enough memory for more complex drawings which can result in incomplete drawings, AutoCAD seeming to lock-up or hang, or crashes when plotting. The higher the setting, the slower other applications could run while plotting in AutoCAD.

• The RASTERTHRESHOLD variable limits the size that the “plot file” can be. By default it is set to 20 megabytes. This means that if the calculated “plot file” would exceed 20 megabytes the plot will be aborted. Before AutoCAD 2007, instead of the plot being aborted, crashes or incomplete plots could occur. A higher setting may be necessary for complex drawings or drawings with large or many raster images attached.

Another setting that can impact the size of these plots is the Raster Graphics control in the Plotter Configuration Editor. Depending on the device you are using, the PC3 file may have the ability to manage “how much” raster data is sent. One way this setting can be set is when plotting:

1. PLOT
2. Select your plot device
3. Click on the Properties… button to open a Plotter Configuration Editor dialog
4. On the Device and Document Settings tab, expand the Graphics node
5. Highlight Raster Graphics (if available)… the slider bar that controls the Raster and Shaded/Viewport quality can be found in the lower portion of the dialog

Previously to AutoCAD 2008, the default setting tended to be with the slider set in the middle. Currently, with some drivers, the slider is defaulting to “Best” which means that AutoCAD is sending a lot more data than was probably sent using prior releases of AutoCAD. If the slider is set all the way to the left (“None”), then drawings will plot with no raster images or shading at all.

The following is are suggestions to help you discover the optimum setting for your configuration -which could change depending on the size of the drawing, attachment, how the Visual Style is configured, the driver and/or the plot device:

• First step:
o Set RASTERPERCENT to 90
o Set RASTERTHRESHOLD to 100
o Set the Raster slider bar one notch above None
• If that test proves successful:
o Try the Raster slider bar set to the middle

• If that test proves successful:
o Decrease RASTERTHRESHOLD incrementally by 10-20 megs between test plots until the default value (20) is reached, or plot performance is negatively affected
• Once you find the optimum setting for RASTERTHRESHOLD:
o If performance of other applications does not seem to be negatively affected when plotting from AutoCAD, you can leave RASTERPERCENT set at 90
o If system performance is impacted when plotting from AutoCAD decrease RASTERPERECENT incrementally by 10-20 percent until an optimum level is found

Please let us know if this information helps resolve your issue with plotting images.

2010 Causes Activation issues with 2009 and earlier software

issue:
===============
2010 has been installed
2009 was installed afterward
2009 crashes when attempting to activate
==============
resolution:
===============
2010 suite of products causes 09 products activation issues.
there is a installation and activation order. as follows.
uninstall 2010
uninstall 2009
install 2009 activate
install 2010 activate

Importing profile into AutoCAD 2010 the \ is stripped out of the path

As I understand the issue, when importing a profile into AutoCAD 2010 the \ is stripped out of the path.

As per our phone conservation:

This is a known issue, which involves the inability of the profile import function to use UNC paths. Your Support Request has been documented and sent to our development team for investigation. The tracking number is 1220101.

The development team will try to reproduce your Support Request and make an initial assessment. We will notify you immediately by email whenever your Support Request is updated. We appreciate your patience as we work to resolve your inquiry.

Please note: Not all issues identified in Support Requests are considered significant enough to address in their entirety. A proposed correction may create significant stability risks, and some issues may be impossible to fix due to product architectural restraints. Whenever possible, we will work with you to establish an acceptable workaround.

Until this is resolved, for now, the best workaround may be to use mapped drive letters rather than UNC paths in your search path.

Secondary Installer AutoCAD 2010

Issue

To reset the default AutoCAD® 2010 user settings, you want to reinitiate the secondary installer.

Solution

To reset the AutoCAD 2010 default user settings, you must first delete your application files and registry entries for the program. Follow these steps:

Note: Make sure that you back up any customized AutoCAD 2010 files before starting this procedure. CLICK HERE FOR STEPS

  1. Log on to the workstation as the user.
  2. On the Start menu (Windows), click Run.
  3. In the Run dialog box, enter regedit.
  4. In the Registry Editor, locate the following subkey and delete it:HKEY_CURRENT_USER\Software\Autodesk\AutoCAD\R18.0\ACAD-8001:409
  5. Exit the Registry Editor.
  6. In Windows Explorer, locate and delete the following application folders:C:\Documents and Settings\<user name>\Application Data\Autodesk\AutoCAD 2010 (backup this directory before deleting it)
    C:\Documents and Settings\<user name>\Local Settings\Application Data\Autodesk\AutoCAD 2010

The user should now be able to launch AutoCAD 2010. When the product is opened, the files and folders that were deleted will be recreated by the secondary installer.

Warning! Problems caused by improperly editing the Windows registry could render your computer operating system unusable. Microsoft provides a wealth of critical information that you need to know about the registry in the Microsoft Knowledge Base at http://support.microsoft.com/support.

Use the Microsoft® Registry Editor only at your own risk and only after backing up the registry as well as the system.dat and user.dat files as outlined for your operating system in the Microsoft Knowledge Base and in the related solution, TS66513. Additional information about the registry is also contained in the Help topics in the Microsoft Registry Editor.

Secondary Installer AutoCAD MEP 2010

Issue

To reset the default AutoCAD® MEP 2010 user settings, you want to reinitiate the secondary installer.

Solution

To reset the AutoCAD MEP 2010 default user settings, you must first delete your application files and registry entries for the program. Follow these steps:

Note: Make sure that you back up any customized AutoCAD MEP 2010 files before starting this procedure. CLICK HERE FOR STEPS

  1. Log on to the workstation as the user.
  2. On the Start menu (Windows), click Run.
  3. In the Run dialog box, enter regedit.
  4. In the Registry Editor, locate the following subkey and delete it:HKEY_CURRENT_USER\Software\Autodesk\AutoCAD\R18.0\ACAD-8006:409
  5. Exit the Registry Editor.

In Windows Explorer, locate and delete the following application folders:
XP:
C:\Documents and Settings\<user name>\Application Data\Autodesk\MEP 2010 (Copy and Paste this as a backup)

C:\Documents and Settings\<user name>\Local Settings\Application Data\Autodesk\MEP 2010
VISTA:
C:\Users\<user name>\AppData\Roaming\Autodesk\MEP 2010 ((Copy and Paste this as a backup)
C:\Users\<user name>\AppData\Local\Autodesk\MEP 2010

The user should now be able to launch AutoCAD MEP 2010. When the product is opened, the files and folders that were deleted will be recreated by the secondary installer.
Warning! Problems caused by improperly editing the Windows registry could render your computer operating system unusable. Microsoft provides a wealth of critical information that you need to know about the registry in the Microsoft Knowledge Base at http://support.microsoft.com/support.

Use the Microsoft® Registry Editor only at your own risk and only after backing up the registry as well as the system.dat and user.dat files as outlined for your operating system in the Microsoft Knowledge Base and in the related solution, TS66513. Additional information about the registry is also contained in the Help topics in the Microsoft Registry Editor.

Secondary Installer AutoCAD Map 3D 2010

Issue

To reset the default AutoCAD Map 3D 2010 user settings, you want to reinitiate the secondary installer.

Solution

To reset the AutoCAD Map 3D 2010 default user settings, you must first delete your application files and registry entries for the program. Follow these steps:

Note: Make sure that you back up any customized AutoCAD Map 3D 2010 files before starting this procedure. CLICK HERE FOR STEPS

1. Log on to the workstation as the user.
2. On the Start menu (Windows), click Run.
3. In the Run dialog box, enter regedit.
4. In the Registry Editor, locate the following subkey and delete it:HKEY_CURRENT_USER\Software\Autodesk\AutoCAD\R18.0\ACAD-8002:409
5. Exit the Registry Editor.
6. In Windows Explorer, locate and delete the following application folders:

XP:
C:\Documents and Settings\<user name>\Application Data\Autodesk\AutoCAD Map 3D 2010 (copy this directory as a backup)
C:\Documents and Settings\<user name>\Local Settings\Application Data\Autodesk\ AutoCAD Map 3D 2010

VISTA / WIN 7:
C:\Users\<userid>\AppData\Roaming\Autodesk\AutoCAD Map 3D 2010((Copy and Paste this as a backup)
C:\Users\<userid>\AppData\Local\Autodesk\AutoCAD Map 3D 2010

The user should now be able to launch AutoCAD Map 3D 2010. When the product is opened, the files and folders that were deleted will be recreated by the secondary installer.

Warning! Problems caused by improperly editing the Windows registry could render your computer operating system unusable. Microsoft provides a wealth of critical information that you need to know about the registry in the Microsoft Knowledge Base at http://support.microsoft.com/support.

Use the Microsoft® Registry Editor only at your own risk and only after backing up the registry as well as the system.dat and user.dat files as outlined for your operating system in the Microsoft Knowledge Base and in the related solution, TS66513. Additional information about the registry is also contained in the Help topics in the Microsoft Registry Editor.

Software Locks up when opening a drawing

Product: Map 3D 2010

Behavior: Locks up when opening a dwg

A Solution:  Norton 360 BUG

============

Duane,

Here is the link to where I found the patch.

http://discussion.autodesk.com/forums/message.jspa?messageID=6211776

Here is the actual link to the patch.

http://tinyurl.com/dfdt9o

I hope this helps if any of your other subscribers have the same issue.

KIP software asks for Map 3D 2010 disk

Autodesk Software:

AutoCAD Map 3D 2010

Issue:

When Using KIP software to transfer plots to the Kip plotter. I dialogue box appears asking for the AutoCAD Map 3D 2010 Disk.

Surprising because on the surface this does not have anything to do with AutoCAD Map 3D 2010 software.

Resolution: (from Autodesk Technical Support)

1. In windows Explorer browser to
XP: “C:\Documents and Settings\All Users\Application Data\Autodesk\”
Vista: “C:\ProgramData\Autodesk”
2. Right-click “Geospatial Coordinate Systems” and choose copy
3. Right-click a blank space in the right pane and choose paste
4. Wait until the copy process is complete
5. Rename “Copy of Geospatial Coordinate Systems” to “Geospatial Coordinate Systems Temp”

Note that Vista protects this folder with extra security. An administrator will need to perform these steps.  Please let me know if you have any further trouble with Map trying to self heal when launching other products.

Secondary Installer AutoCAD Civil 3D 2010

Issue

To reset the default AutoCAD Civil 3D 2010 user settings, you want to reinitiate the secondary installer.

Solution

To reset the AutoCAD Civil 3D 2010 default user settings, you must first delete your application files and registry entries for the program. Follow these steps:
Note: Make sure that you back up any customized AutoCAD Civil 3D 2010 files before starting this procedure. CLICK HERE FOR STEPS

  1. Log on to the workstation as the user.
  2. On the Start menu (Windows), click Run.
  3. In the Run dialog box, enter regedit.
  4. In the Registry Editor, locate the following subkey and delete it:
    HKEY_CURRENT_USER\Software\Autodesk\AutoCAD\R18.0\ACAD-8000:409
  5. Exit the Registry Editor.
  6. In Windows Explorer, locate and delete the following application folders:
    C:\Documents and Settings\<user name>\Application Data\Autodesk\C3D 2010
    C:\Documents and Settings\<user name>\Local Settings\Application Data\Autodesk\C3D 2010

The user should now be able to launch AutoCAD Civil 3D 2010. When the product is opened, the files and folders that were deleted will be recreated by the secondary installer.

Warning! Problems caused by improperly editing the Windows registry could render your computer operating system unusable. Microsoft provides a wealth of critical information that you need to know about the registry in the Microsoft Knowledge Base at http://support.microsoft.com/support.
Use the Microsoft® Registry Editor only at your own risk and only after backing up the registry as well as the system.dat and user.dat files as outlined for your operating system in the Microsoft Knowledge Base and in the related solution, TS66513. Additional information about the registry is also contained in the Help topics in the Microsoft Registry Editor.

Installation aborted after 5 seconds : DRAG AND DROP INTERCEPTOR

PRODUCT:

Civil 3D 2010
I believe that this will apply to many Autodesk products.
ISSUE:
Installation is aborted without messages less than 5 seconds after installation disc inserted into disk drive
(the installation page never appears)
SOLUTION:
Uninstall a 3rd party software called >>> DRAG AND DROP INTERCEPTOR

==========
Click for Additional Workaround Information
==========
excerpt from the above link

The Autodesk setup software can conflict with Drag & Drop Interceptor and refuse to start.
A quick workaround: create a batch file, f.e. setup2.bat with the following text inside:

ren “c:\Program Files\DDInterceptor\CopyHook.dll” CopyHook.dll.x
setup.exe
ren “c:\Program Files\DDInterceptor\CopyHook.dll.x” CopyHook.dll

and place this file in the autocad setup folder. Instead of running setup.exe you would run setup2.bat

Notice that although this temporarily renames CopyHook.dll to CopyHook.dll.x this doesn’t effect DDInterceptor
(because copyhook.dll is loaded into memory). If you move a folder during setup of autocad DDI will pop-up as usual.
Thus the fact alone that you rename a file “fools” the autocad setup.exe. Very weird.

Note: when uninstalling autocad you also have to rename copyhook.dll temporarily.
===========

AutoCAD fails to launch aborts after 10 seconds – no errors

SUMMARY

  • The correct .NET version may not be installed on this computer (or corrupted).  You can follow the instructions at – http://usa.autodesk.com/getdoc/id=TS1056464
  • to uninstall the framework and then reinstall it from – http://www.microsoft.com/downloads/details.aspx?FamilyId=333325FD-AE52-4E35-B531-508D977D32A6&displaylang=en
  • and be sure to install the service pack afterwards from – http://www.microsoft.com/Net/Download.aspx
  • Is the user running /3GB switch?  Disable it if they are.
    • Using xp
      • When booting up select the non 3gb option.
    • Using Vista
      • Start >>Run>> “bcdedit /deletevalue IncreaseUserVa”
  • Disable the video card detection by doing the following:  Modify the icon you are using to start Civil 3D and change the Target line to include the “nohardware” switch after acad.exe. For example:
    “C:\Program Files\AutoCAD 2007\acad.exe” /nohardware
    If this works then the video driver is at fault and you should find a newer version or one that is compatible with Civil 3D 2010.

=============================================================
UNINSTALLING THE .NET FRAMEWORK

  1. On the Start menu (Windows), click Settings > Control Panel.
  2. In Control Panel, double-click Add or Remove Programs (Windows 2000/XP) or Programs and Features (Windows Vista).
  3. Uninstall all versions of .NET Framework, beginning with the newest version first.
  4. Reinstall only the version of .NET Framework required for your software version. Refer to the list below for AutoCAD requirements. For vertical products, consult the product installation literature for the required .NET Framework version.
  • AutoCAD 2007/AutoCAD LT 2007 requires .NET Framework 2.0
  • AutoCAD 2008/AutoCAD LT 2008 requires .NET Framework 2.0
  • AutoCAD 2009/AutoCAD LT 2009 requires .NET Framework 3.0
  • AutoCAD 2010/AutoCAD LT 2010 requires .NET Framework 3.5 Service Pack 1

=============================================================
INSTALLING THE .NET FRAMEWORK 3.5
http://www.microsoft.com/downloads/details.aspx?FamilyId=333325FD-AE52-4E35-B531-508D977D32A6&displaylang=en
=============================================================
INSTALLING THE .NET FRAMEWORK 3.5 SP1
http://www.microsoft.com/Net/Download.aspx
=============================================================
DISABLING THE 3GB SWITH ON WINDOWS VISTA
To enable the 3GB switch on Windows Vista™

  • Right-click Command Prompt in the Accessories program group of the Start menu. Click Run as Administrator.
  • At the command prompt, enter “bcdedit /set IncreaseUserVa 3072”
  • Restart the computer.

To turn off the 3GB switch

  • Right-click on Command Prompt in the Accessories program group of the Start menu. Click Run as Administrator.
  • At the command prompt, enter “bcdedit /deletevalue IncreaseUserVa”
  • Restart the computer.

=============================================================
DISABLE VIDEO CARD DETECTION

http://screencast.com/t/OTg5YmQz

Open Dialogue Box will not display

ISSUE:
AutoCAD 2010 not being able to open drawings.
The Open dialogue box wouldn’t pop up.  (even with FileDia=1).
RESOLUTION:
Set different profile to current.
Video of customer computer:
http://screencast.com/t/PpDG5i1aL4b
had the customer recreate his profile.
==========================================
There are known bugs with 2010 AutoCAD and Verticals: with profiles.
Initiating secondary installation will resolve this, however the profile is what is breaking the open command here.
==========================================

Revit Architecture 2009: The parameter is incorrect

Issue:
Revit arch 2009
Standalone
Trying to activate, it says “The parameter is incorrect”
=========
Reason:
If you have installed 2010 product….in this case Autodesk Revit Suite Revit Architecture 2010
And then you install a previous version, it will not activate, or may not activate …register (correct terminology)
You will need to uninstall 2010, and previous version Revit Architecture, then install the previous version and ACTIVATE (register) first, BEFORE installing 2010.
=========
Clean uninstall of Revit 2010 products
http://usa.autodesk.com/adsk/servlet/ps/dl/item?siteID=123112&id=13712572&linkID=9243099

Secondary Installer AutoCAD Civil 3D 2009

To reset Civil 3D® 2009 user settings for a particular user, you must first delete the user’s application files and registry entries for the program. Make sure you back up any customized Civil 3D 2009 files before you implement the following procedure CLICK HERE FOR STEPS:

  1. Log on to the workstation as the user.
  2. On the Start menu (Windows), click Run.
  3. In the Run dialog box, enter regedit.
  4. 4. In the Registry Editor, locate the following subkey and delete it:HKEY_CURRENT_USER\Software\Autodesk\AutoCAD\R17.2\ACAD-7000:409
  5. Exit the Registry Editor.
  6. In Windows Explorer, locate and delete the user’s application folders listed below.

XP———————————————

C:\Documents and Settings\<user name>\Application Data\Autodesk\C3D 2009 (copy as as backup first)
C:\Documents and Settings\<user name>\Local Settings\Application Data\Autodesk\C3D 2009

VISTA—————————————-

C:\Users\Duane.Brown\AppData\Roaming\Autodesk\C3D 2009 (copy as a backup first)
C:\Users\Duane.Brown\AppData\Local\Autodesk\C3D 2009

The user should now be able to launch Civil 3D 2009. When the product is opened, the files and folders that were deleted will be recreated by the secondary installer.

Warning! Problems caused by improperly editing the Windows registry could render your computer operating system unusable. Microsoft provides a wealth of critical information that you need to know about the registry in the Microsoft Knowledge Base at http://support.microsoft.com/support.

Use the Microsoft® Registry Editor only at your own risk and only after backing up the registry as well as the system.dat and user.dat files as outlined for your operating system in the Microsoft Knowledge Base and in the related solution, TS66513. Additional information about the registry is also contained in the Help topics in the Microsoft Registry Editor.

Grip Editing Layout Viewports results in cursor jumping erratically around

Product:
Civil 3D 2009

Problem:
Grip Editing Layout Viewports results in curser jumping erratically around.

Solution:
Close Layer Manager

Reason:
It keeps updating layers constantly.

Secondary Installer AutoCAD Architecture 2009

Issue

To reset the default AutoCAD Architecture 2009 user settings, you want to reinitiate the secondary installer.

Solution

To reset the AutoCAD Architecture 2009 default user settings, you must first delete your application files and registry entries for the program. Follow these steps:

Note: Make sure that you back up any customized AutoCAD Architecture 2009 files before starting this procedure.  We recommend backing up your software profile (Options, Profile tab, export)

  1. Log on to the workstation as the user.
  2. On the Start menu (Windows), click Run.
  3. In the Run dialog box, enter regedit.
  4. We recommend backup up the registry, File pulldown then select Export.
  5. In the Registry Editor, locate the following subkey and delete it:HKEY_CURRENT_USER\Software\Autodesk\AutoCAD\R17.2\ACAD-7004:409
  6. Exit the Registry Editor.
  7. In Windows Explorer, locate and delete the following application folders:

XP———————————————
C:\Documents and Settings\<user name>\Application Data\Autodesk\ ACD-A 2009 (copy this directory as a backup first)
C:\Documents and Settings\<user name>\Local Settings\Application Data\Autodesk\ ACD-A 2009

VISTA—————————————-
C:\Users\\<user name>\\AppData\Roaming\Autodesk\ ACD-A 2009 (copy this directory as a backup first)
C:\Users\\<user name>\\AppData\Local\Autodesk\ ACD-A 2009

The user should now be able to launch AutoCAD Architecture 2009. When the product is opened, the files and folders that were deleted will be recreated by the secondary installer.

Warning! Problems caused by improperly editing the Windows registry could render your computer operating system unusable. Microsoft provides a wealth of critical information that you need to know about the registry in the Microsoft Knowledge Base at http://support.microsoft.com/support.

Use the Microsoft® Registry Editor only at your own risk and only after backing up the registry as well as the system.dat and user.dat files as outlined for your operating system in the Microsoft Knowledge Base and in the related solution, TS66513. Additional information about the registry is also contained in the Help topics in the Microsoft Registry Editor.

Secondary Installer AutoCAD Architecture 2008

Issue

To reset the default AutoCAD Architecture 2008 user settings, you want to reinitiate the secondary installer.

Solution

To reset the AutoCAD Architecture 2008 default user settings, you must first delete your application files and registry entries for the program. Follow these steps:

Note: Make sure that you back up any customized AutoCAD Architecture 2008 files before starting this procedure.

  1. Log on to the workstation as the user.
  2. On the Start menu (Windows), click Run.
  3. In the Run dialog box, enter regedit.
  4. In the Registry Editor, locate the following subkey and delete it:HKEY_CURRENT_USER\Software\Autodesk\AutoCAD\R17.1\ACAD-6004:409
  5. Exit the Registry Editor.
  6. In Windows Explorer, locate and delete the following application folders:

XP———————————————
C:\Documents and Settings\<user name>\Application Data\Autodesk\ ACD-A 2008
C:\Documents and Settings\<user name>\Local Settings\Application Data\Autodesk\ ACD-A 2008

VISTA—————————————-

C:\Users\\<user name>\\AppData\Roaming\Autodesk\ ACD-A 2008
C:\Users\\<user name>\\AppData\Local\Autodesk\ ACD-A 2008

The user should now be able to launch AutoCAD Architecture 2008. When the product is opened, the files and folders that were deleted will be recreated by the secondary installer.

Warning! Problems caused by improperly editing the Windows registry could render your computer operating system unusable. Microsoft provides a wealth of critical information that you need to know about the registry in the Microsoft Knowledge Base at http://support.microsoft.com/support.

Use the Microsoft® Registry Editor only at your own risk and only after backing up the registry as well as the system.dat and user.dat files as outlined for your operating system in the Microsoft Knowledge Base and in the related solution, TS66513. Additional information about the registry is also contained in the Help topics in the Microsoft Registry Editor.

Secondary Installer AutoCAD MEP 2008

Issue

To reset the default AutoCAD® MEP 2008 user settings, you want to reinitiate the secondary installer.

Solution

To reset the AutoCAD MEP 2008 default user settings, you must first delete your application files and registry entries for the program. Follow these steps:

Note: Make sure that you back up any customized AutoCAD MEP 2008 files before starting this procedure.

  1. Log on to the workstation as the user.
  2. On the Start menu (Windows), click Run.
  3. In the Run dialog box, enter regedit.
  4. In the Registry Editor, locate the following subkey and delete it:HKEY_CURRENT_USER\Software\Autodesk\AutoCAD\R17.1\ACAD-6006:409
  5. Exit the Registry Editor.

In Windows Explorer, locate and delete the following application folders:
XP:
C:\Documents and Settings\<user name>\Application Data\Autodesk\ ACD-MEP 2008 (Copy and Paste this as a backup)
C:\Documents and Settings\<user name>\Local Settings\Application Data\Autodesk\ ACD-MEP 2008

VISTA:

C:\Users\<user name>\AppData\Roaming\Autodesk\ ACD-MEP 2008 ((Copy and Paste this as a backup)
C:\Users\<user name>\AppData\Local\Autodesk\ ACD-MEP 2008

The user should now be able to launch AutoCAD MEP 2008. When the product is opened, the files and folders that were deleted will be recreated by the secondary installer.

Warning! Problems caused by improperly editing the Windows registry could render your computer operating system unusable. Microsoft provides a wealth of critical information that you need to know about the registry in the Microsoft Knowledge Base at http://support.microsoft.com/support.

Use the Microsoft® Registry Editor only at your own risk and only after backing up the registry as well as the system.dat and user.dat files as outlined for your operating system in the Microsoft Knowledge Base and in the related solution, TS66513. Additional information about the registry is also contained in the Help topics in the Microsoft Registry Editor.

Secondary Installer AutoCAD 2008

Issue

To reset the default AutoCAD® 2008 user settings, you want to reinitiate the secondary installer.

Solution

To reset the AutoCAD 2008 default user settings, you must first delete your application files and registry entries for the program. Follow these steps:

Note: Make sure that you back up any customized AutoCAD 2008 files before starting this procedure.

  1. Log on to the workstation as the user.
  2. On the Start menu (Windows), click Run.
  3. In the Run dialog box, enter regedit.
  4. In the Registry Editor, locate the following subkey and delete it:HKEY_CURRENT_USER\Software\Autodesk\AutoCAD\R17.1\ACAD-6001:409
  5. Exit the Registry Editor.
  6. In Windows Explorer, locate and delete the following application folders:C:\Documents and Settings\<user name>\Application Data\Autodesk\AutoCAD 2008
    C:\Documents and Settings\<user name>\Local Settings\Application Data\Autodesk\AutoCAD 2008

The user should now be able to launch AutoCAD 2008. When the product is opened, the files and folders that were deleted will be recreated by the secondary installer.

Warning! Problems caused by improperly editing the Windows registry could render your computer operating system unusable. Microsoft provides a wealth of critical information that you need to know about the registry in the Microsoft Knowledge Base at http://support.microsoft.com/support.

Use the Microsoft® Registry Editor only at your own risk and only after backing up the registry as well as the system.dat and user.dat files as outlined for your operating system in the Microsoft Knowledge Base and in the related solution, TS66513. Additional information about the registry is also contained in the Help topics in the Microsoft Registry Editor.

32 BIT 2008 INSTALL on 64 BIT Operating System

I want you to know that I provide the following without personal knowledge that it will work.  However there are those that say it does.  Posted below is a comment by James Wedding -a celebrity around Civil 3D circles – AND – the thread that shows the step by step instructions for bypassing the installers objection to VISTA 64 bit.

Autodesk doesn’t support this combination of CIVIL 3D 2008 and VISTA 64 bit.
—————————————-
Posted by James Wedding, P.E. on April 17th, 2007

Not that I would ever suggest anyone try it, but I’m such a geek, I had to point this out. Peter Funk was kind enough a few weeks back to mention that C3D 2008 will not only not be supported, but will be blocked from installation on Vista 64. Well, given the interest, you had to figure something might happen. Jimmy Bergmark over at JTBWorld mentions a thread in the Adesk groups Id never have noticed. Using Orca you can apparently hack the .msi to get it installed. I don’t even know if this would work on C3D, but if you’re really interested¦

Do it, and you are so in unsupported land, and flying without a net. But a good hack is always worth mention.

Ed: Bryant Quinney of COINS has pulled it off. I haven’t seen the results, but he claims all is well. Still in serious unsupported territory, and if something goes south, youre on your own.
———————————-
VISTA 64 BIT is NOT supported in any way by autodesk.
The following is a hack, found at the thread mentioned above.
it is partially excerpted here for your convenience
=================================================
http://discussion.autodesk.com/thread.jspa?threadID=562426
=================================================

  1. Download and install Orca from Microsoft.
    1. Download Orca MSI Editor

2. Copy the installation files to your hard drive or a network folder.
3. Backup the files ACA.msi and Setup.ini
4. Edit the ACA.msi with Orca and delete the action found in the table
“InstallExecuteSequence” that is called “CheckFor64BitOS” Delete the same
line under table “CustomAction”
5. Save and close the ACA.msi
6. Edit the Setup.ini with Notepad. Delete the line under
“#==================== Platform Requirement” that is labeled
“PLATFORM=NO_WOW_64_PROCESS”
7. Double-click the Setup.exe and you should be able to install without any
problems.
8. Some support paths under the “Files” tab of the configuration dialog box
have incorrect paths. The installer adds and extra “\AppData\AppData” to
some support paths located in the user profile. For example the Main
Customization File’s path is listed as
“C:\Users\%username%\AppData\AppData\AppData\Roaming\Autodesk\ACD-A
2008\enu\Support\ADT” when it should be
“C:\Users\%username%\AppData\Roaming\Autodesk\ACD-A 2008\enu\Support\ADT”
Fix the incorrect paths, hit apply, and you are good to go.
==========================================================
I wonder why the ADT team chose to disable 64 bit installs. The program
seems to function fine in Vista 64 bit. ADT 2006 and 2007 installed without
a hitch on this same system even though you had to set them to run as ADMIN
in order to be able to use them, so I am not buying the whole “the ARX
programs don’t work with 64 bit” argument. I switched to Revit a few years
ago anyway, but it is a shame what they are doing to ADT. Peace out.

Secondary Installer AutoCAD 2007

Issue

To reset the default AutoCAD® 2007 user settings, you want to reinitiate the secondary installer.

Solution

To reset the AutoCAD 2007 default user settings, you must first delete your application files and registry entries for the program. Follow these steps:

Note: Make sure that you back up any customized AutoCAD 2007 files before starting this procedure.

  1. Log on to the workstation as the user.
  2. On the Start menu (Windows), click Run.
  3. In the Run dialog box, enter regedit.
  4. In the Registry Editor, locate the following subkey and delete it:

    HKEY_CURRENT_USER\Software\Autodesk\AutoCAD\R17.0\ACAD-5001:409

  5. Exit the Registry Editor.
  6. In Windows Explorer, locate and delete the following application folders:

    C:\Documents and Settings\<user name>\Application Data\Autodesk\AutoCAD 2007
    C:\Documents and Settings\<user name>\Local Settings\Application Data\Autodesk\AutoCAD 2007

The user should now be able to launch AutoCAD 2007. When the product is opened, the files and folders that were deleted will be recreated by the secondary installer.

Warning! Problems caused by improperly editing the Windows registry could render your computer operating system unusable. Microsoft provides a wealth of critical information that you need to know about the registry in the Microsoft Knowledge Base at http://support.microsoft.com/support.

Use the Microsoft® Registry Editor only at your own risk and only after backing up the registry as well as the system.dat and user.dat files as outlined for your operating system in the Microsoft Knowledge Base and in the related solution, TS66513. Additional information about the registry is also contained in the Help topics in the Microsoft Registry Editor.

Secondary Installer AutoCAD Architecture 2006

Issue

To reset the default AutoCAD Architecture 2006 user settings, you want to reinitiate the secondary installer.

Solution

To reset the AutoCAD Architecture 2006 default user settings, you must first delete your application files and registry entries for the program. Follow these steps:
Note: Make sure that you back up any customized AutoCAD Architecture 2006 files before starting this procedure.

  1. Log on to the workstation as the user.
  2. On the Start menu (Windows), click Run.
  3. In the Run dialog box, enter regedit.
  4. In the Registry Editor, locate the following subkey and delete it: HKEY_CURRENT_USER\Software\Autodesk\AutoCAD\R17.1\ACAD-4004:409
  5. Exit the Registry Editor.
  6. In Windows Explorer, locate and delete the following application folders:

XP———————————————

C:\Documents and Settings\<user name>\Application Data\Autodesk\ ADT 2006
C:\Documents and Settings\<user name>\Local Settings\Application Data\Autodesk\ ADT 2006

VISTA—————————————-

C:\Users\\<user name>\\AppData\Roaming\Autodesk\ ADT 2006
C:\Users\\<user name>\\AppData\Local\Autodesk\ ADT 2006

The user should now be able to launch AutoCAD Architecture 2006. When the product is opened, the files and folders that were deleted will be recreated by the secondary installer.

Warning! Problems caused by improperly editing the Windows registry could render your computer operating system unusable. Microsoft provides a wealth of critical information that you need to know about the registry in the Microsoft Knowledge Base at http://support.microsoft.com/support.

Use the Microsoft® Registry Editor only at your own risk and only after backing up the registry as well as the system.dat and user.dat files as outlined for your operating system in the Microsoft Knowledge Base and in the related solution, TS66513. Additional information about the registry is also contained in the Help topics in the Microsoft Registry Editor.

ac1st16.dll is missing

issue:
64 bit win 7
land desktop 2004 launches with error(s)
error header: acad.exe – System Error
error text: The program can’t start because ac1st16.dll is missing from your computer.  Try reinstalling the program to fix this problem.

NOTES:
uninstall/reinstall and repair has already been attempted

resolution:        
This error can occur after reinstalling or uninstalling some Windows applications. The AC1ST16.DLL is probably not missing, only AutoCAD cannot find it.
Go to Windows System settings of your computer and in the Environment variables, make sure that the PATH variable contains the folder name C:\Program Files\Common Files\Autodesk Shared (without the backslash at the end, you can remove it using the Edit button).
To set Windows environment variables, right-click on the ‘My Computer’ icon, select ‘Properties’. In the ‘System Properties’ dialog, go to the ‘Advanced’ tab and click the ‘Environment variables’ button. You can modify the User- (for you) or System- (for all) variables.
to launch the product you right click the desktop icon and “Run as Administrator”

Design a site like this with WordPress.com
Get started